Table of Contents
Table of Contents
Introduction
Recap
In the first Lab, we Learned
- Bring the contact into Webex Contact Center and hear welcome message
- Queue the contact to Live Agent after hearing welcome prompt
Lab Objective
In this section, we will go over the steps that are required to offer a Menu and an opt_Out options to the caller. In this Lab you will learn the following
- Adding menu to Flow
- Creating Local Variable and using that in flow
- Offering Opt_Out option (Callback and Voicemail) to the caller after 10 seconds in the queue
- Make call and opt for a callback and make sure caller receives the callback.
Pre-requisites
- All previous labs are completed successfully
Quick Links
Control Hub: https://admin.webex.com
Portal: https://portal.wxcc-us1.cisco.com/portal
Agent Desktop: https://desktop.wxcc-us1.cisco.com\
Lab Section
Create Queue and Team
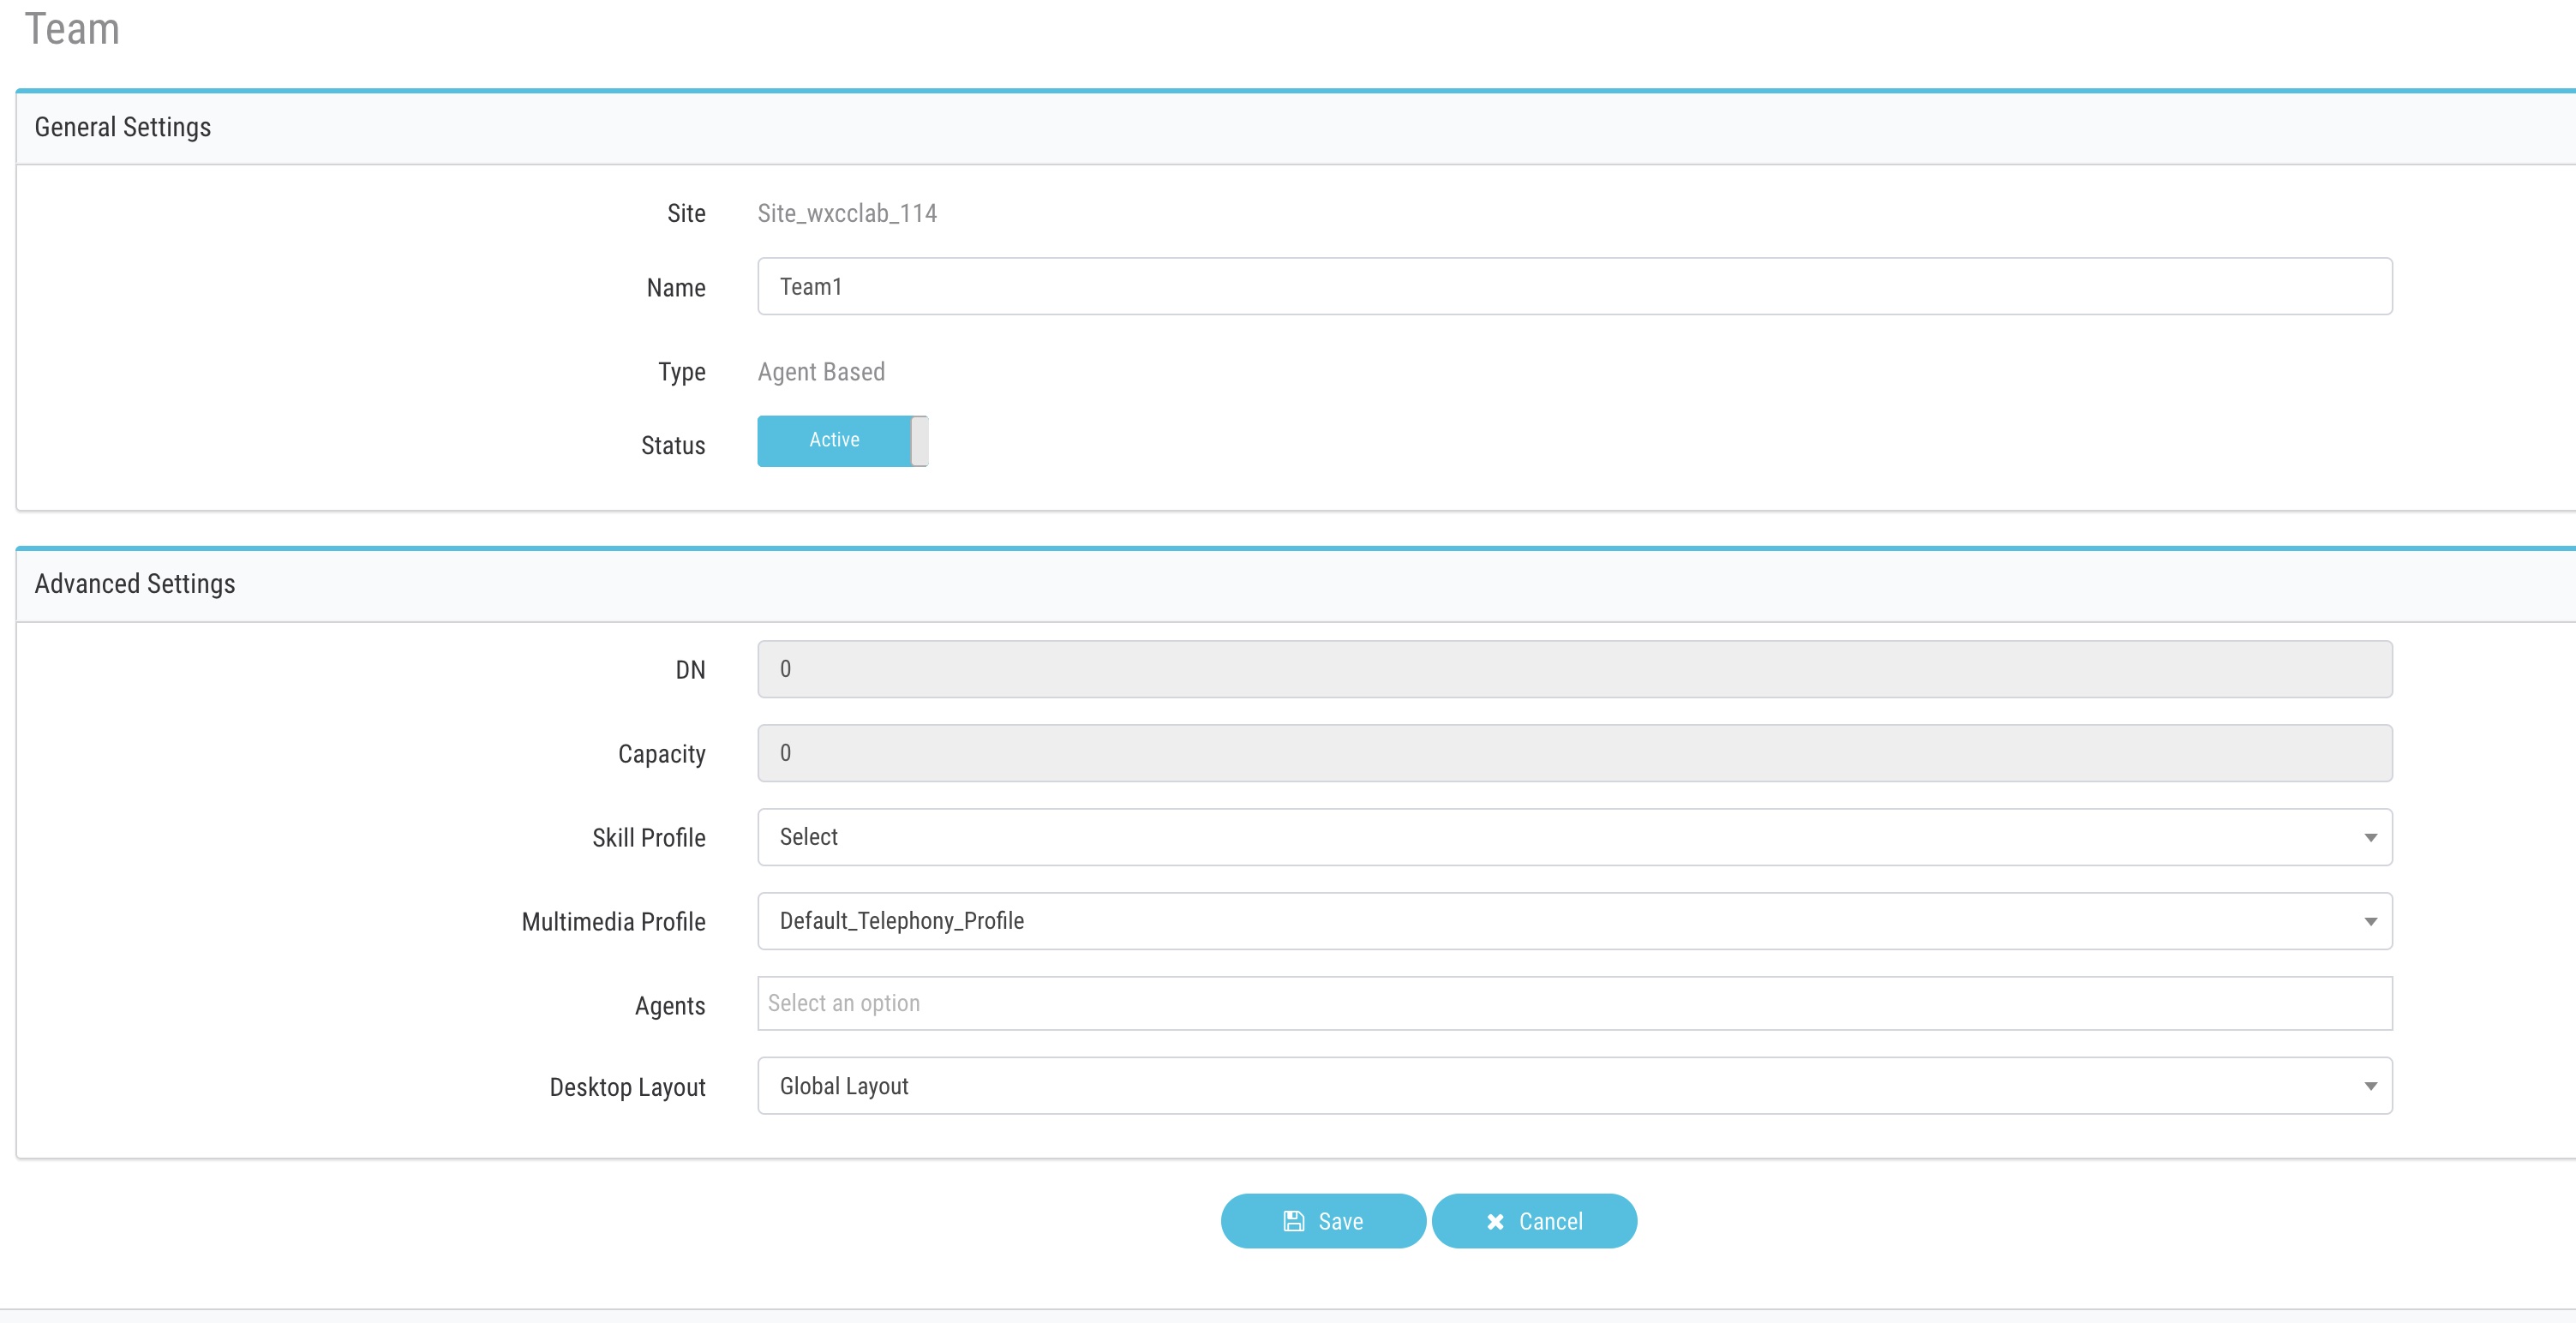
Team
- From portal –>provisioning –>Create new Team, name is
Team1 - Make sure to select the same
SiteasUserbelongs to - Select default
Multimedia Profile
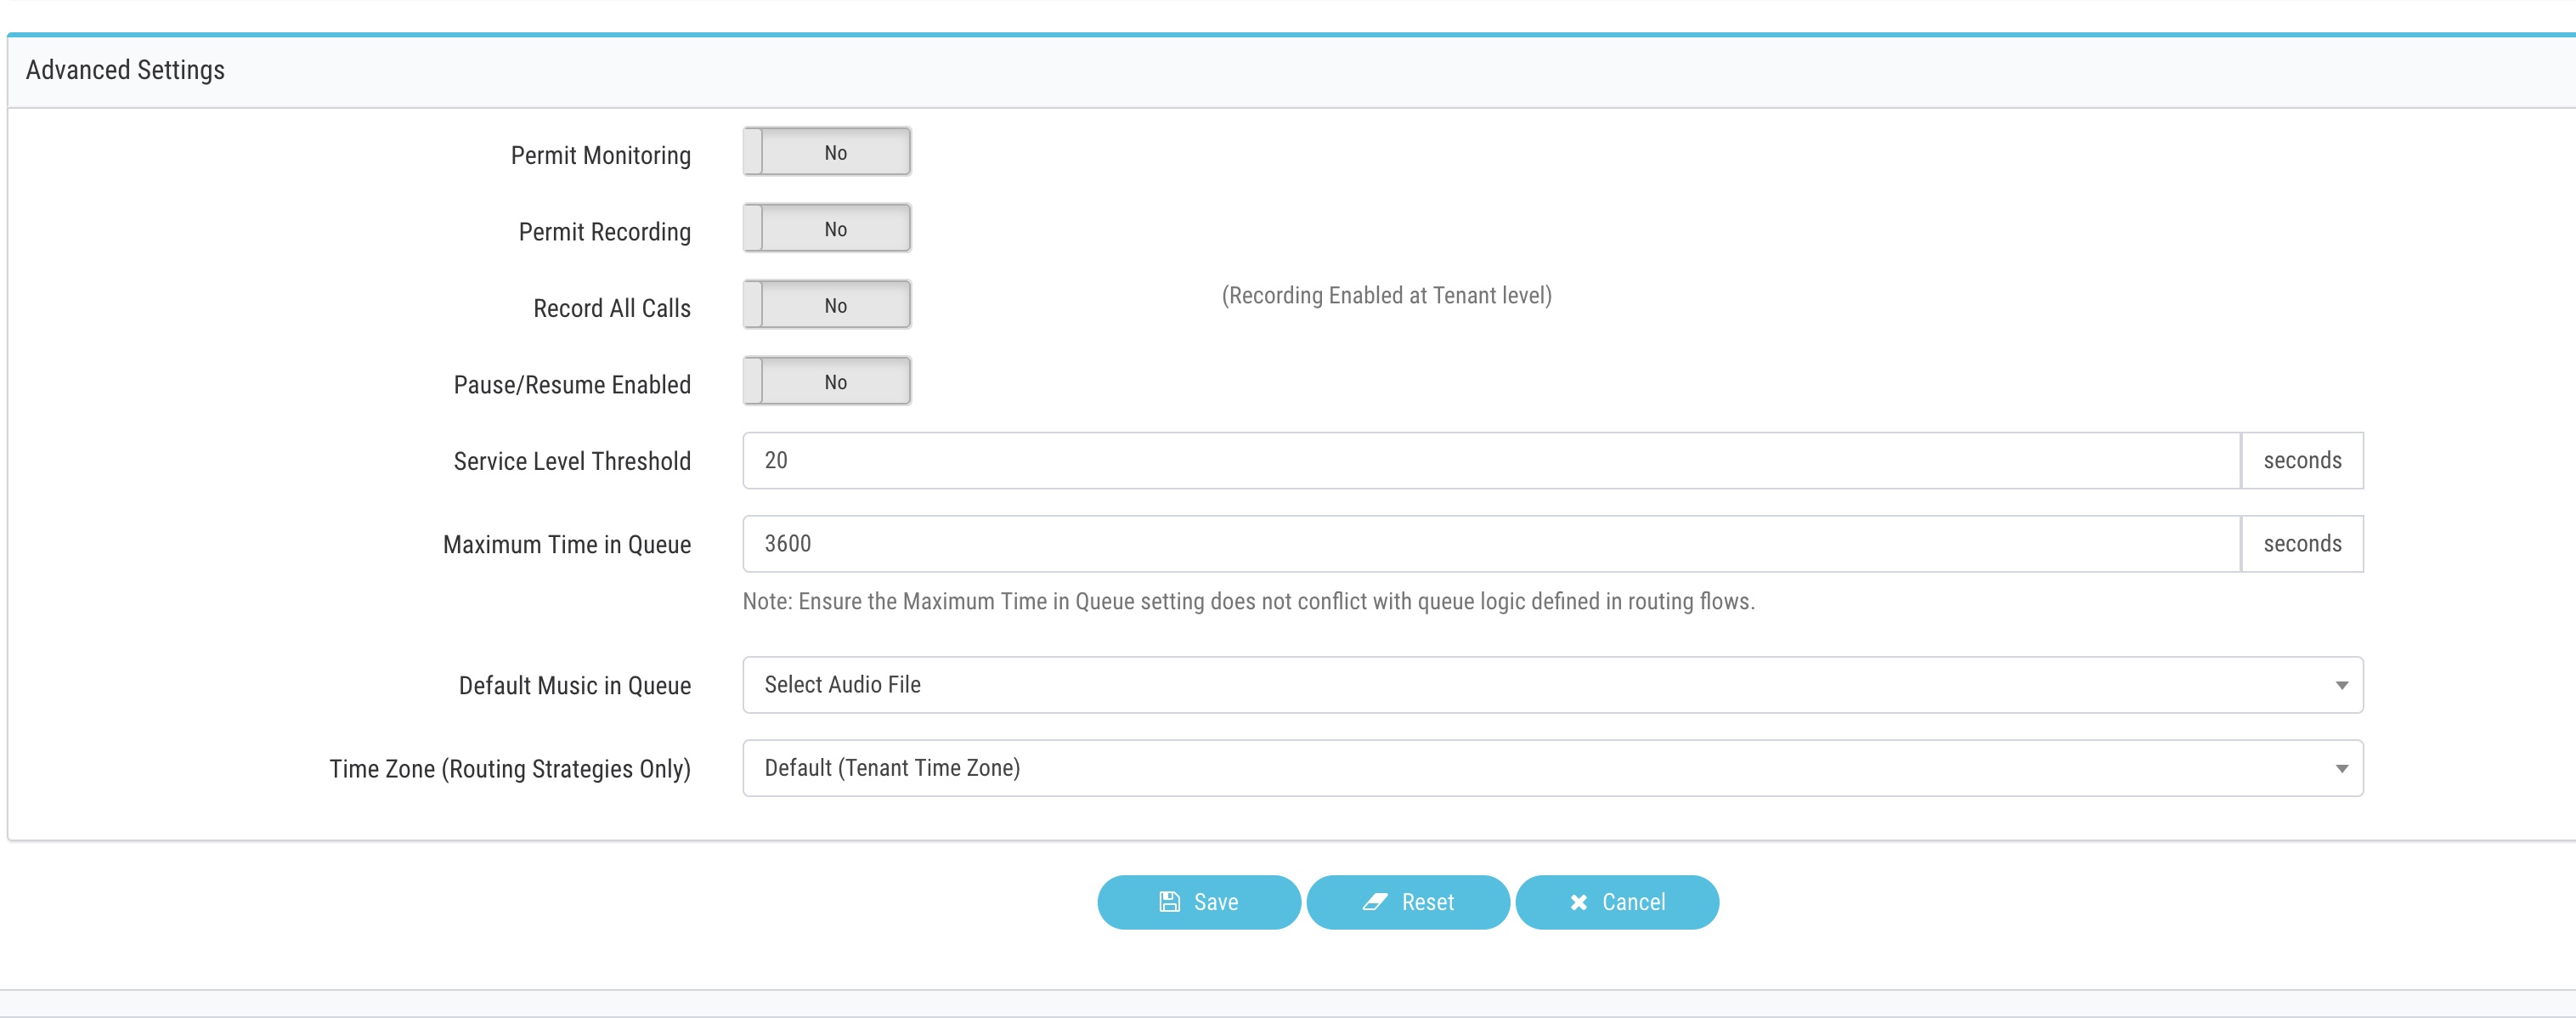
Create Queue
- From portal –>provisioning –>Create new queue, name is
Dummy_Queue - add call distribution group aka Teams, Team 1
- make sure give service level threshold time (preferably 3600) and service level threshold

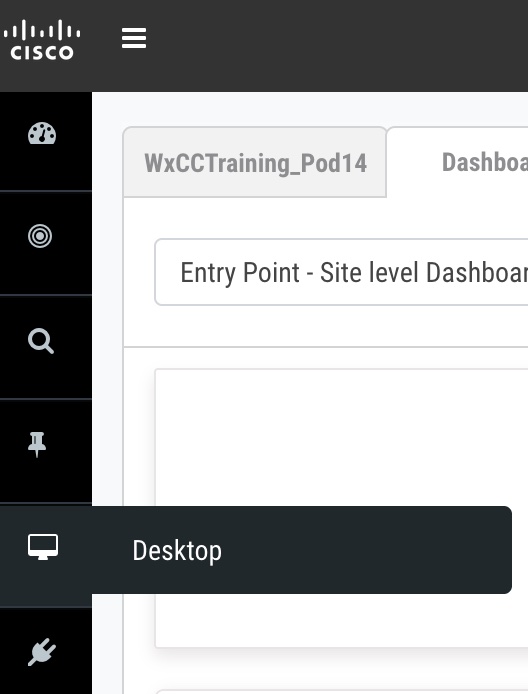
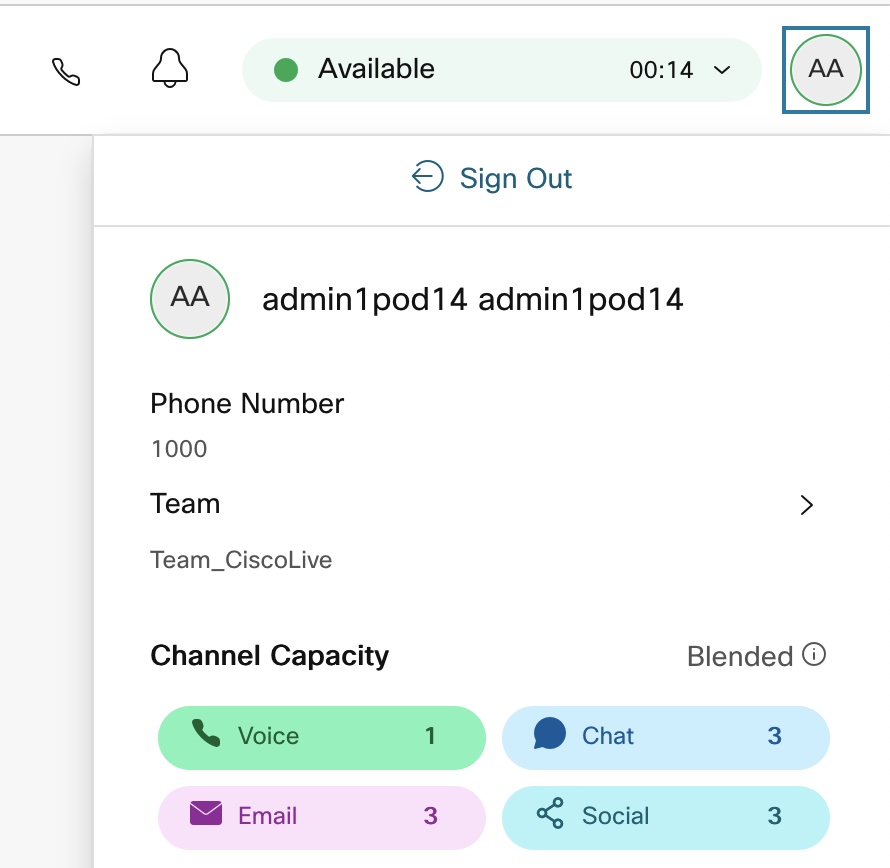
Agent Login
Follow the steps from Lab1 and login in Agent
Agent Desktop: **https://desktop.wxcc-us1.cisco.com
While login into agent desktop make sure to choose Extension and correct Team
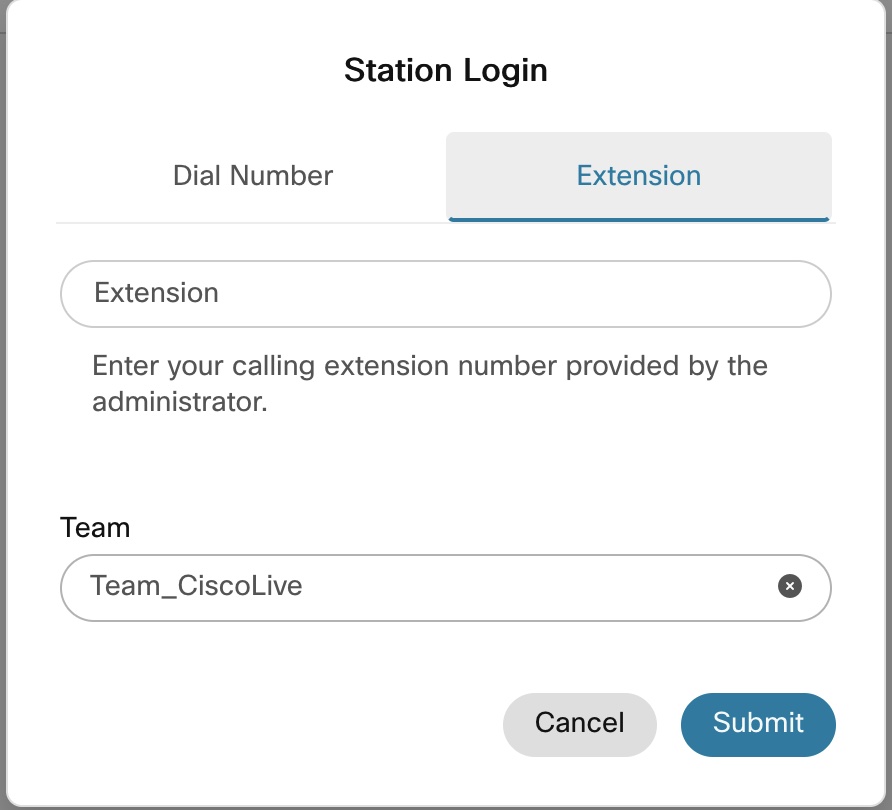
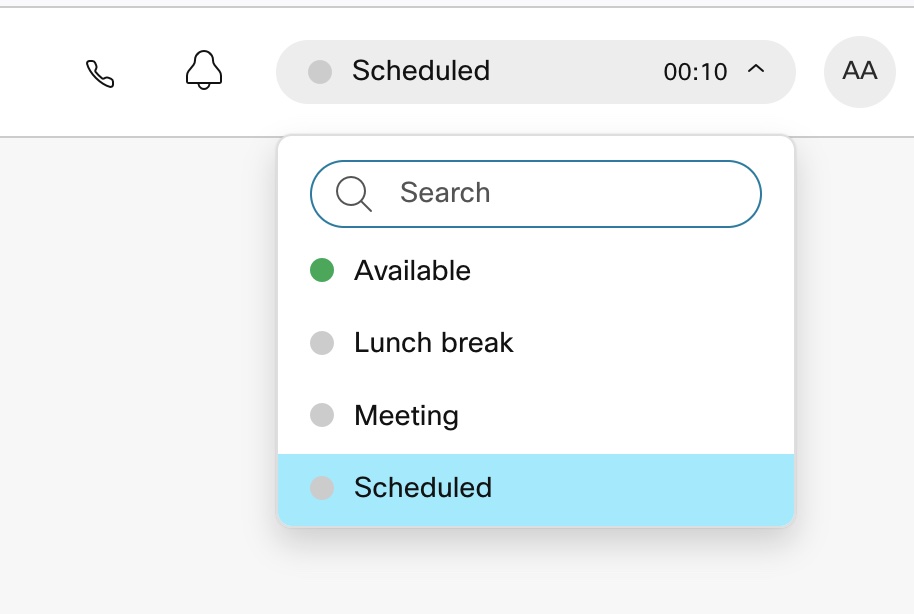
Set the Agent status to
Not Ready
Flow configuration
-
Copy the Lab1 flow by clicking on 3 dot
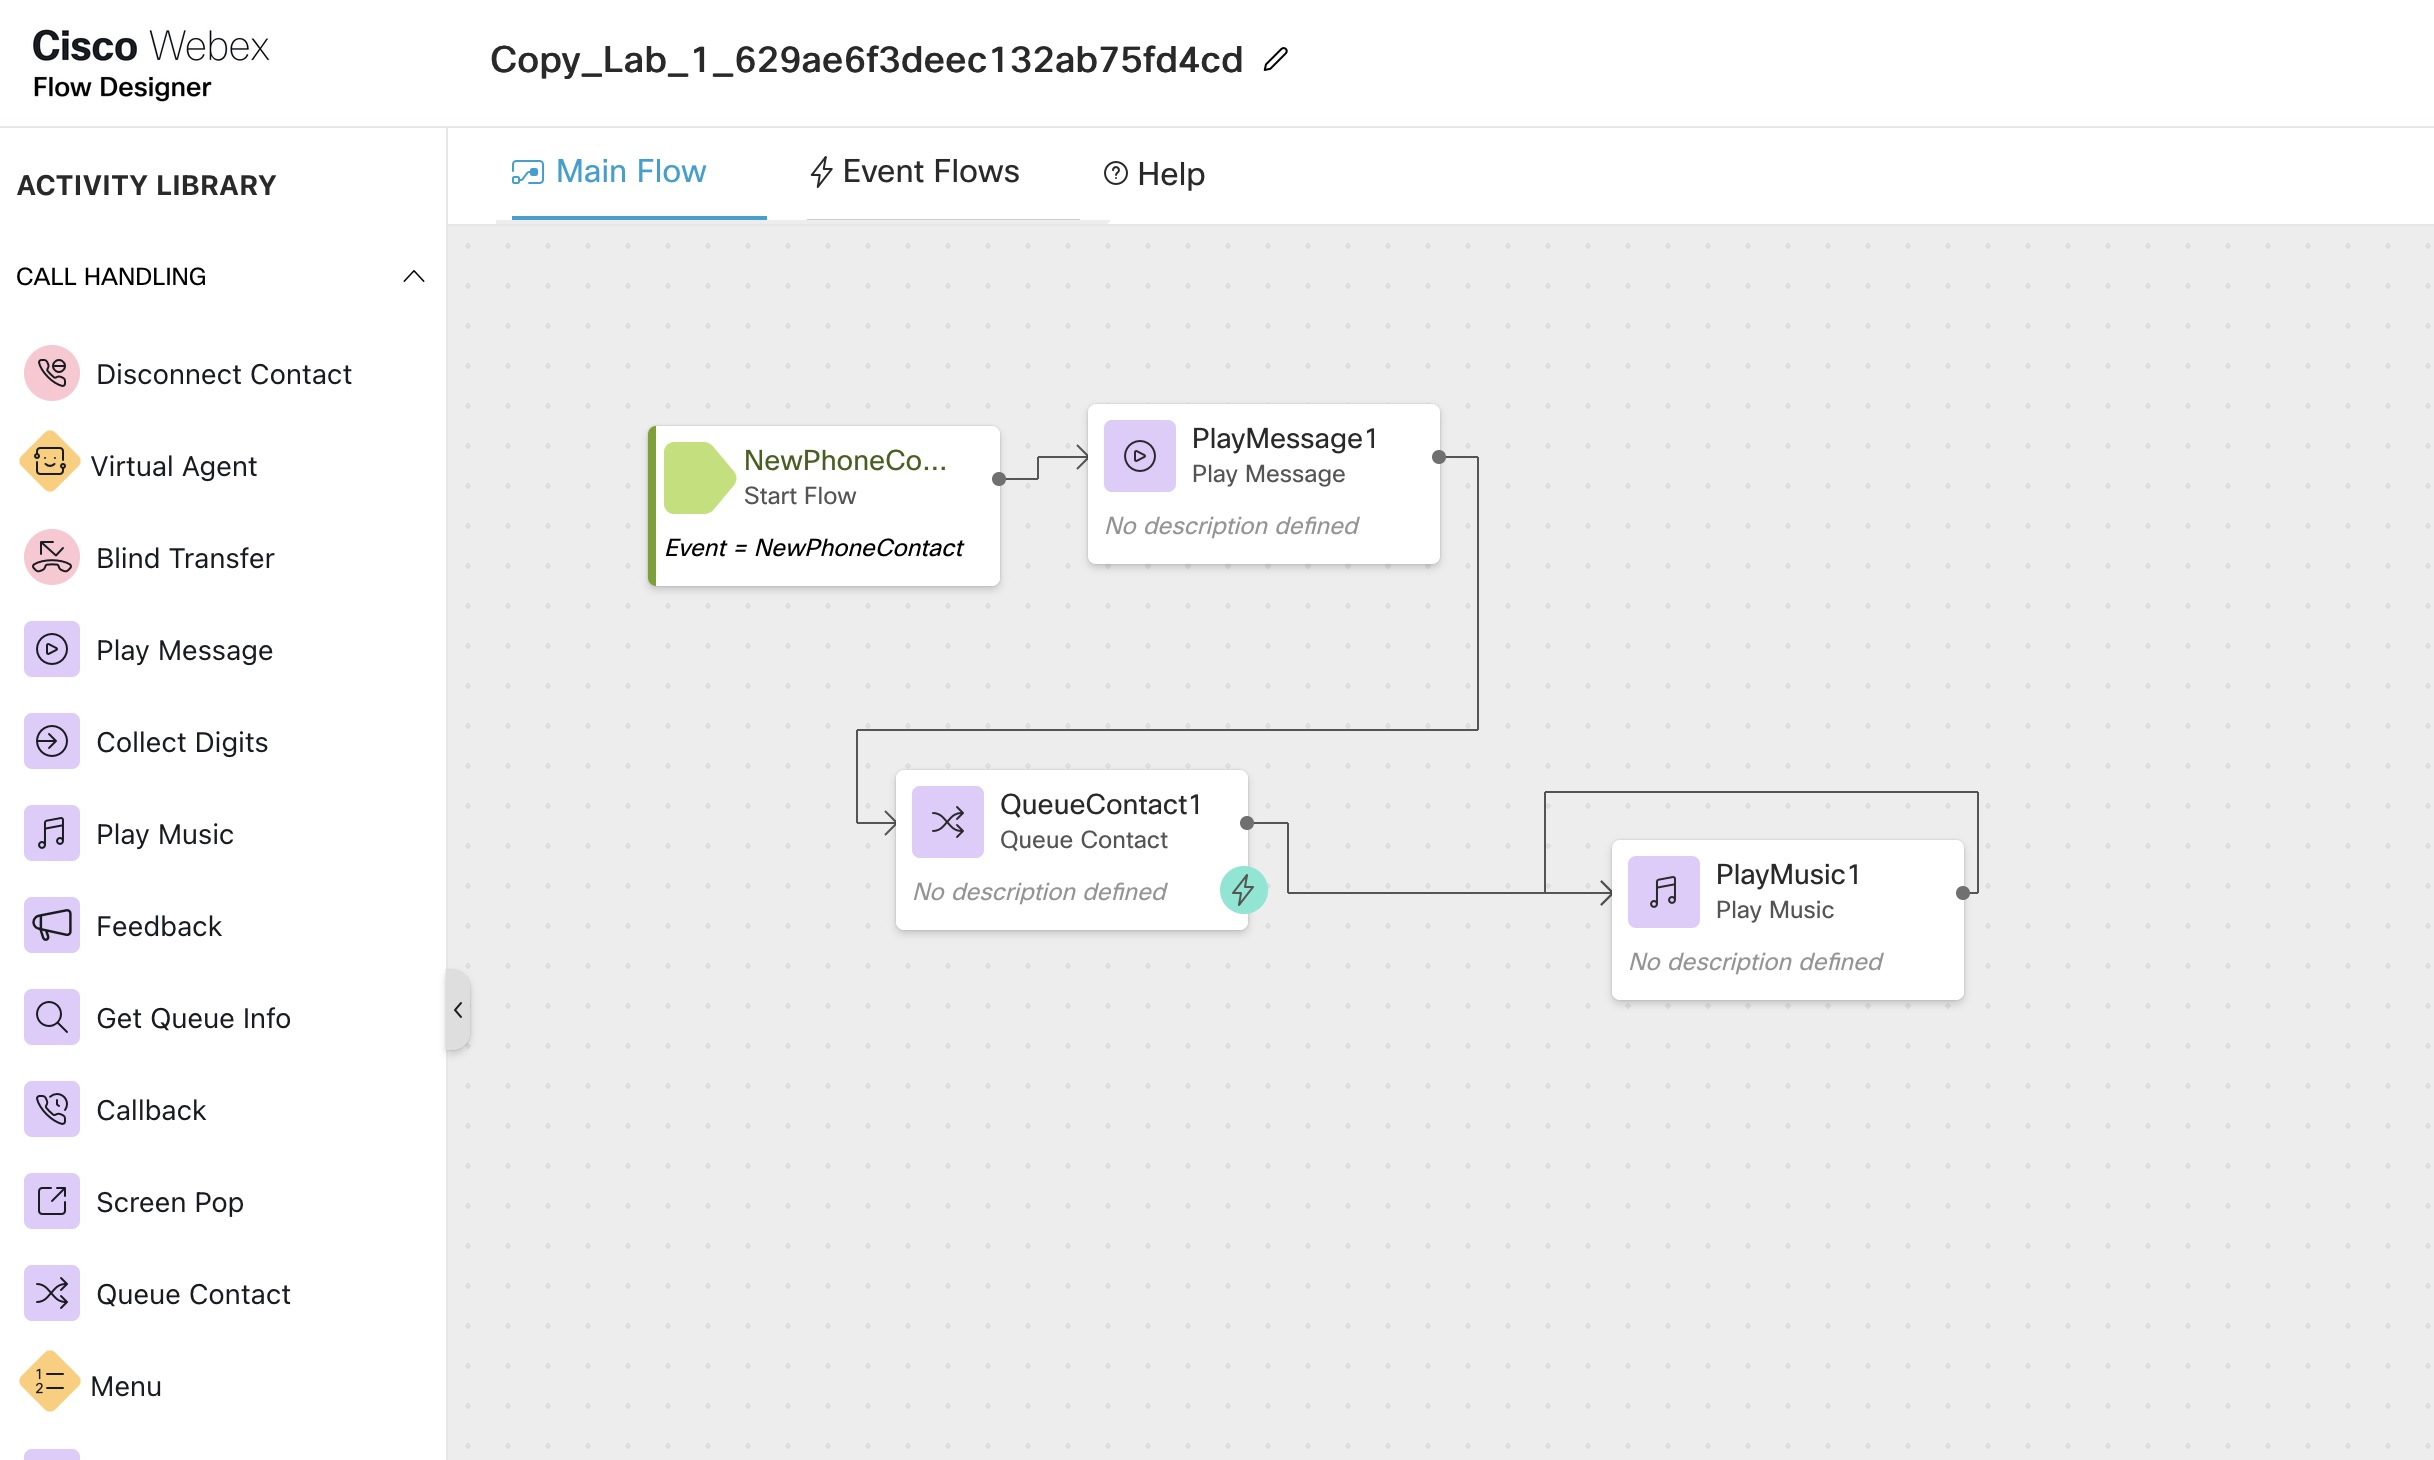
-
Remove Play message node
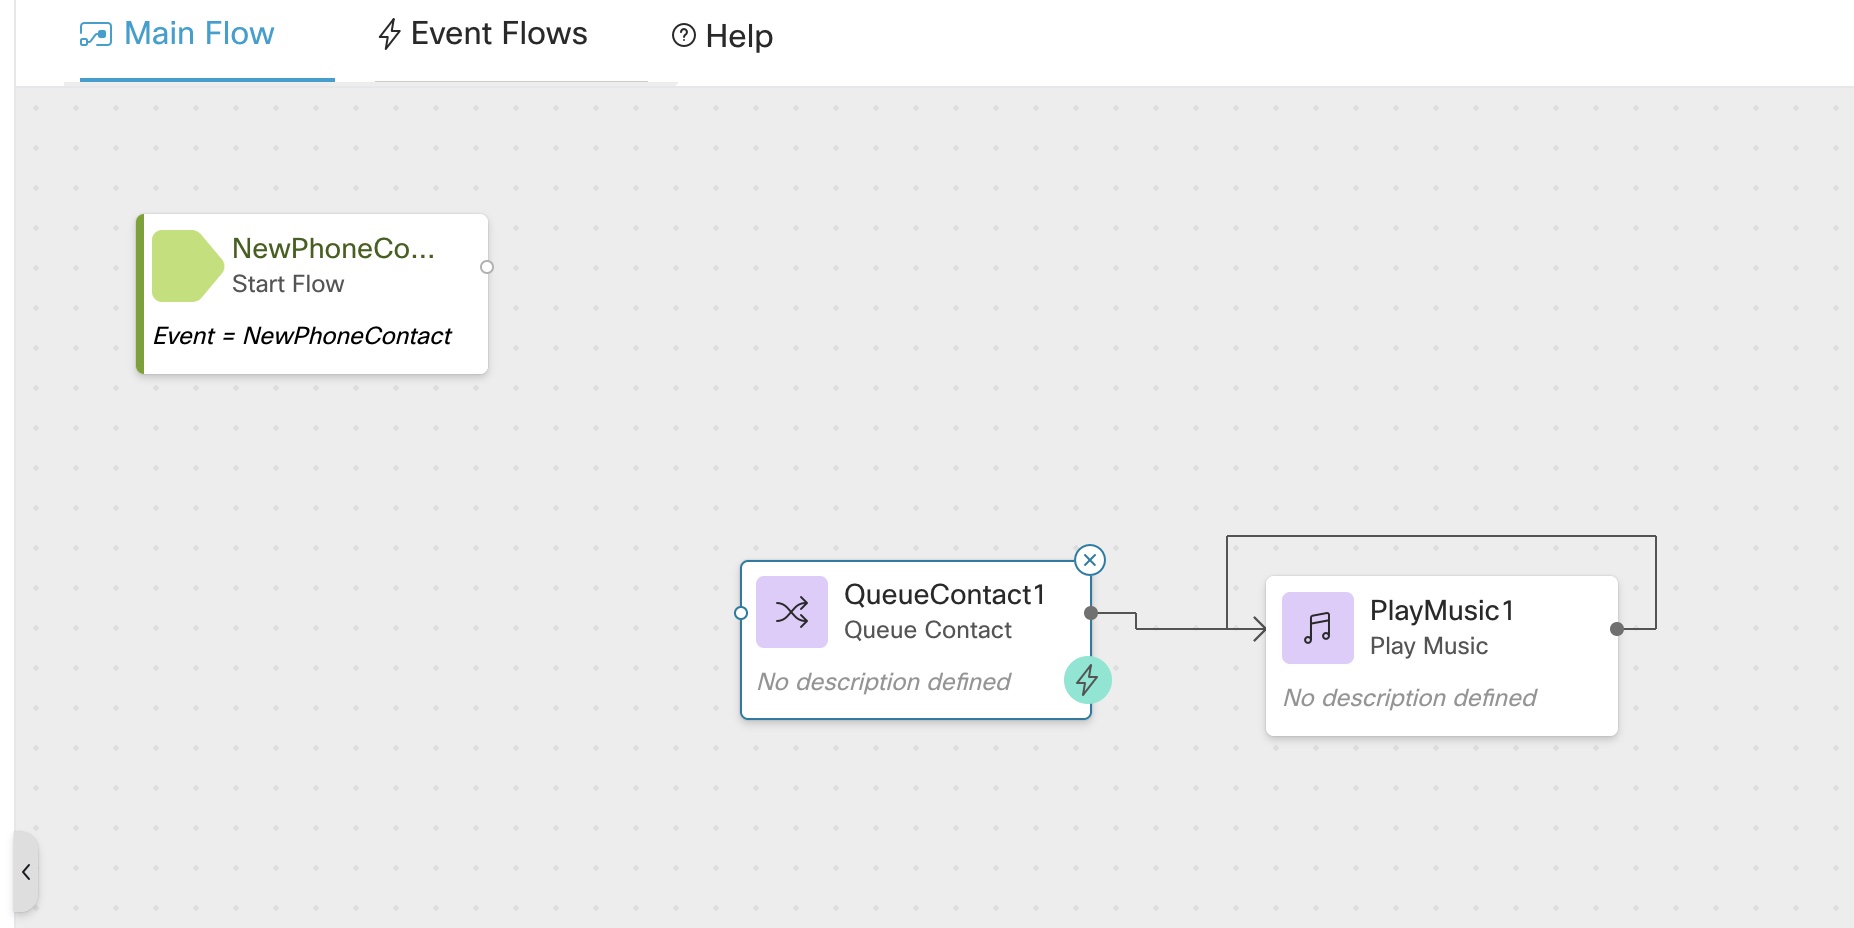
-
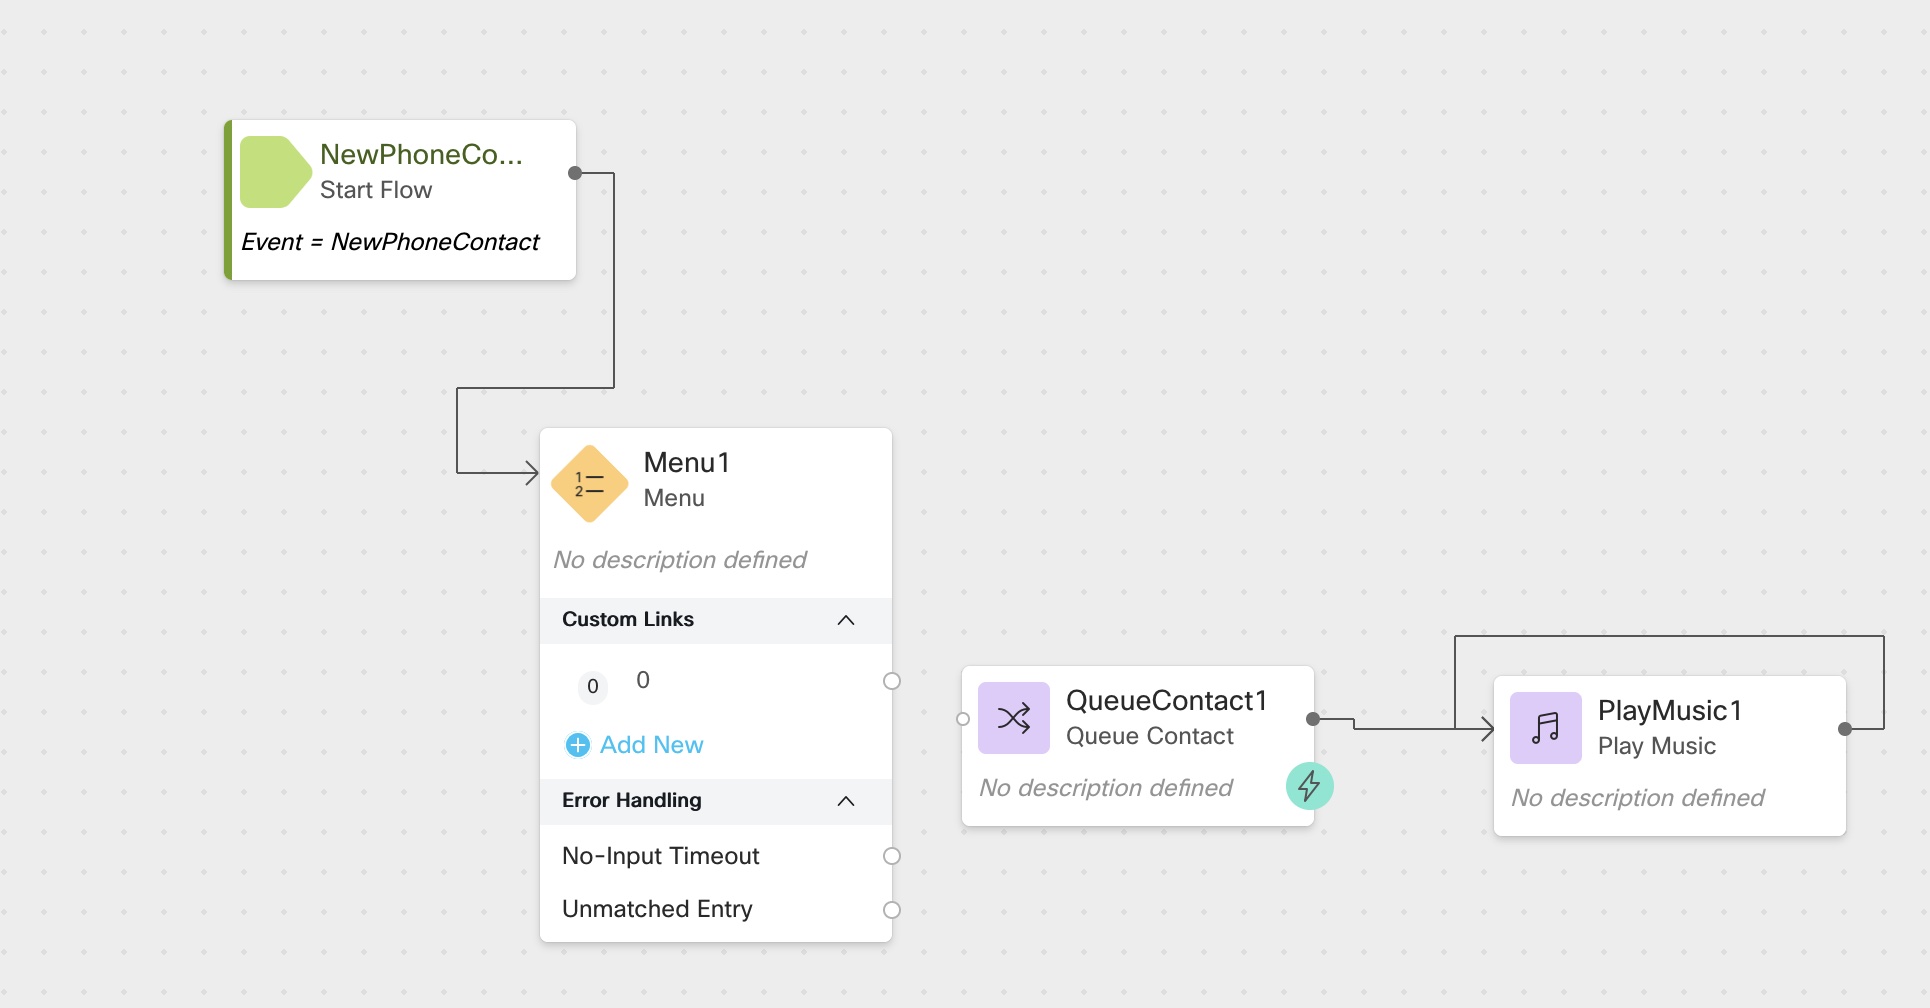
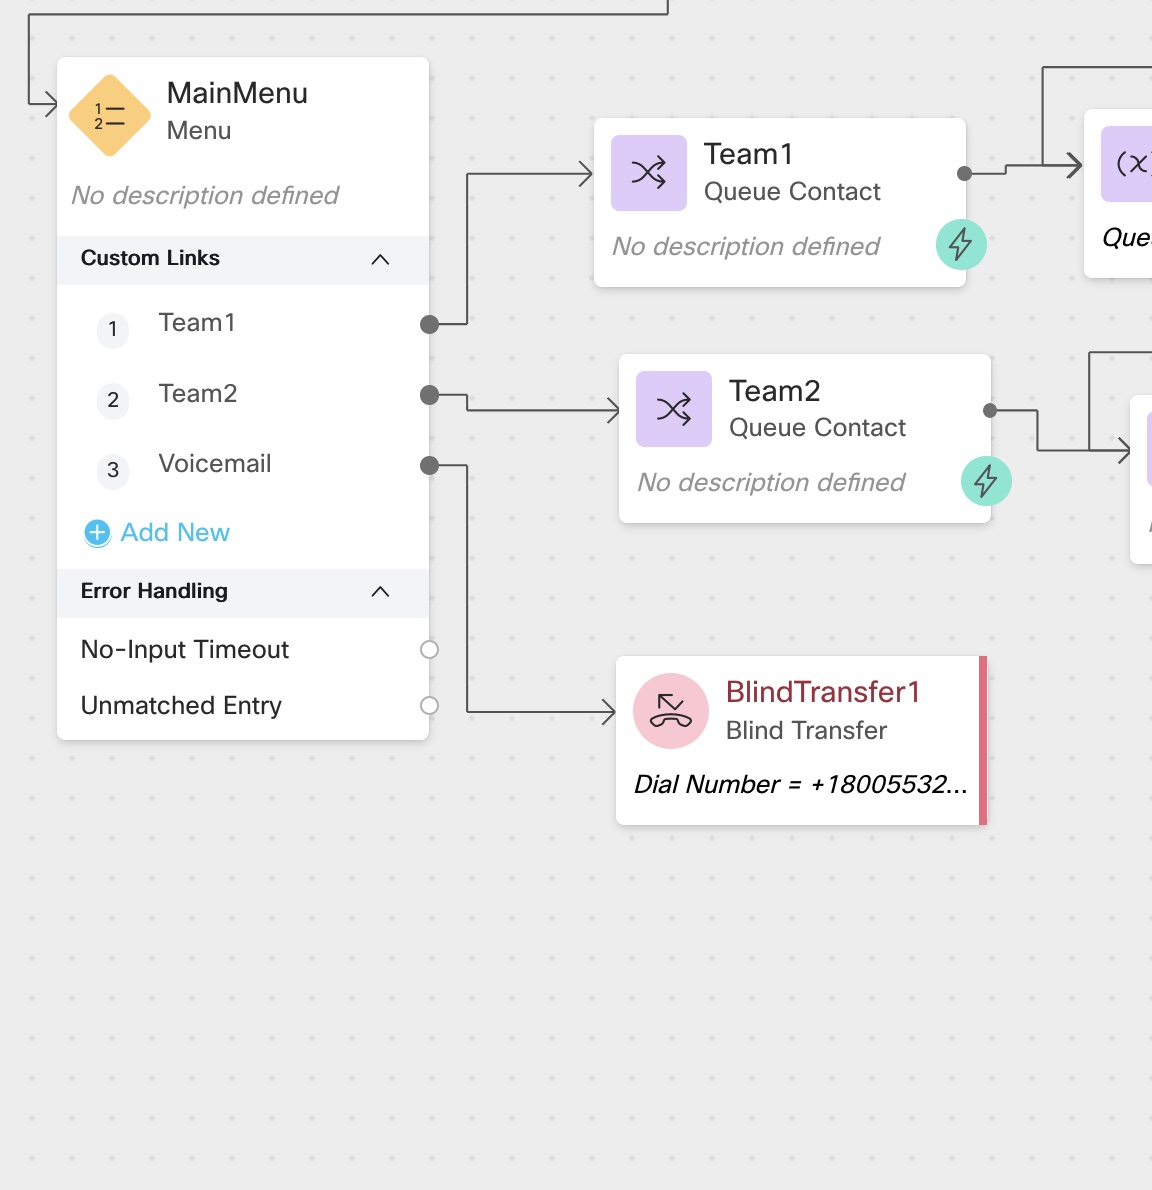
Drag and Drop Menu Node and connect NewPhoneContact node to MenuNode
-
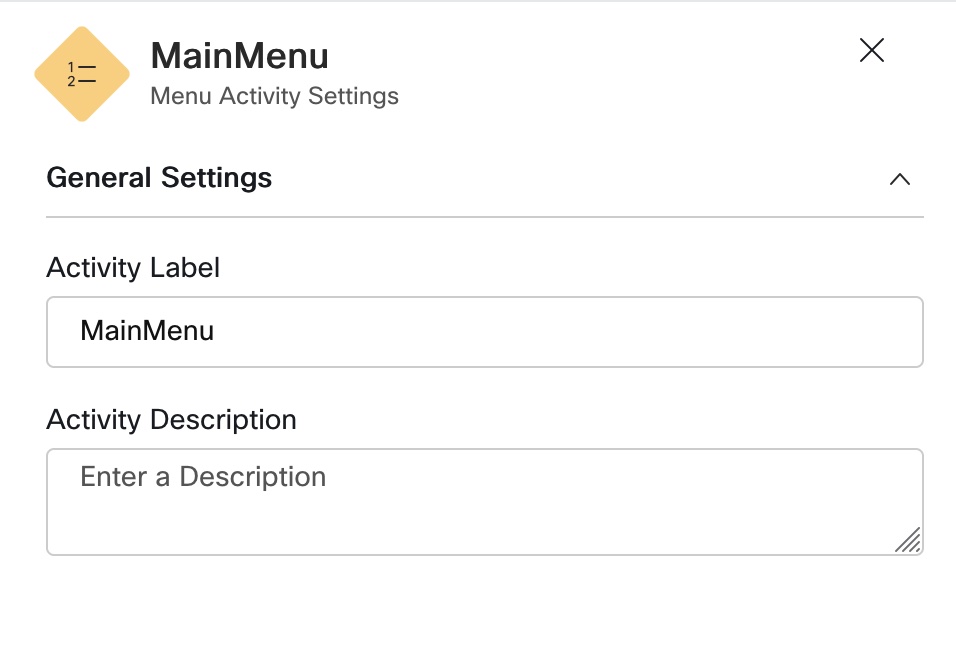
i) Click on Menu node, rename it to
MainMenuandii) Select
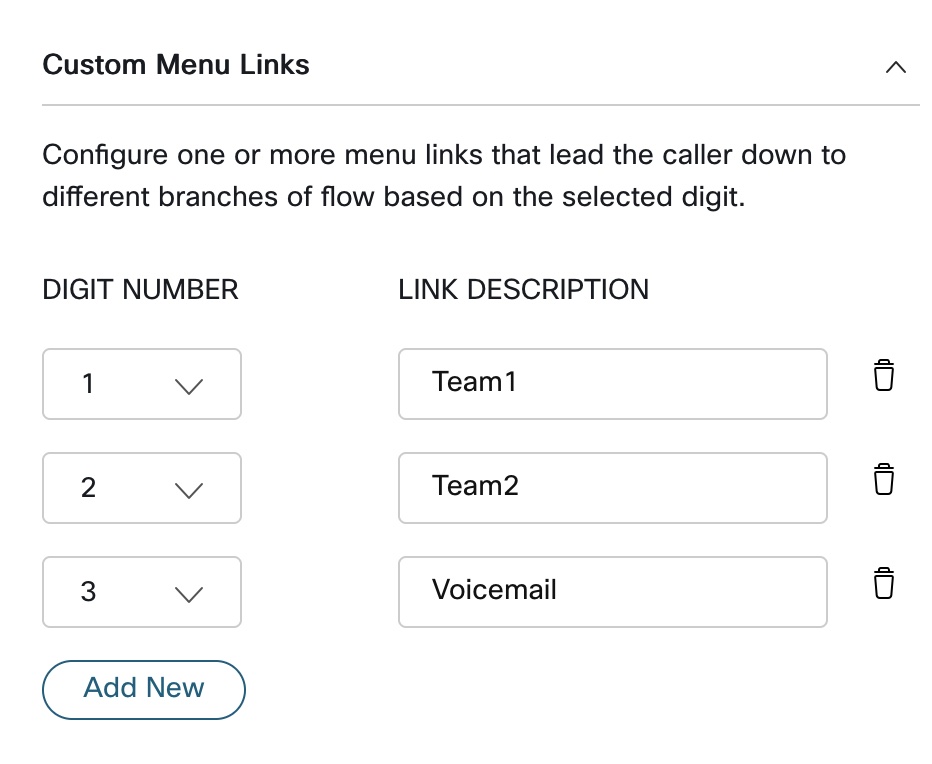
1_main_main.wavfileiii) Add 3 custom menu link 1,2,3 and add respective Descriptions

-
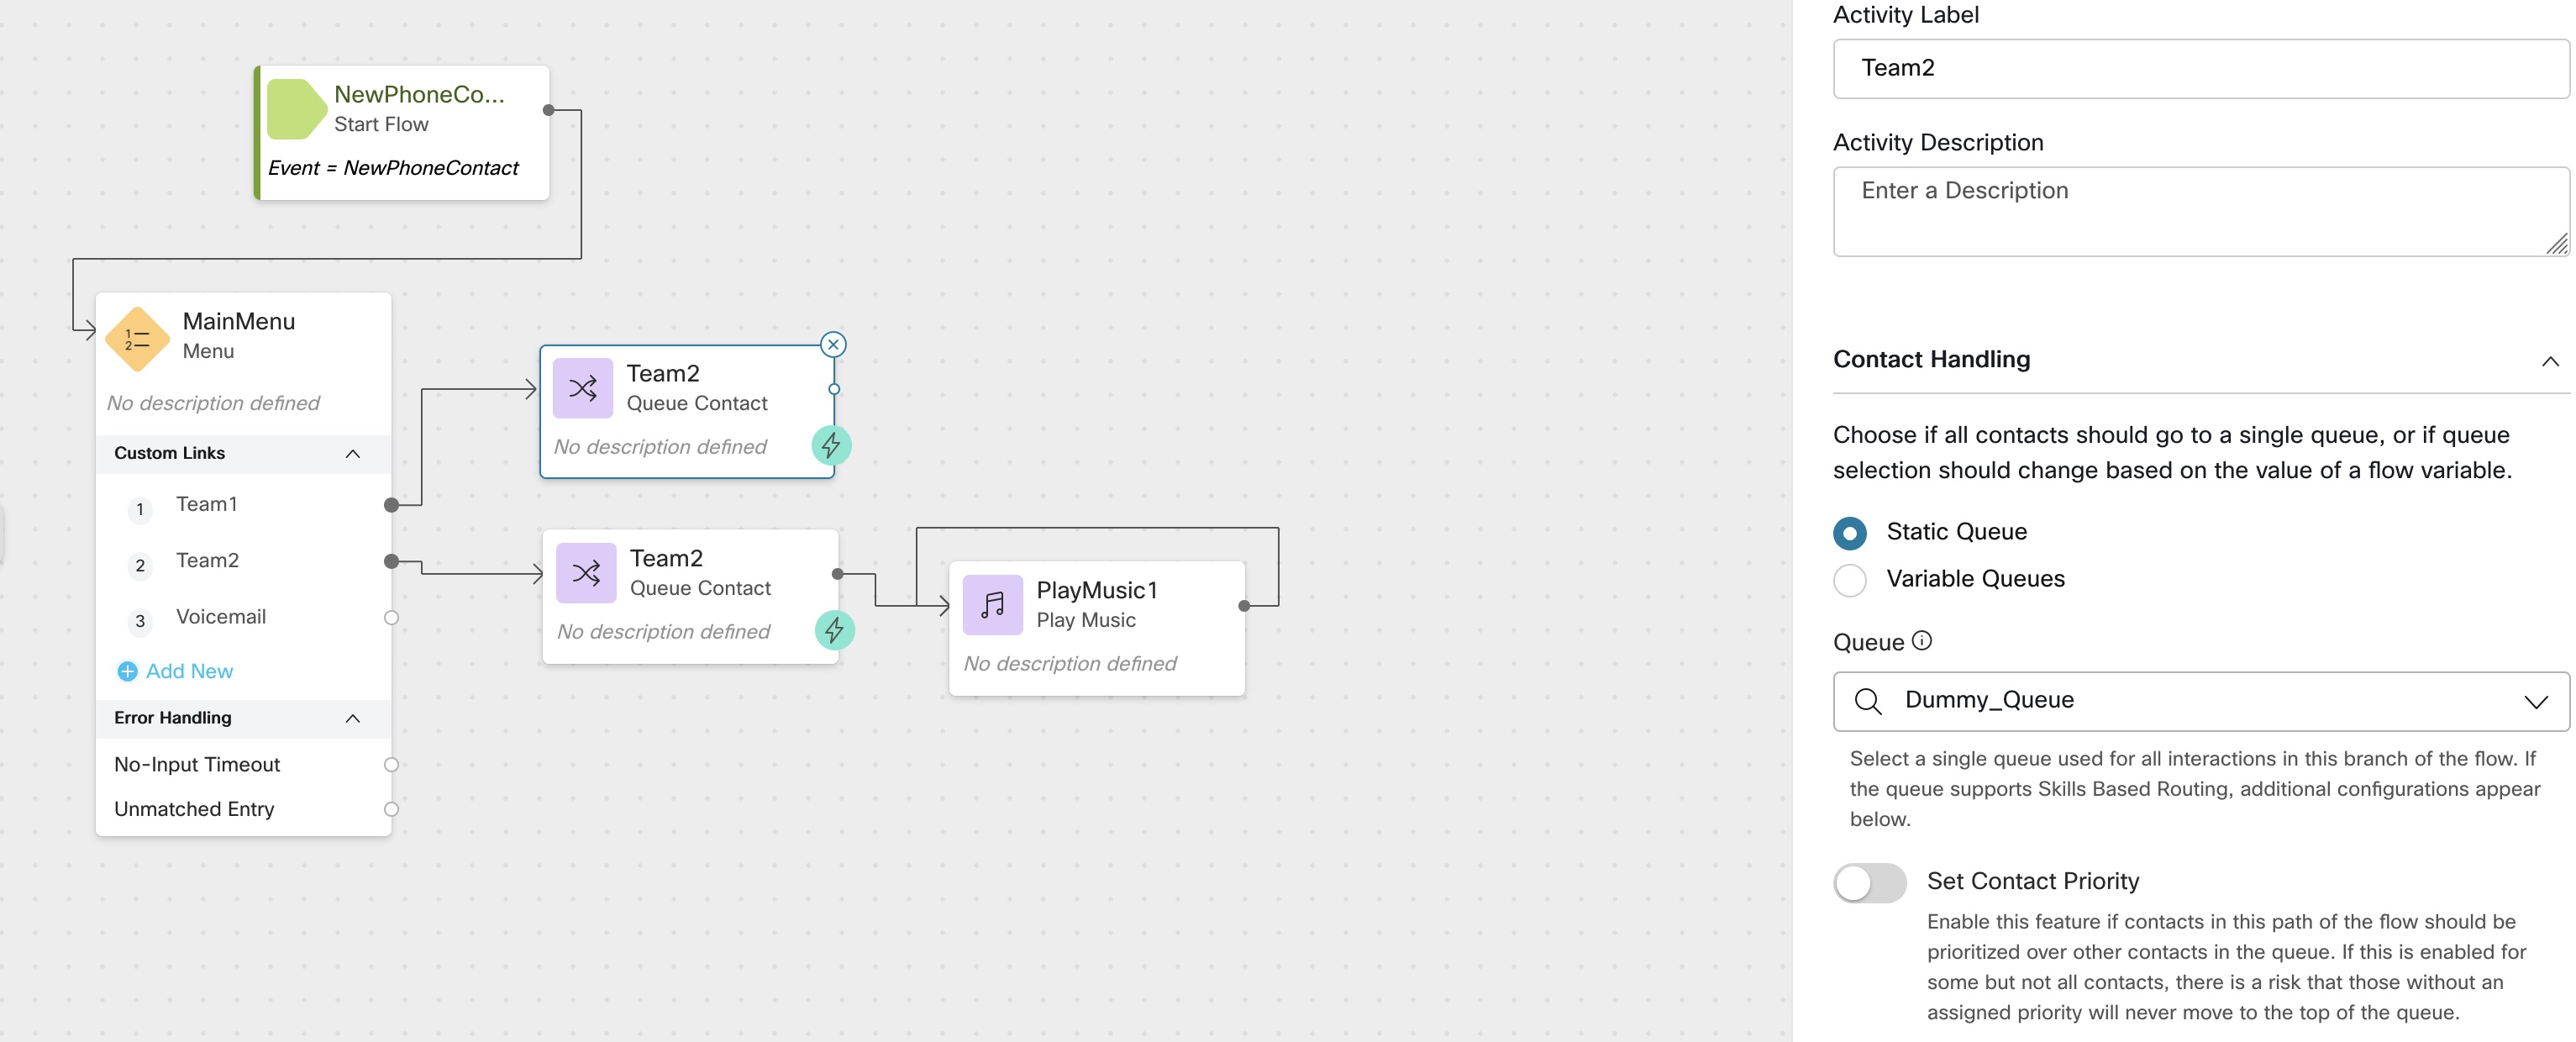
Drag and drop
Queue contactnode and selectDummy_Queuecreated
-
To Set
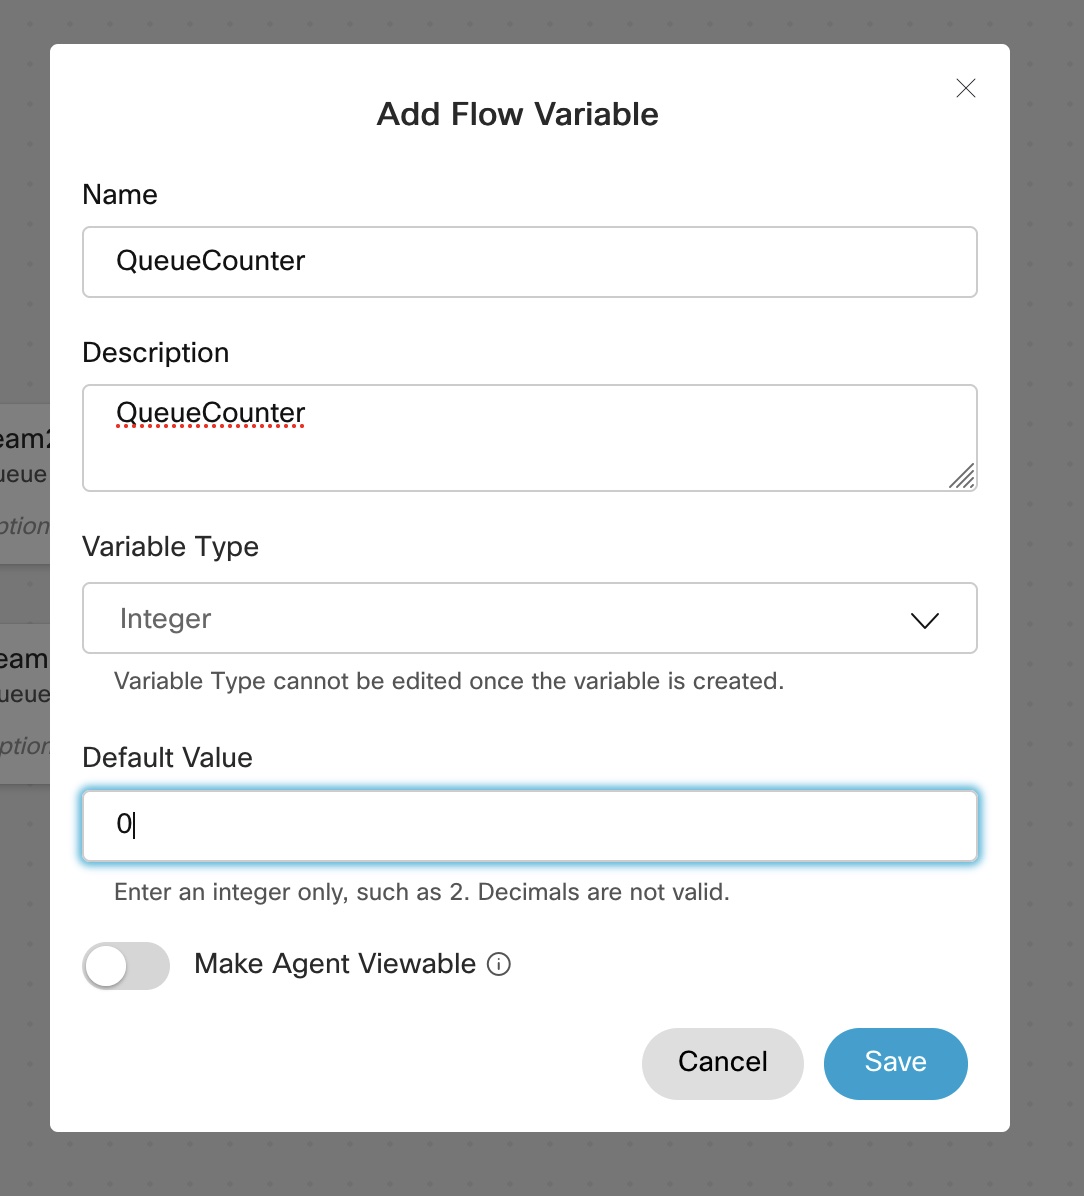
QueueCounterVariablei) Click anywhere on the Flow canvas
ii)Click on
Add Flow Variableiii) Create a
integervariable namedQueueCounterand set Default value to0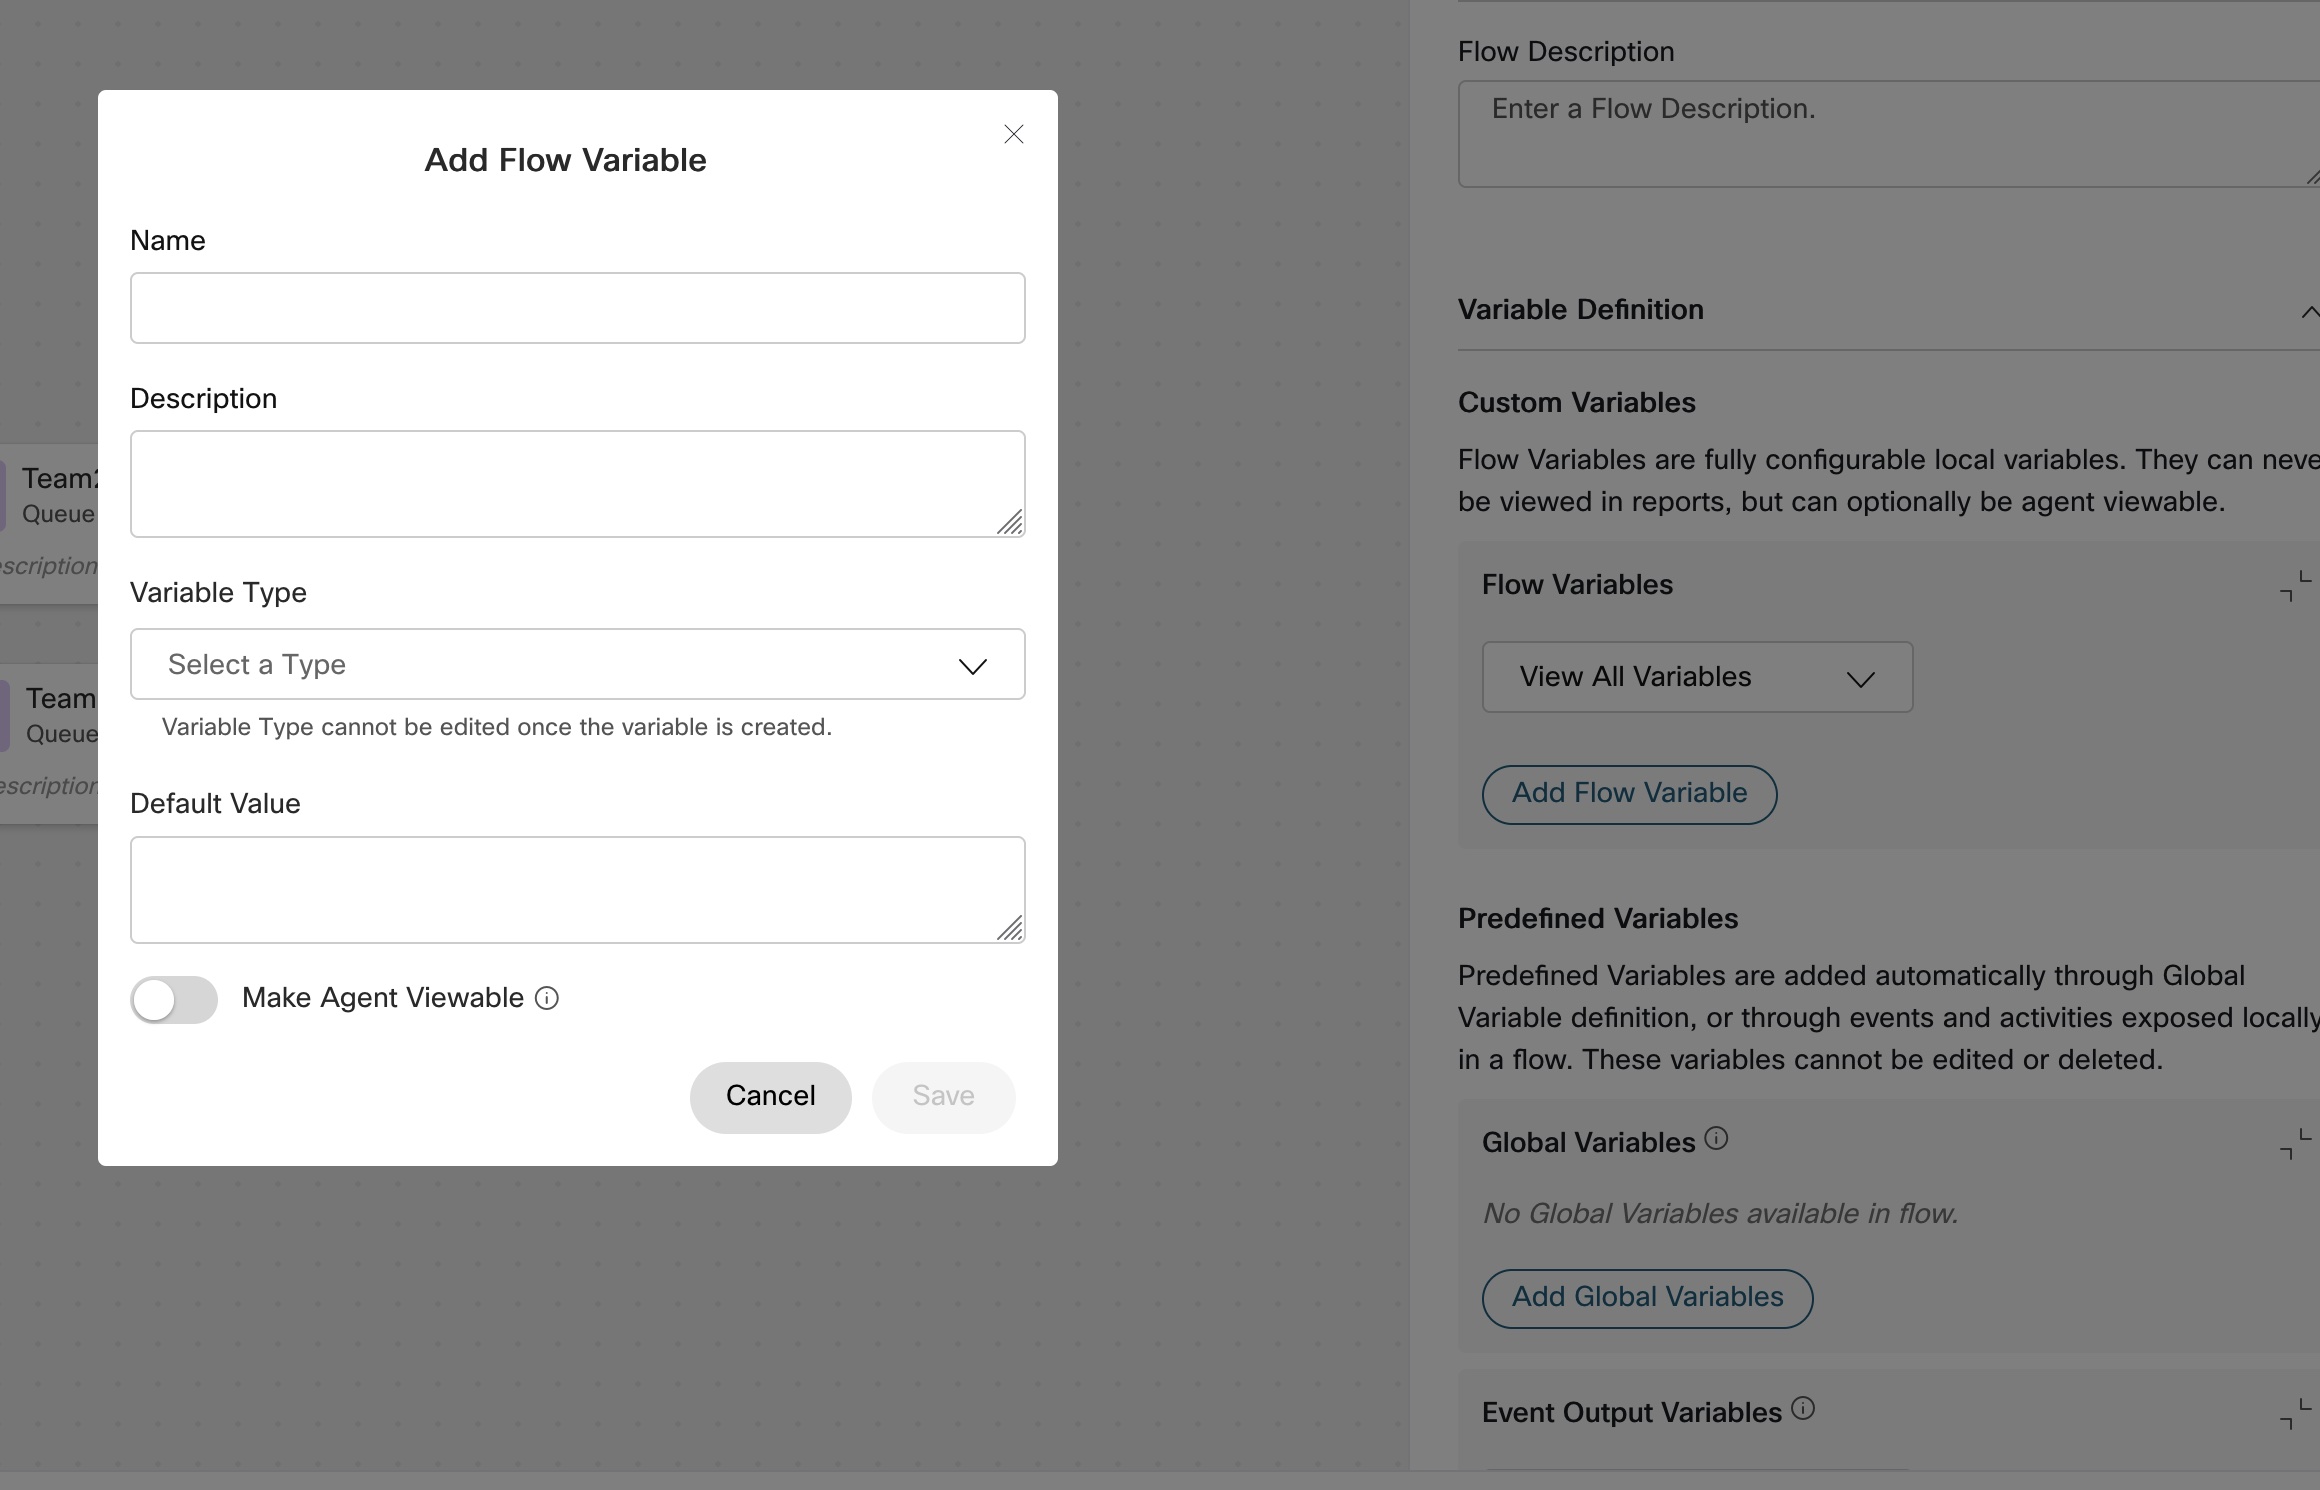
-
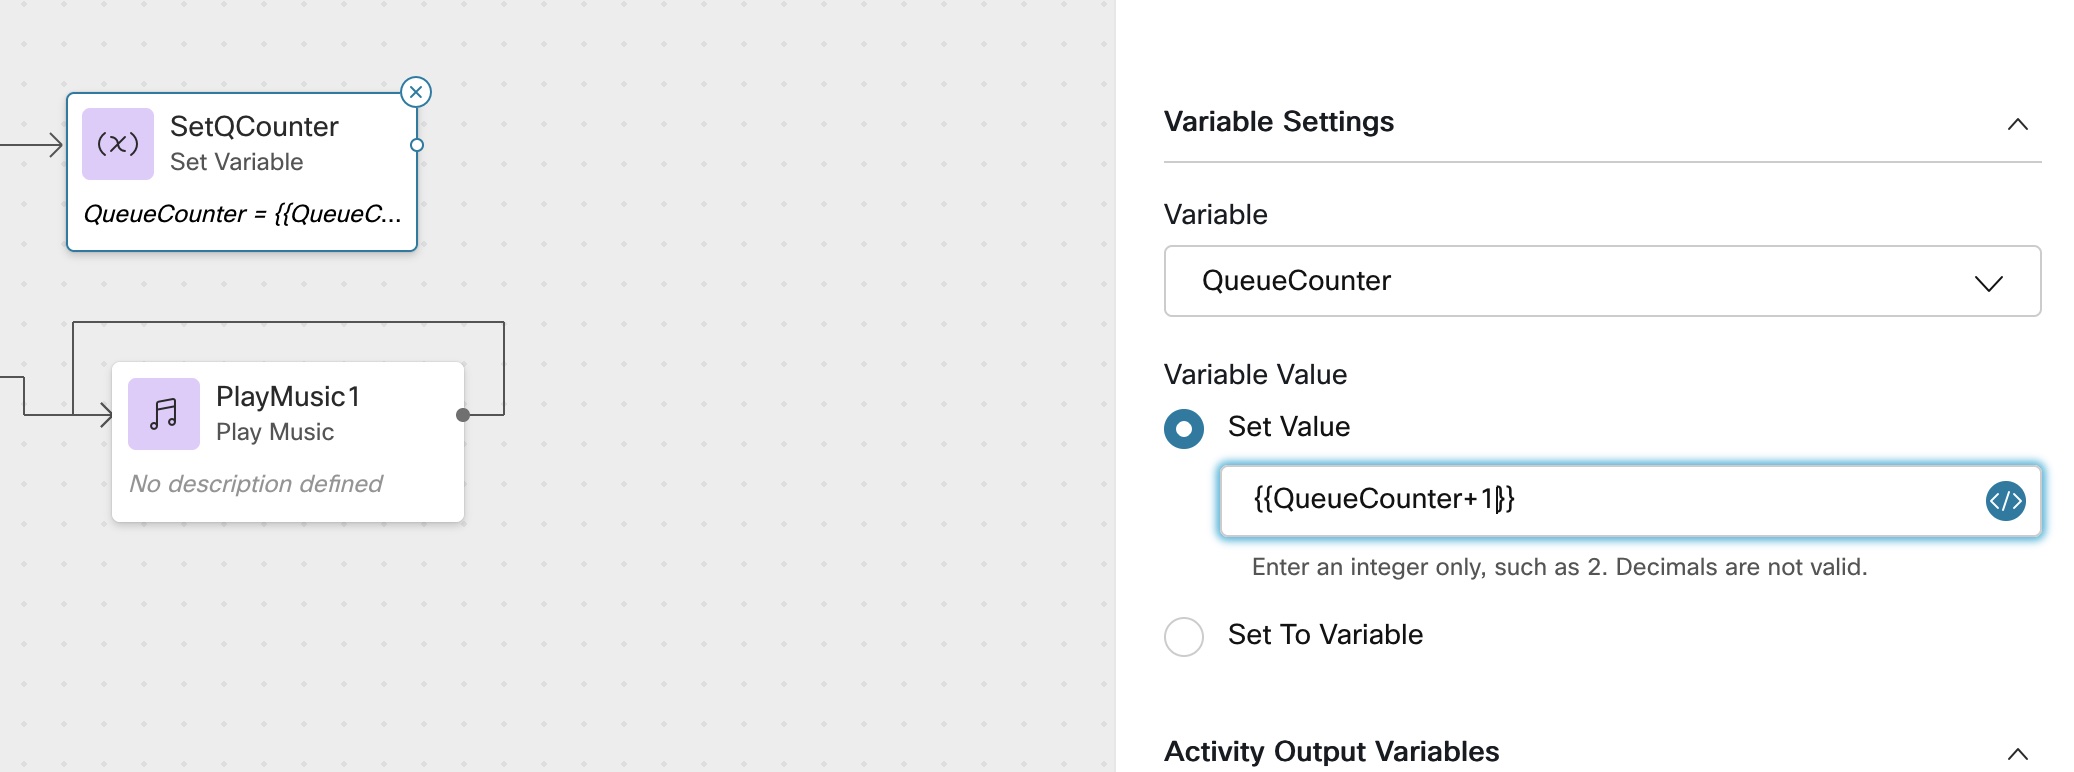
Set
QueueCountervariable i) Drag and DropSetVariblenode
ii) In the variable select QueueCounter variable created
iii) In the set value type ``, Note: variable in the set node must always be typed inside ` ` braces
-
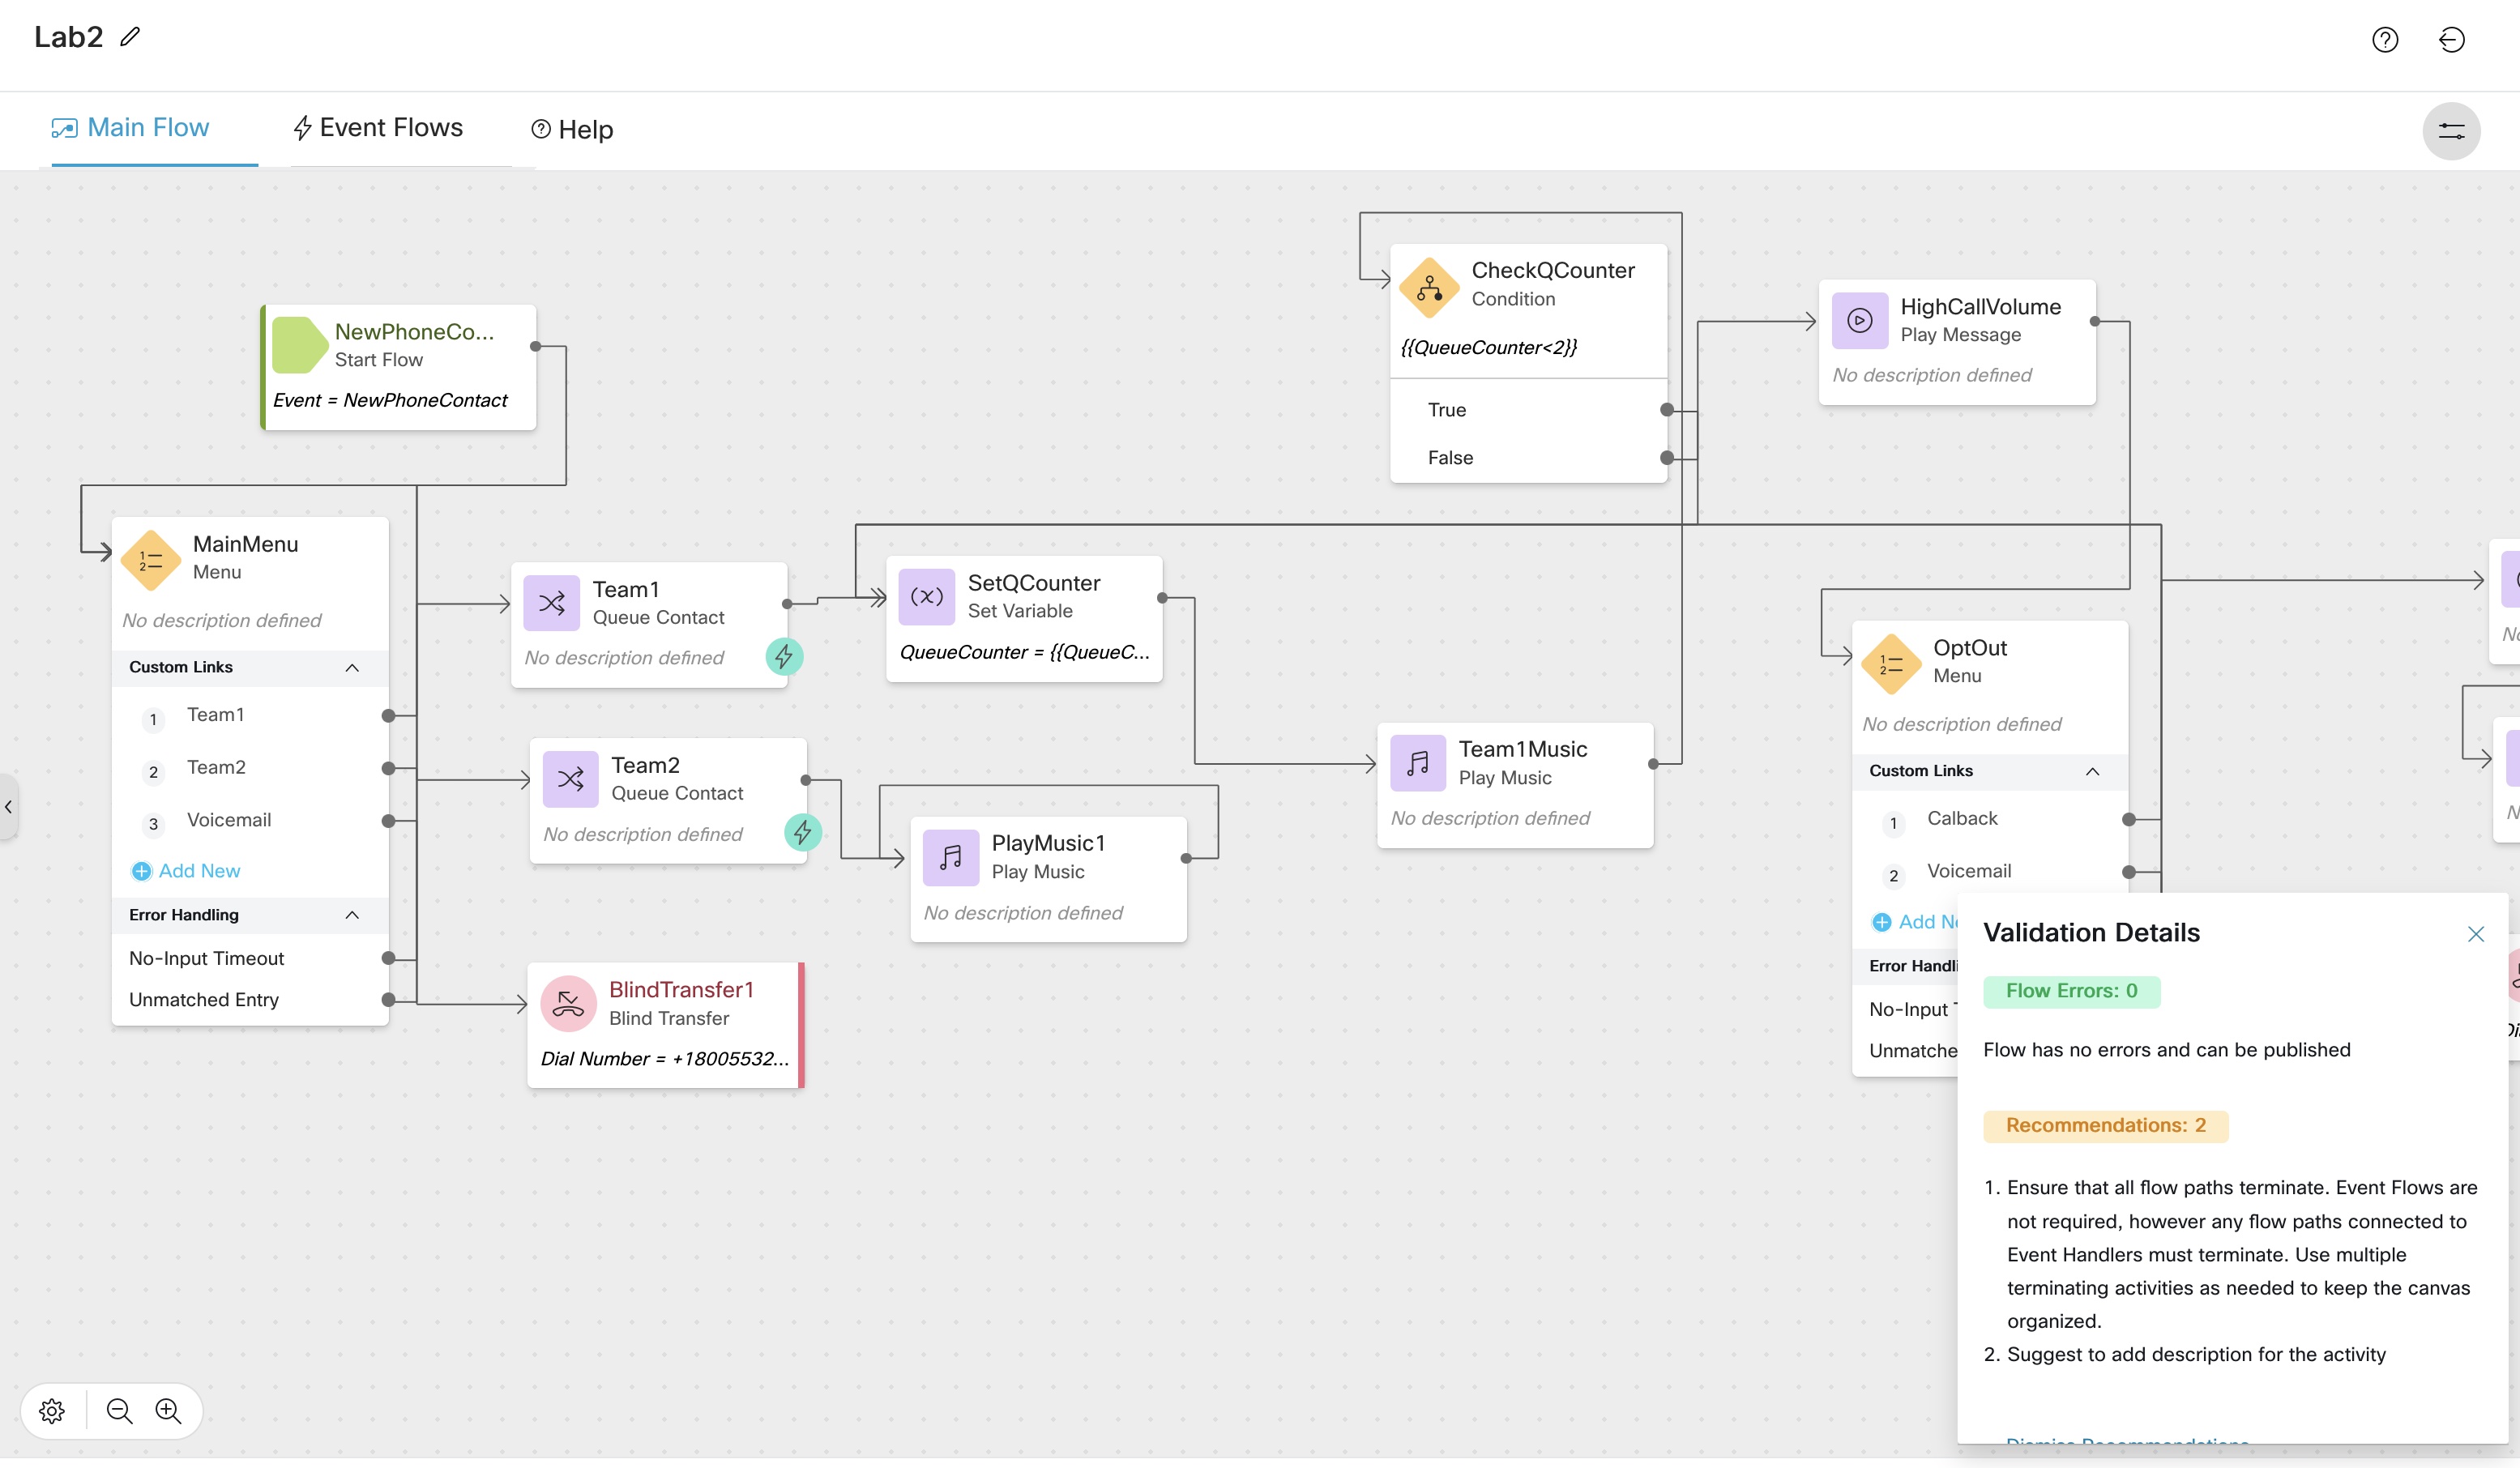
Drag and Drop
PlayMusicnode and selectMusic Fileand setoffsetto5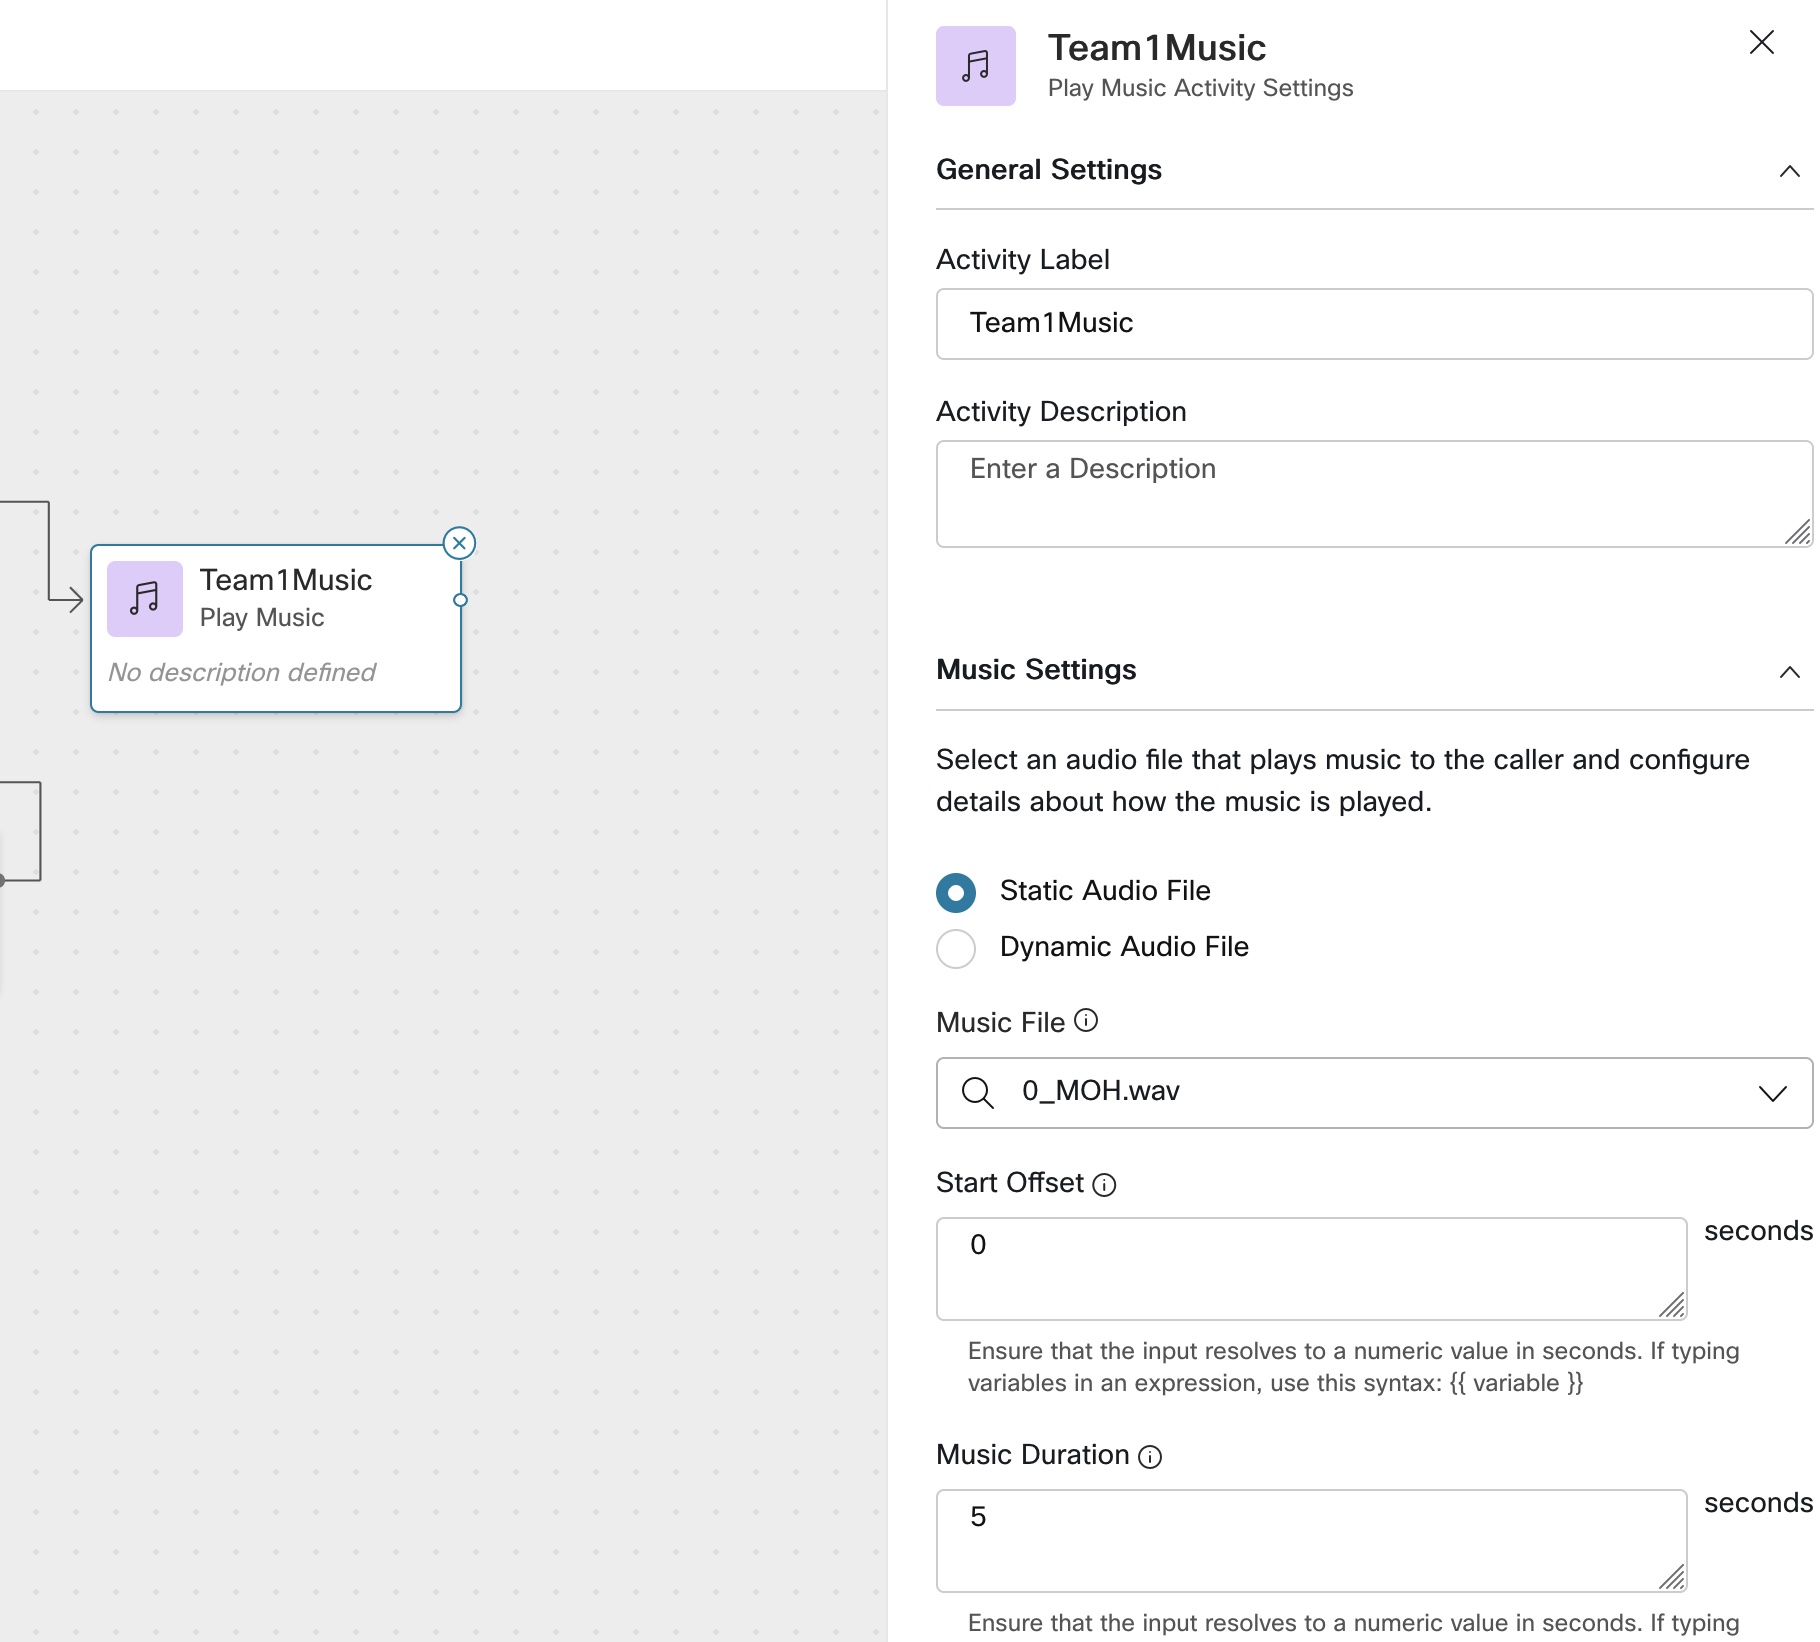
-
Drag and Drop
Conditionnode and set the condition to `` ifTrueconnect it toSetQCounter
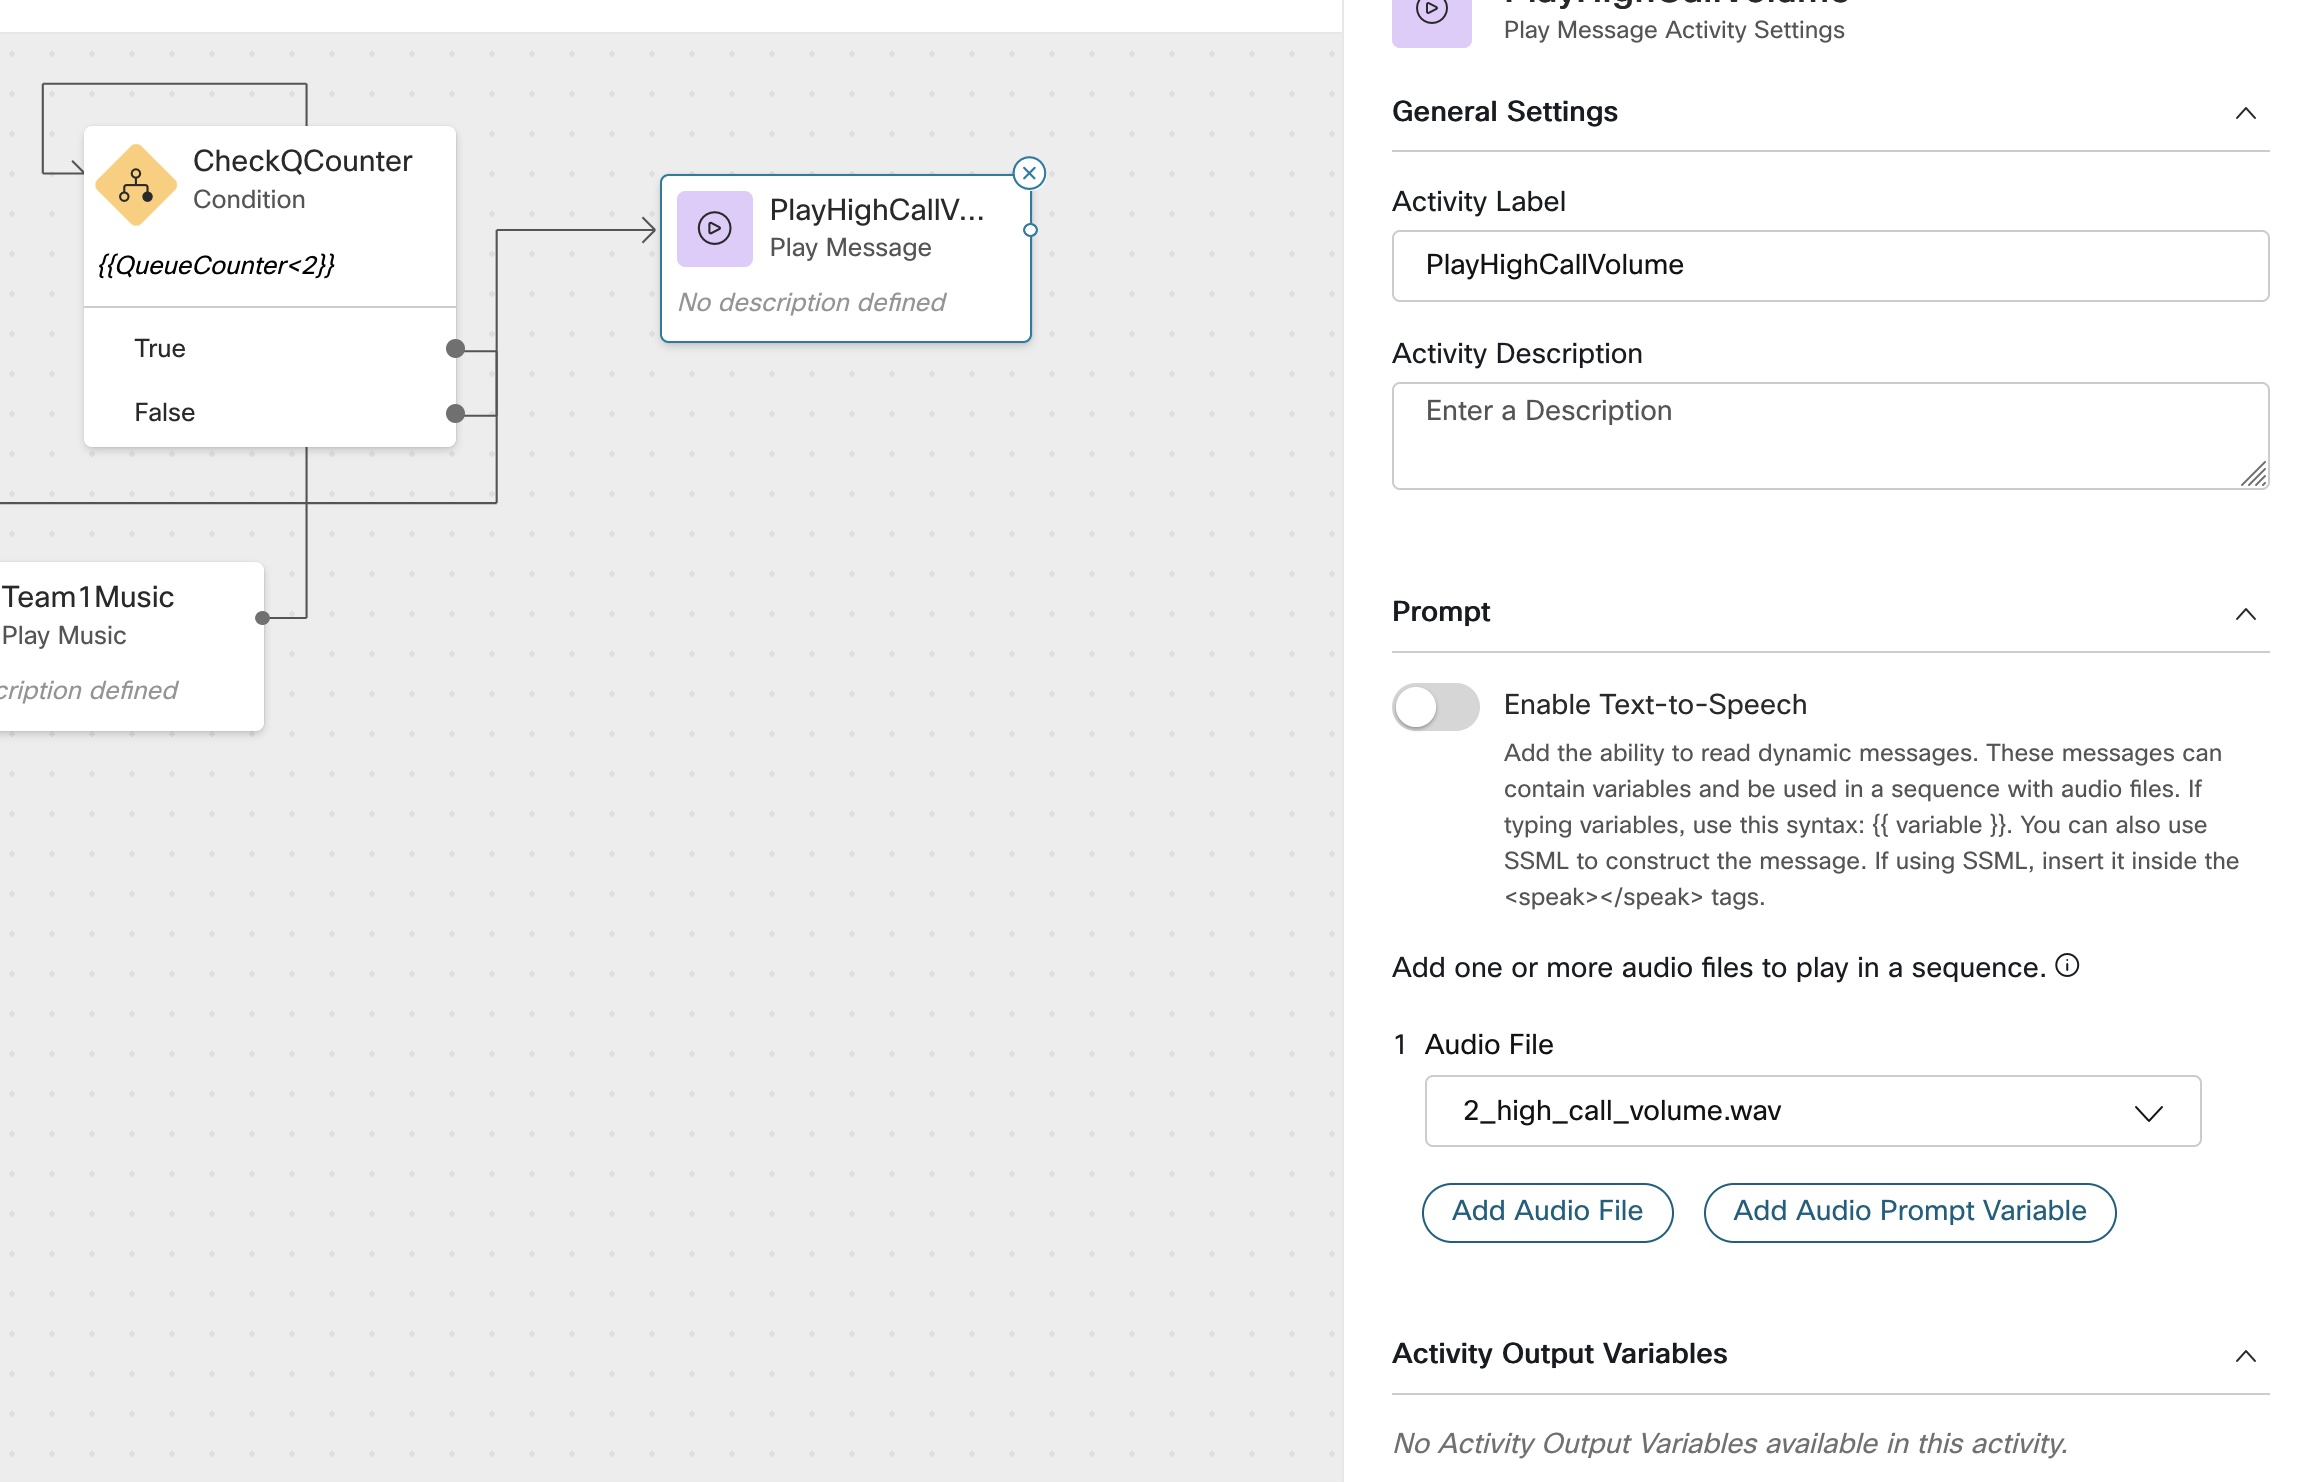
- Drag and Drop
PlayMessagenode and select2_high_call_volume.wavfile and connectFalseoutput toPlayMessagenode
-
Drag and Drop
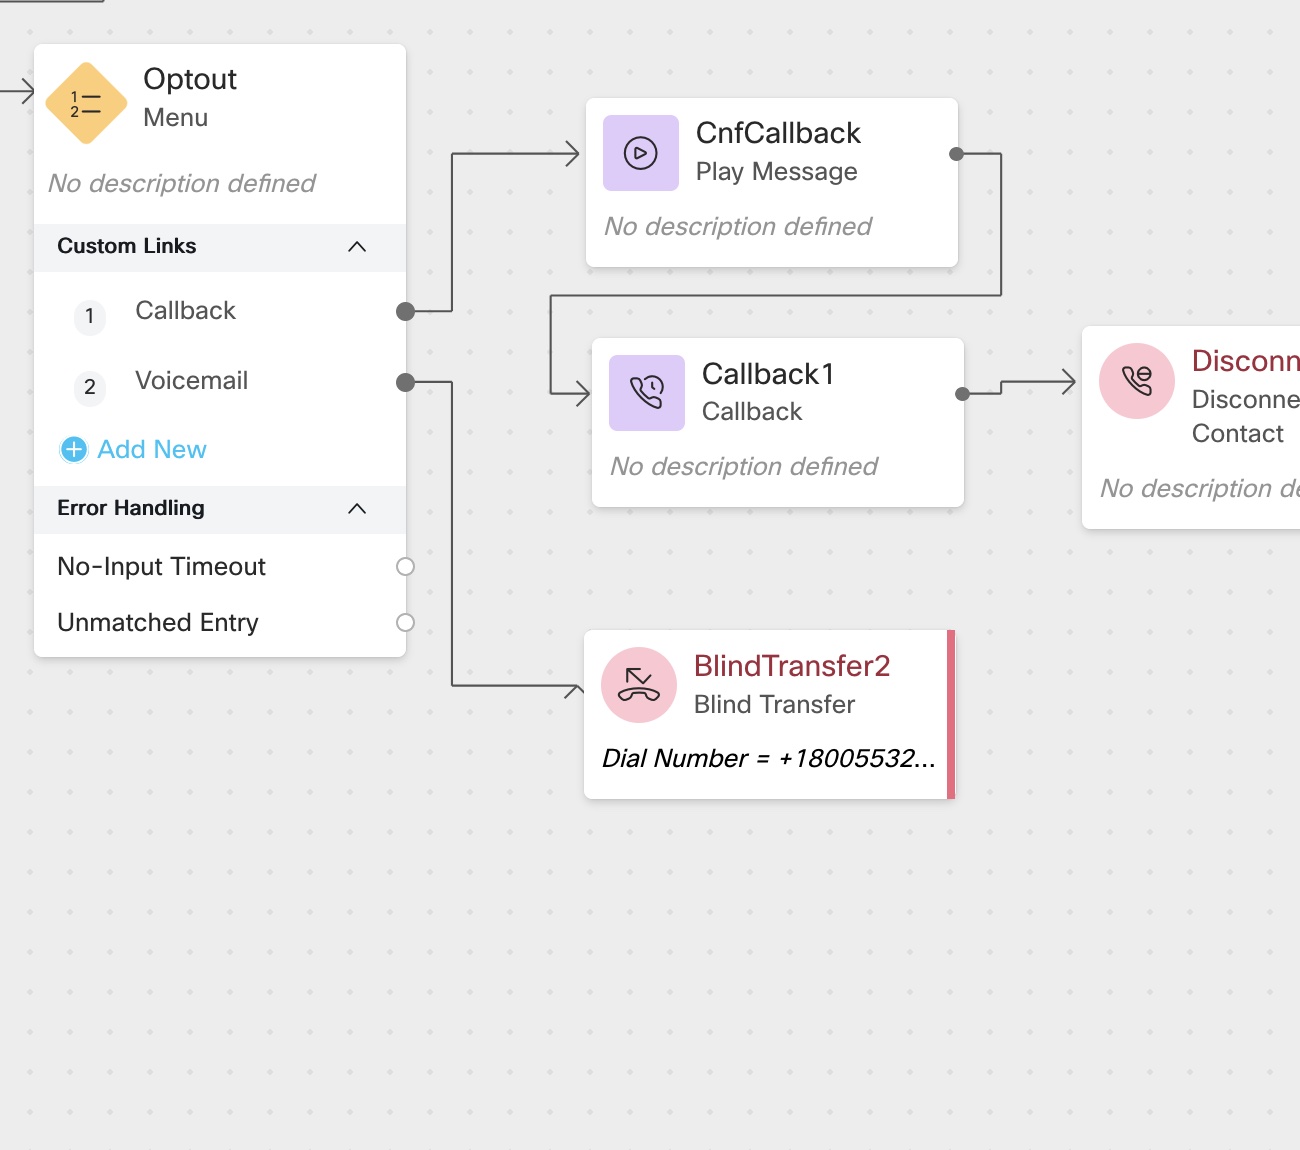
Menunode and select3_callback_menu.wavfile and add 2 more custom links 1 and 2 forcallbackandVoicemail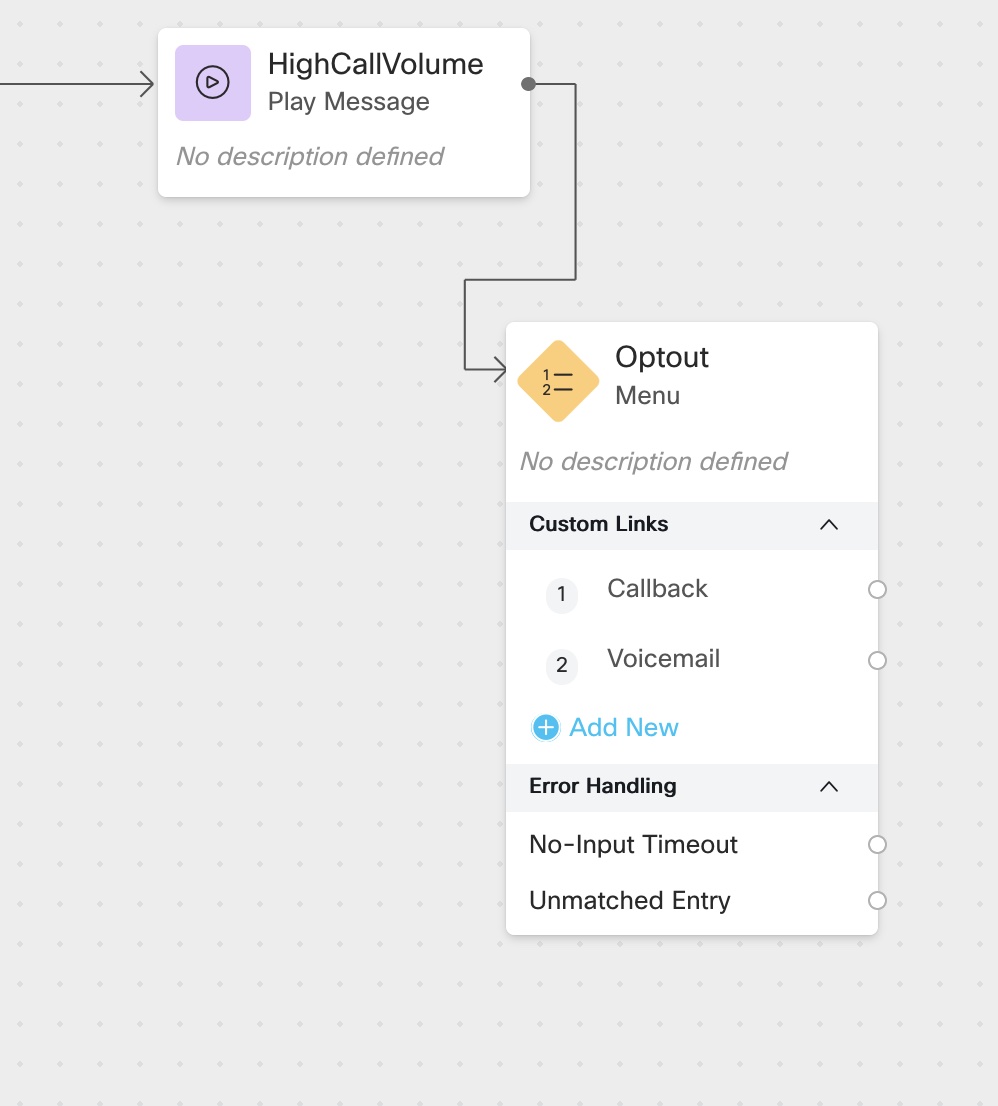
-
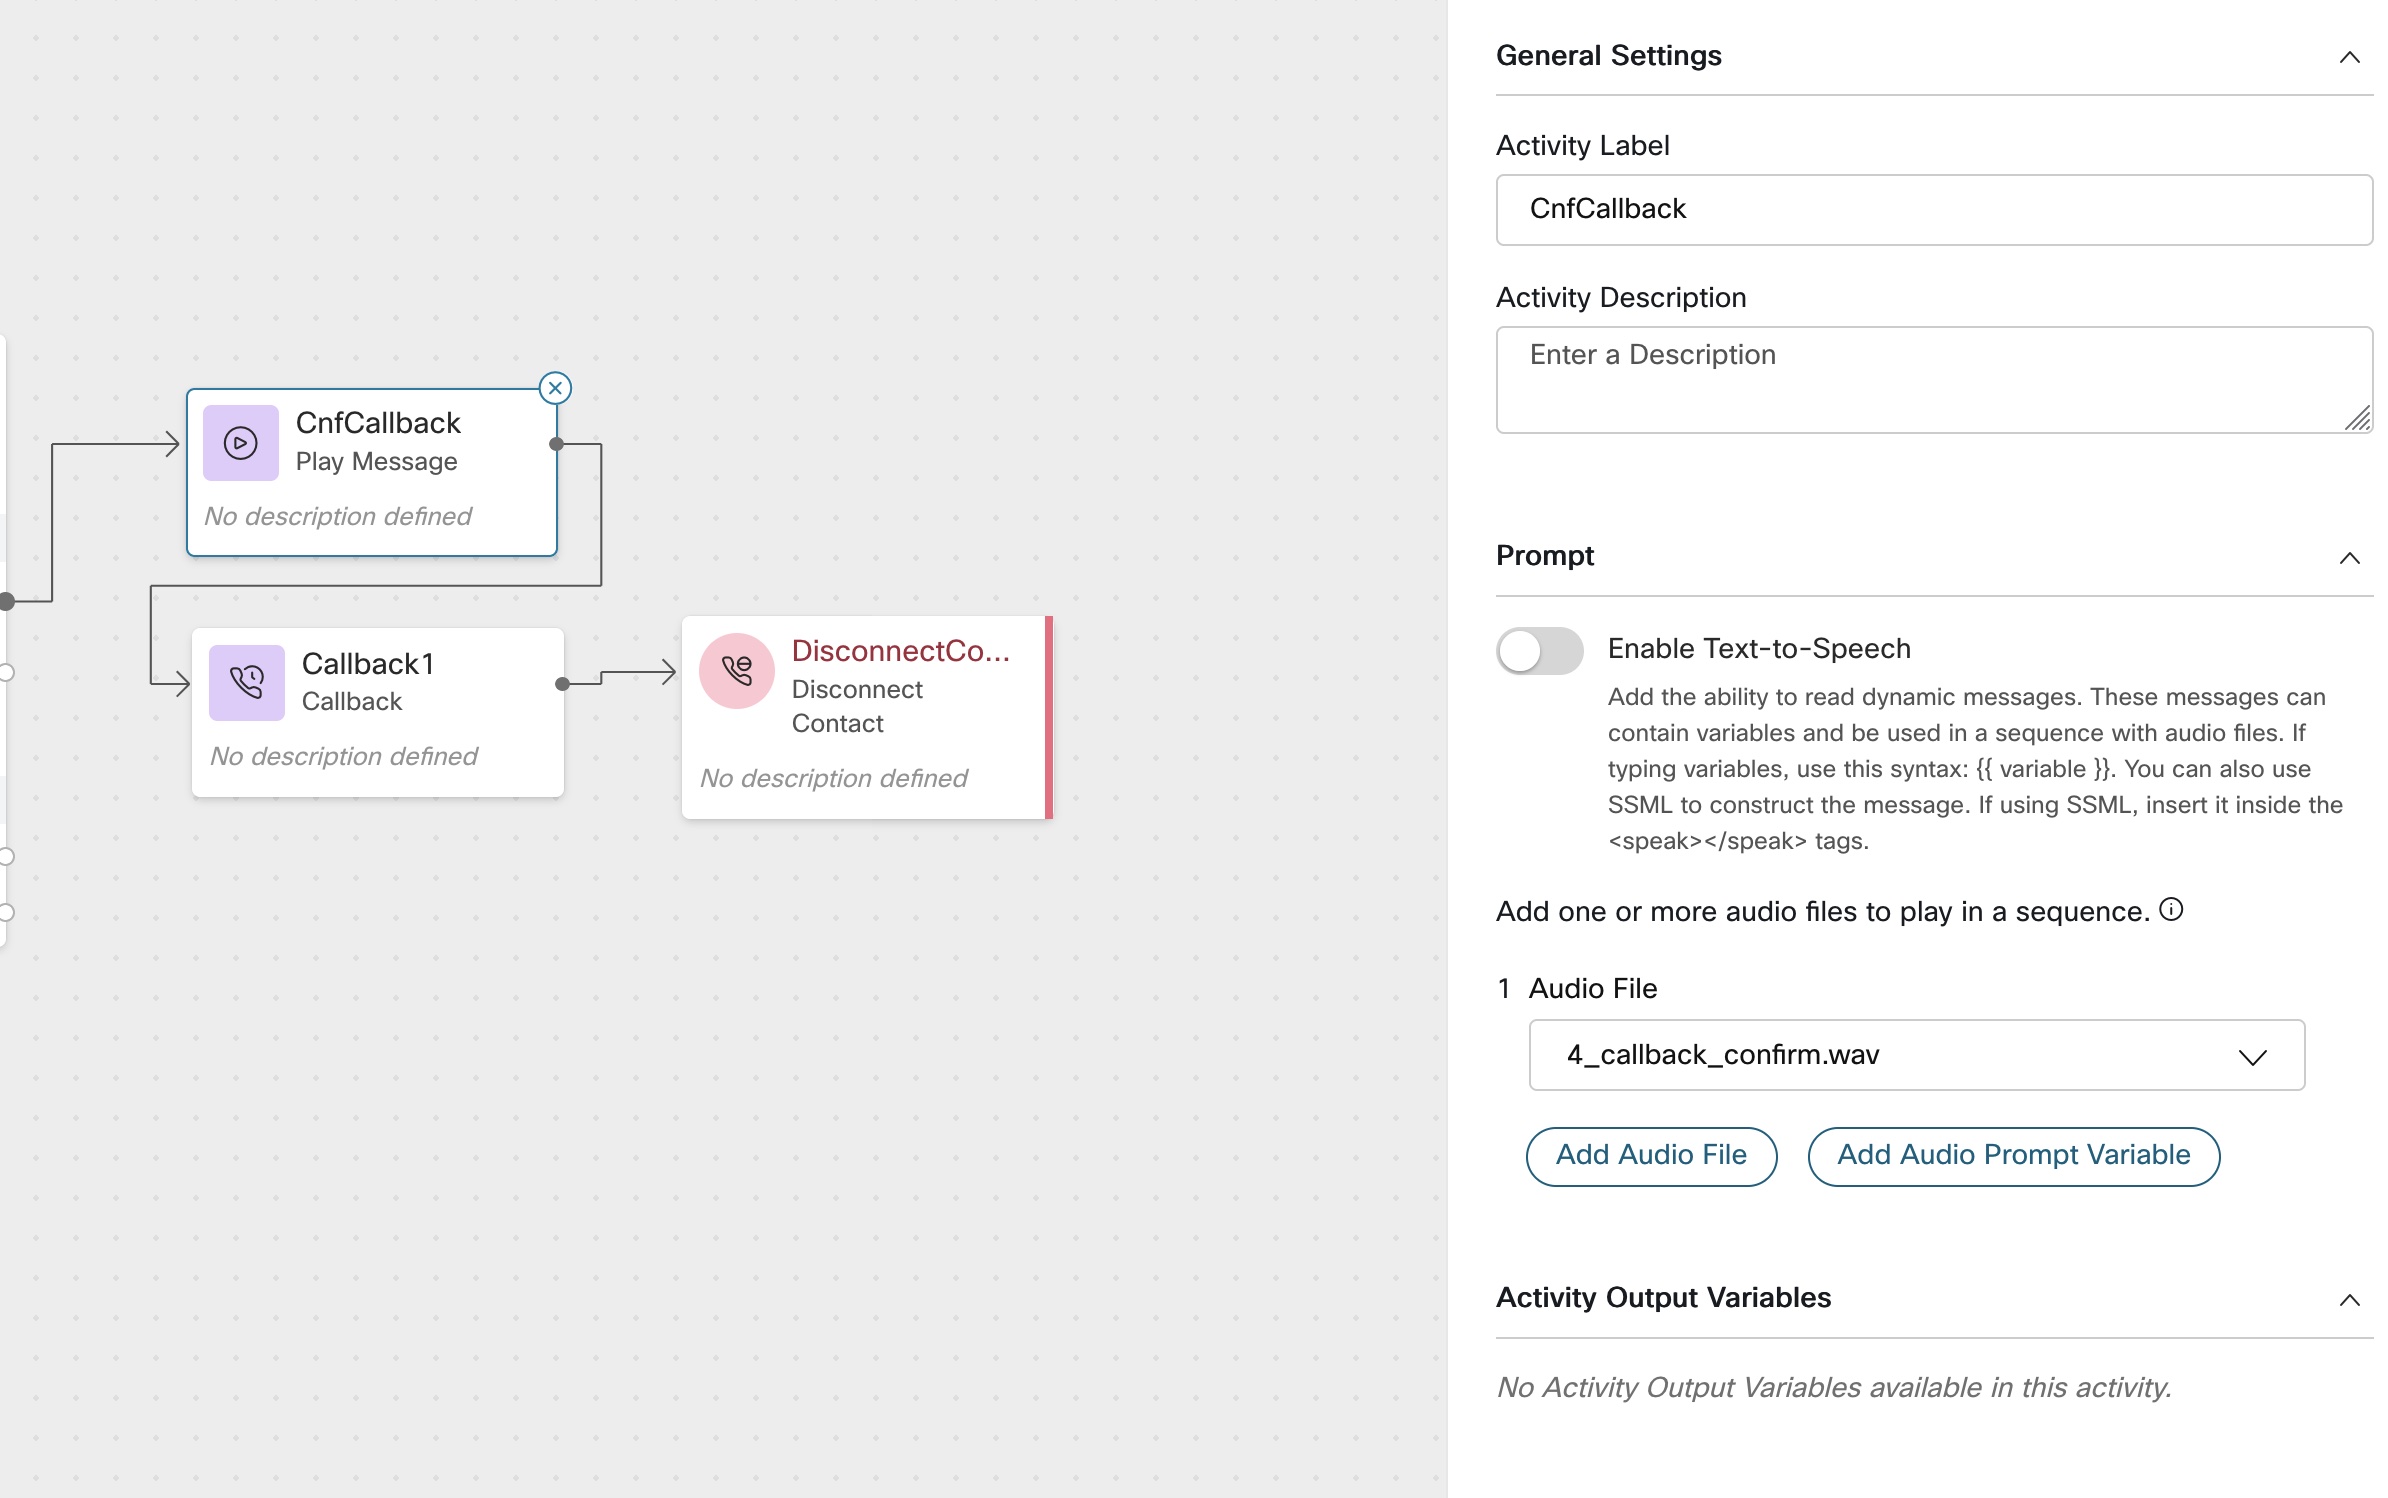
Set call back
i) Drag and Drop PlayMessage node and select 4_callback_confirm.wav file
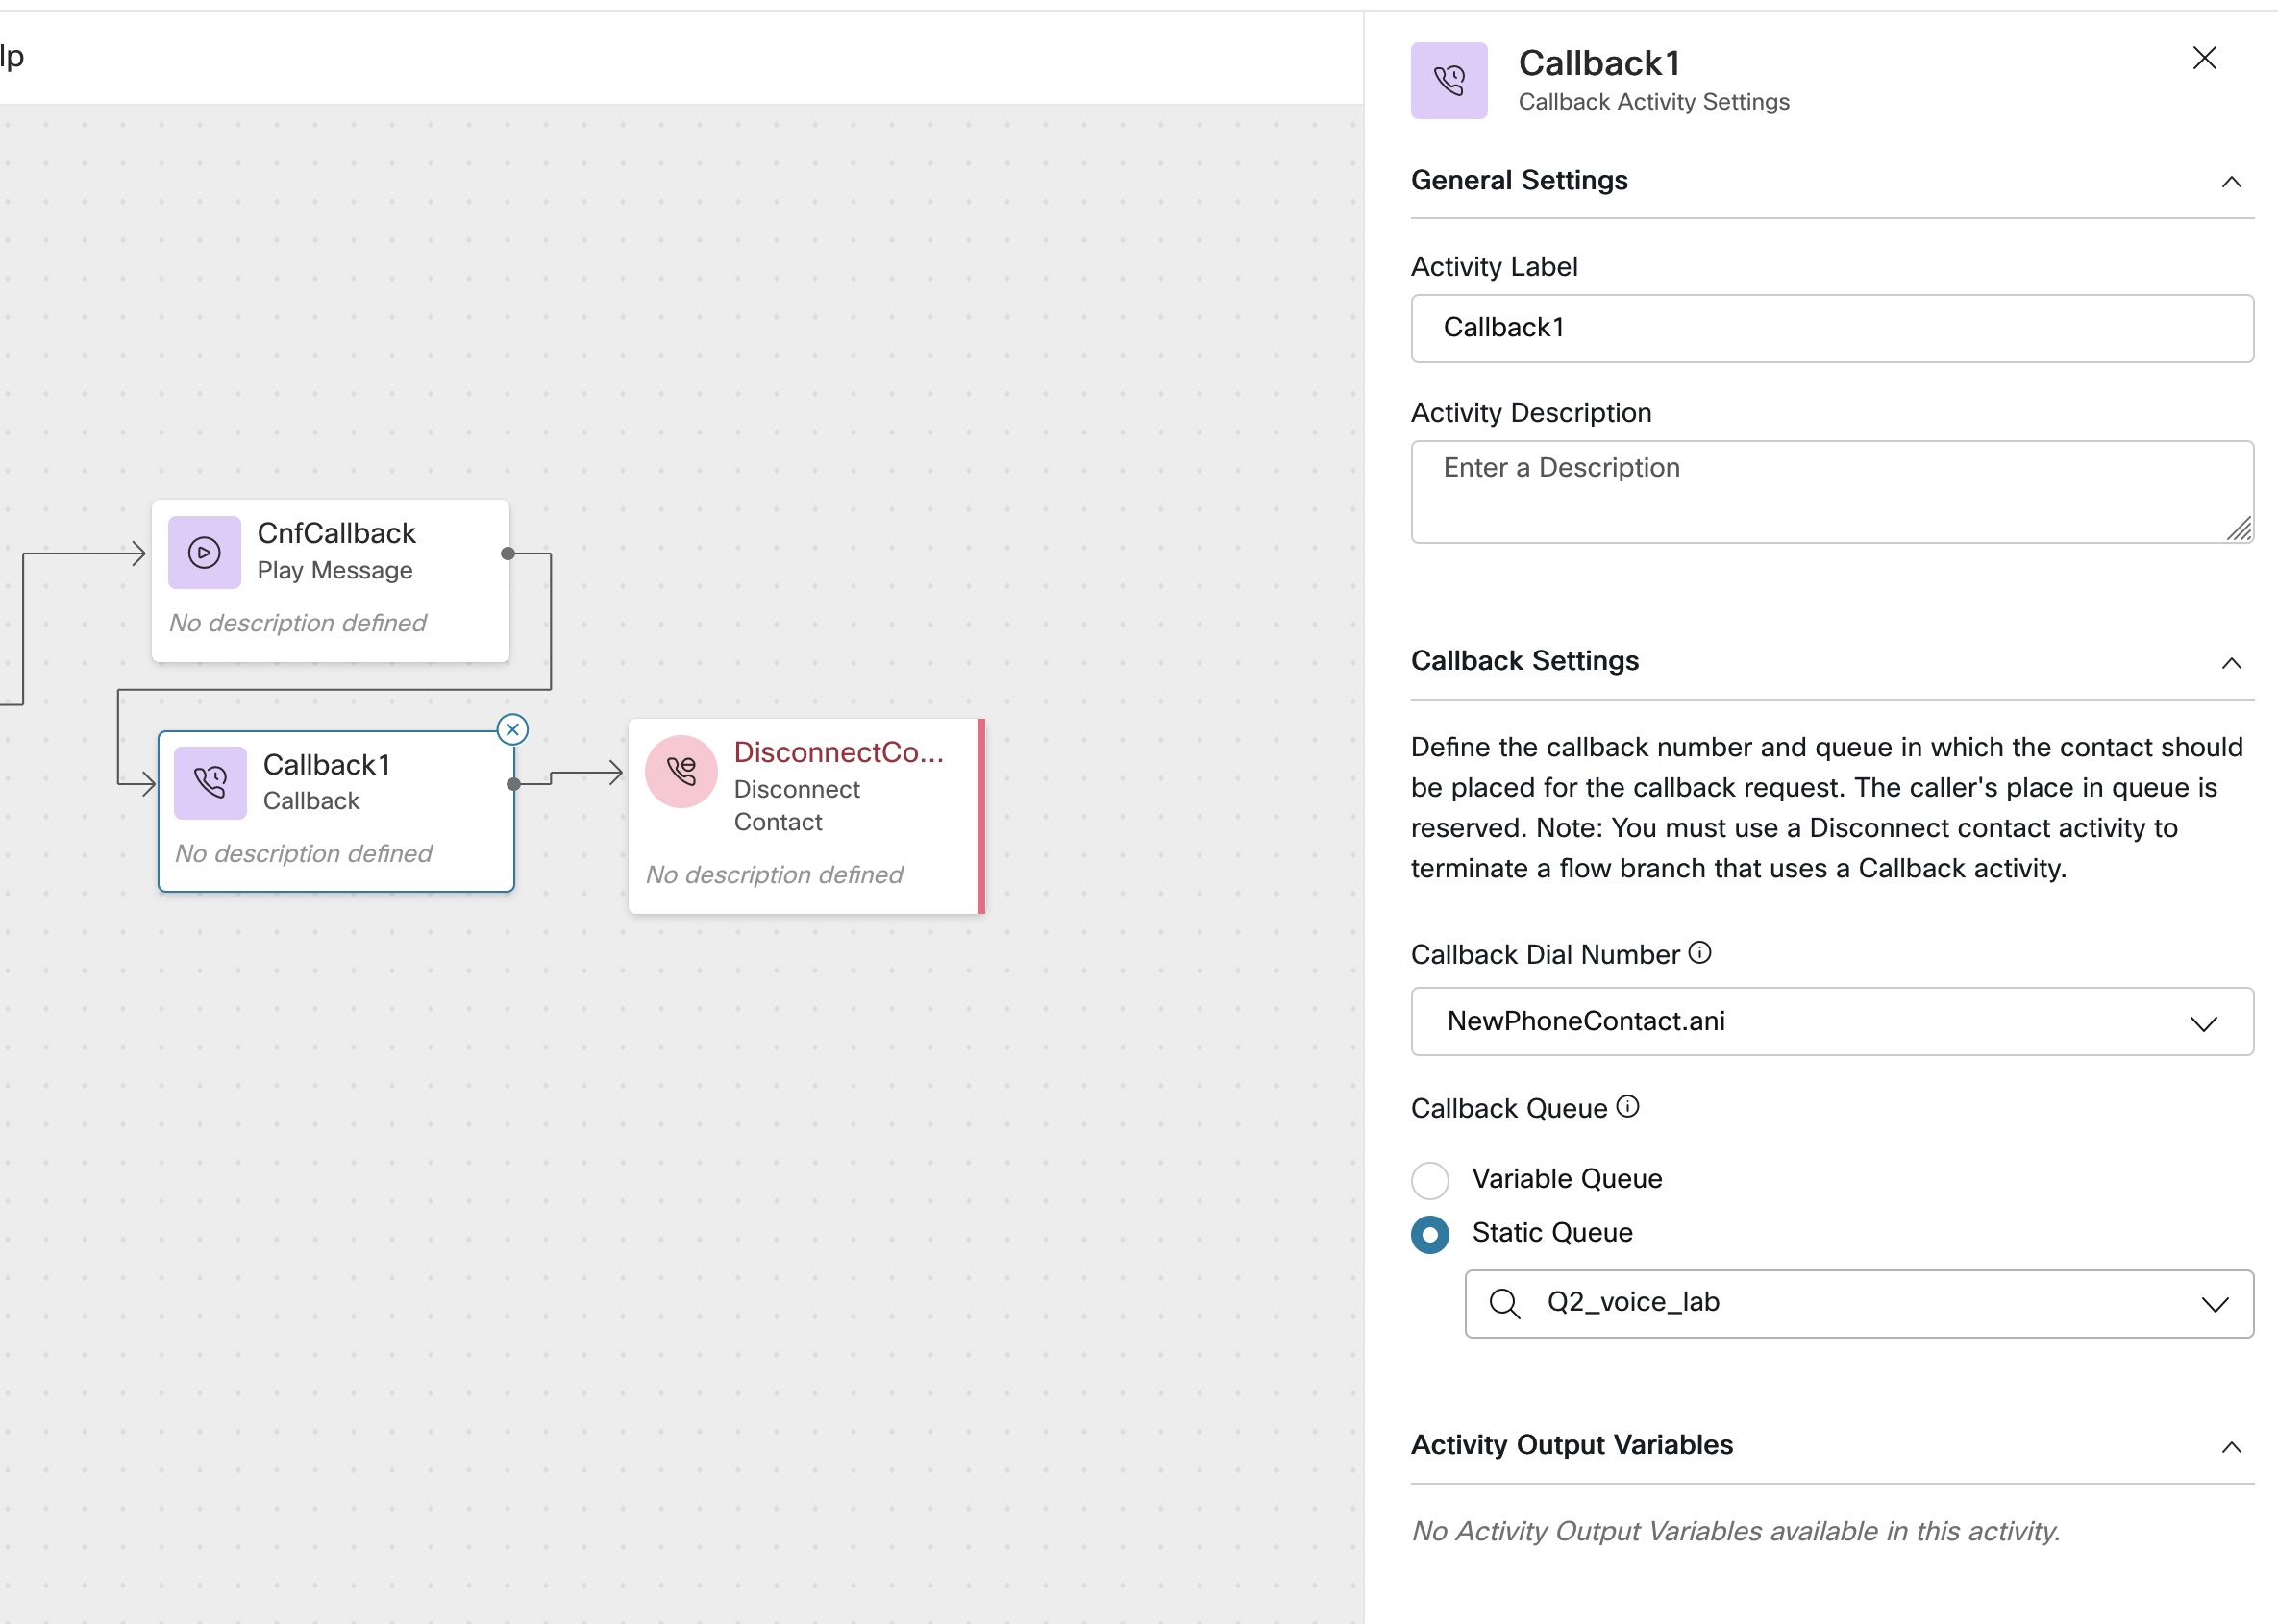
ii) Drag and Drop Callback node and set callback Dial Number to NewPhoneContact.ANI and Static Queue to the queue created in lab 1
iii) connect DisconnectContact node to callback node
- Set Voicemail
i) Drag and Drop Blindtransfer node and set Number to +18005532447 which is Cisco TAC support number
ii) Repeat the same for optout menu as well
-
Connect
No-input TimeoutandUnmatched Entryfrom Main menu to itself -
Connect
No-input TimeoutandUnmatched Entryfrom OptOut menu toSetQCounternode -
validate & Publish the flow
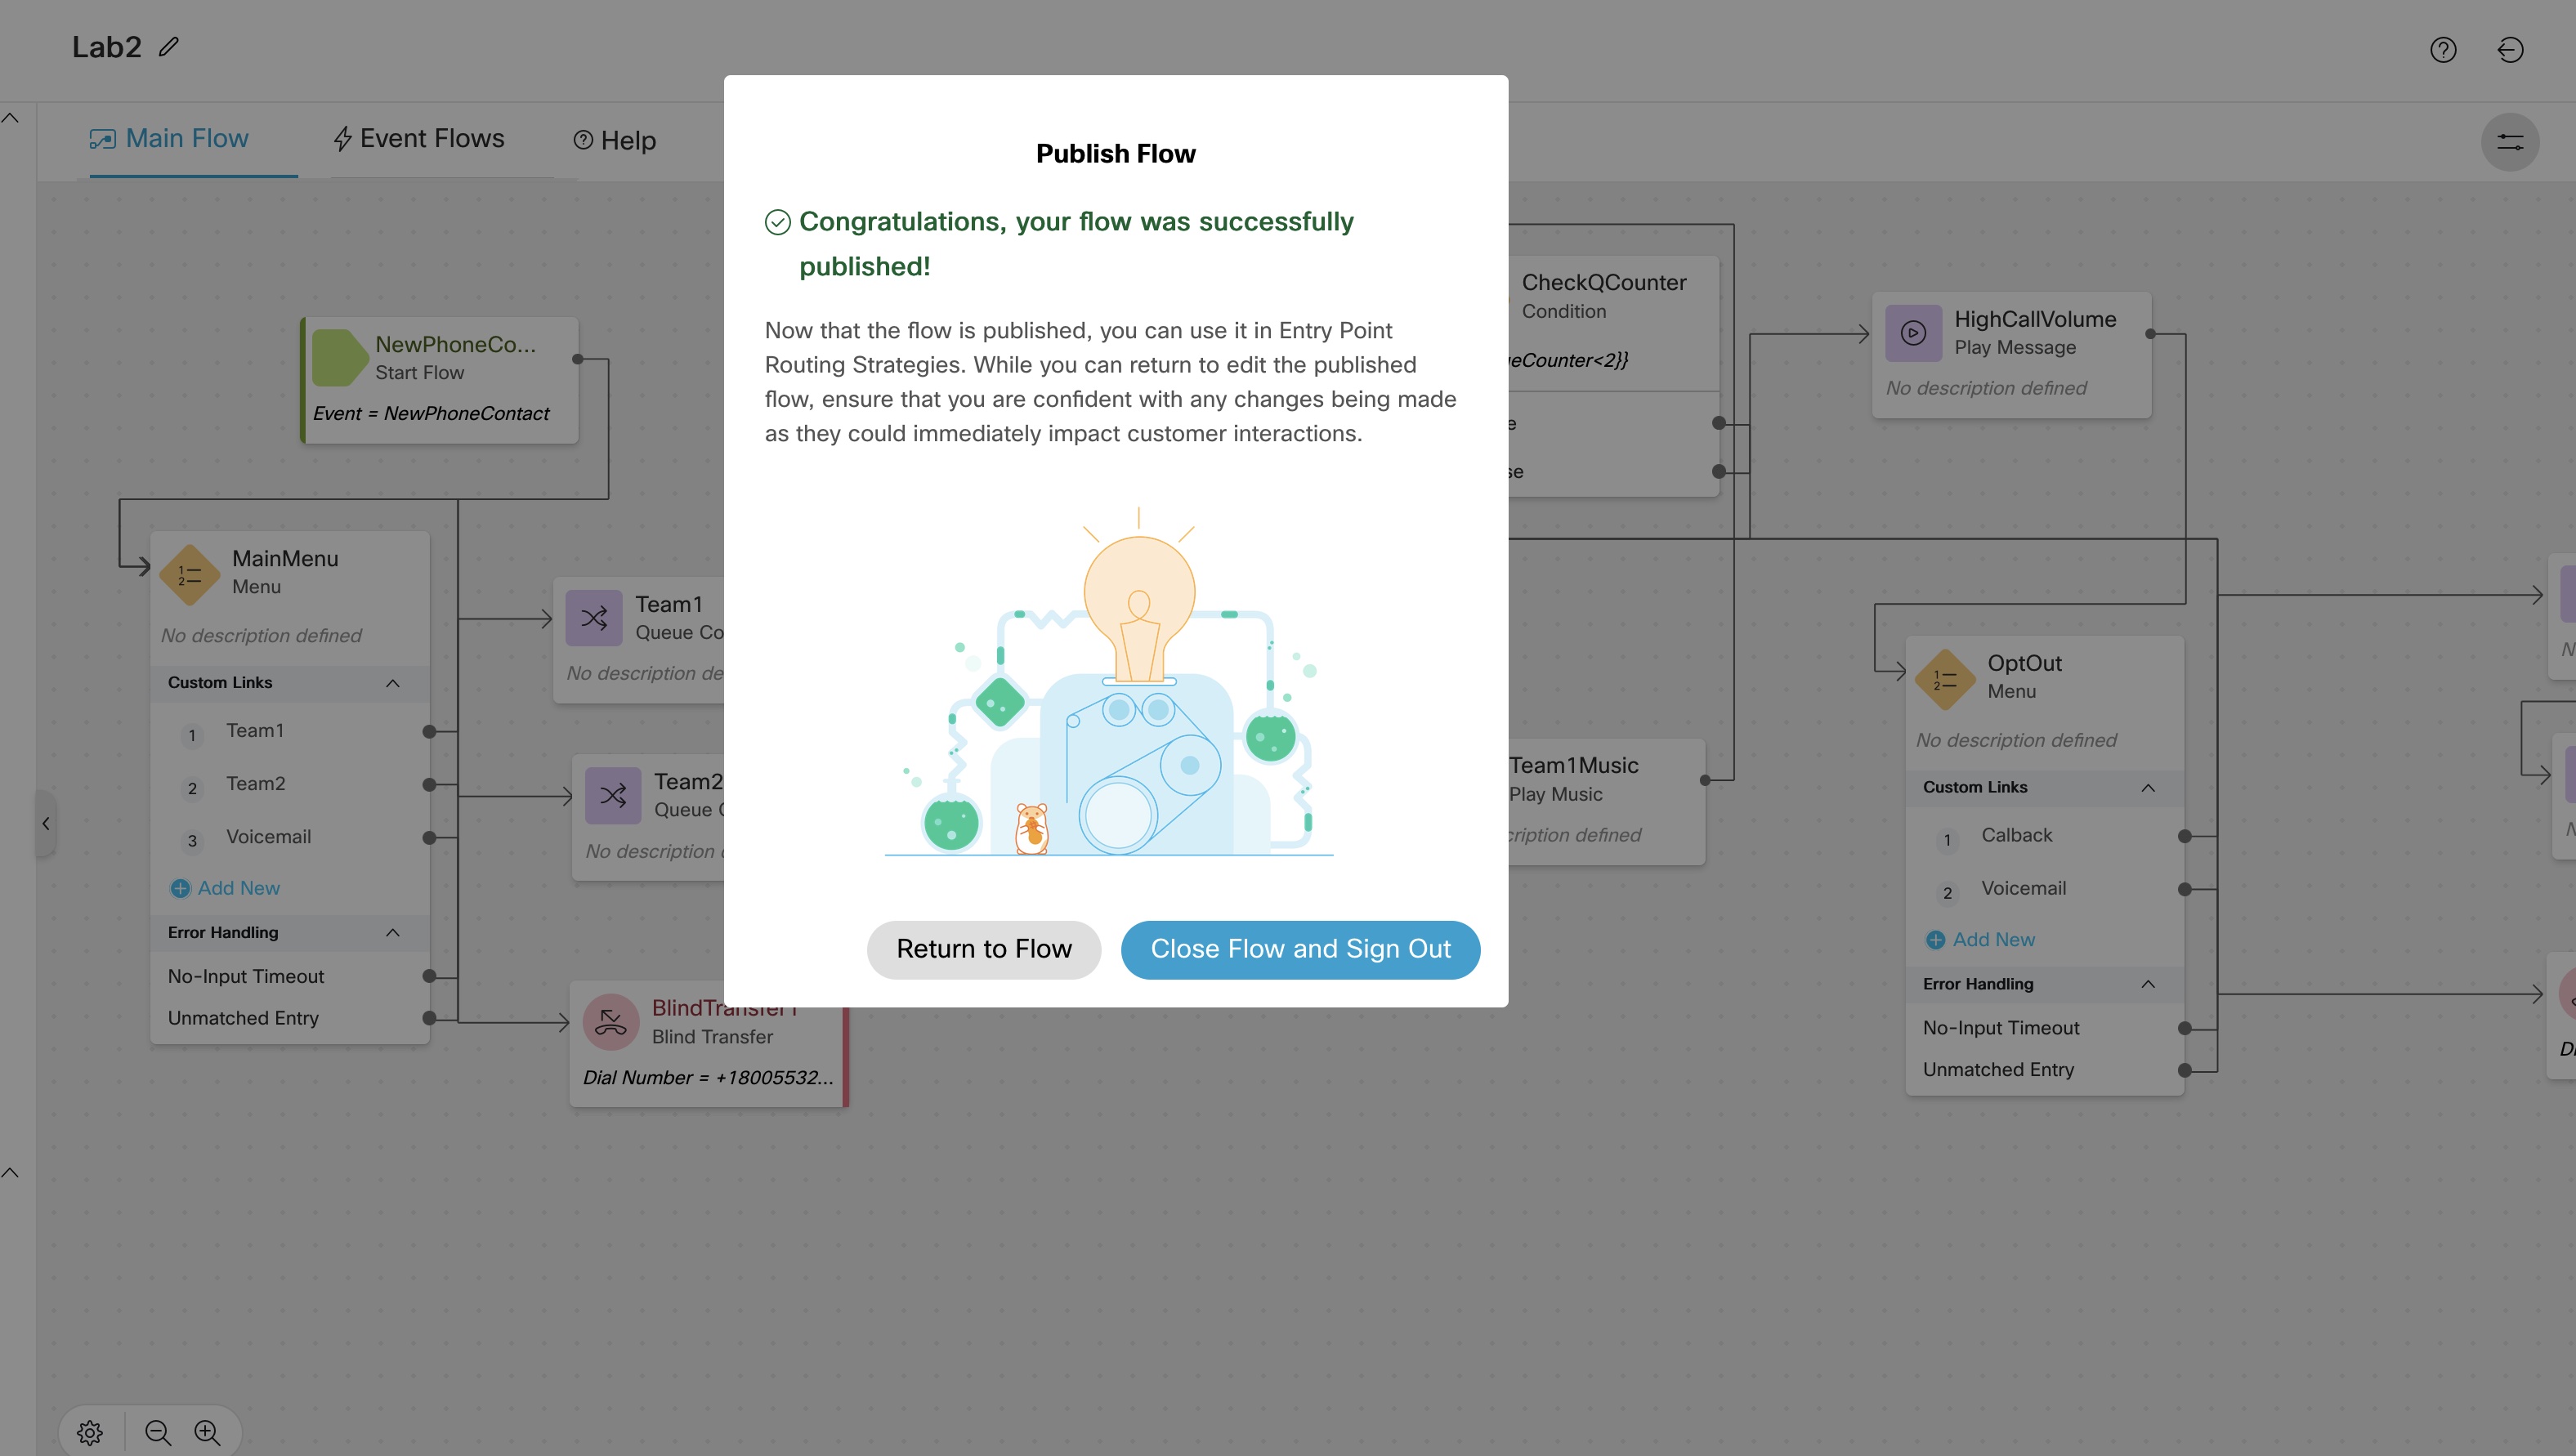
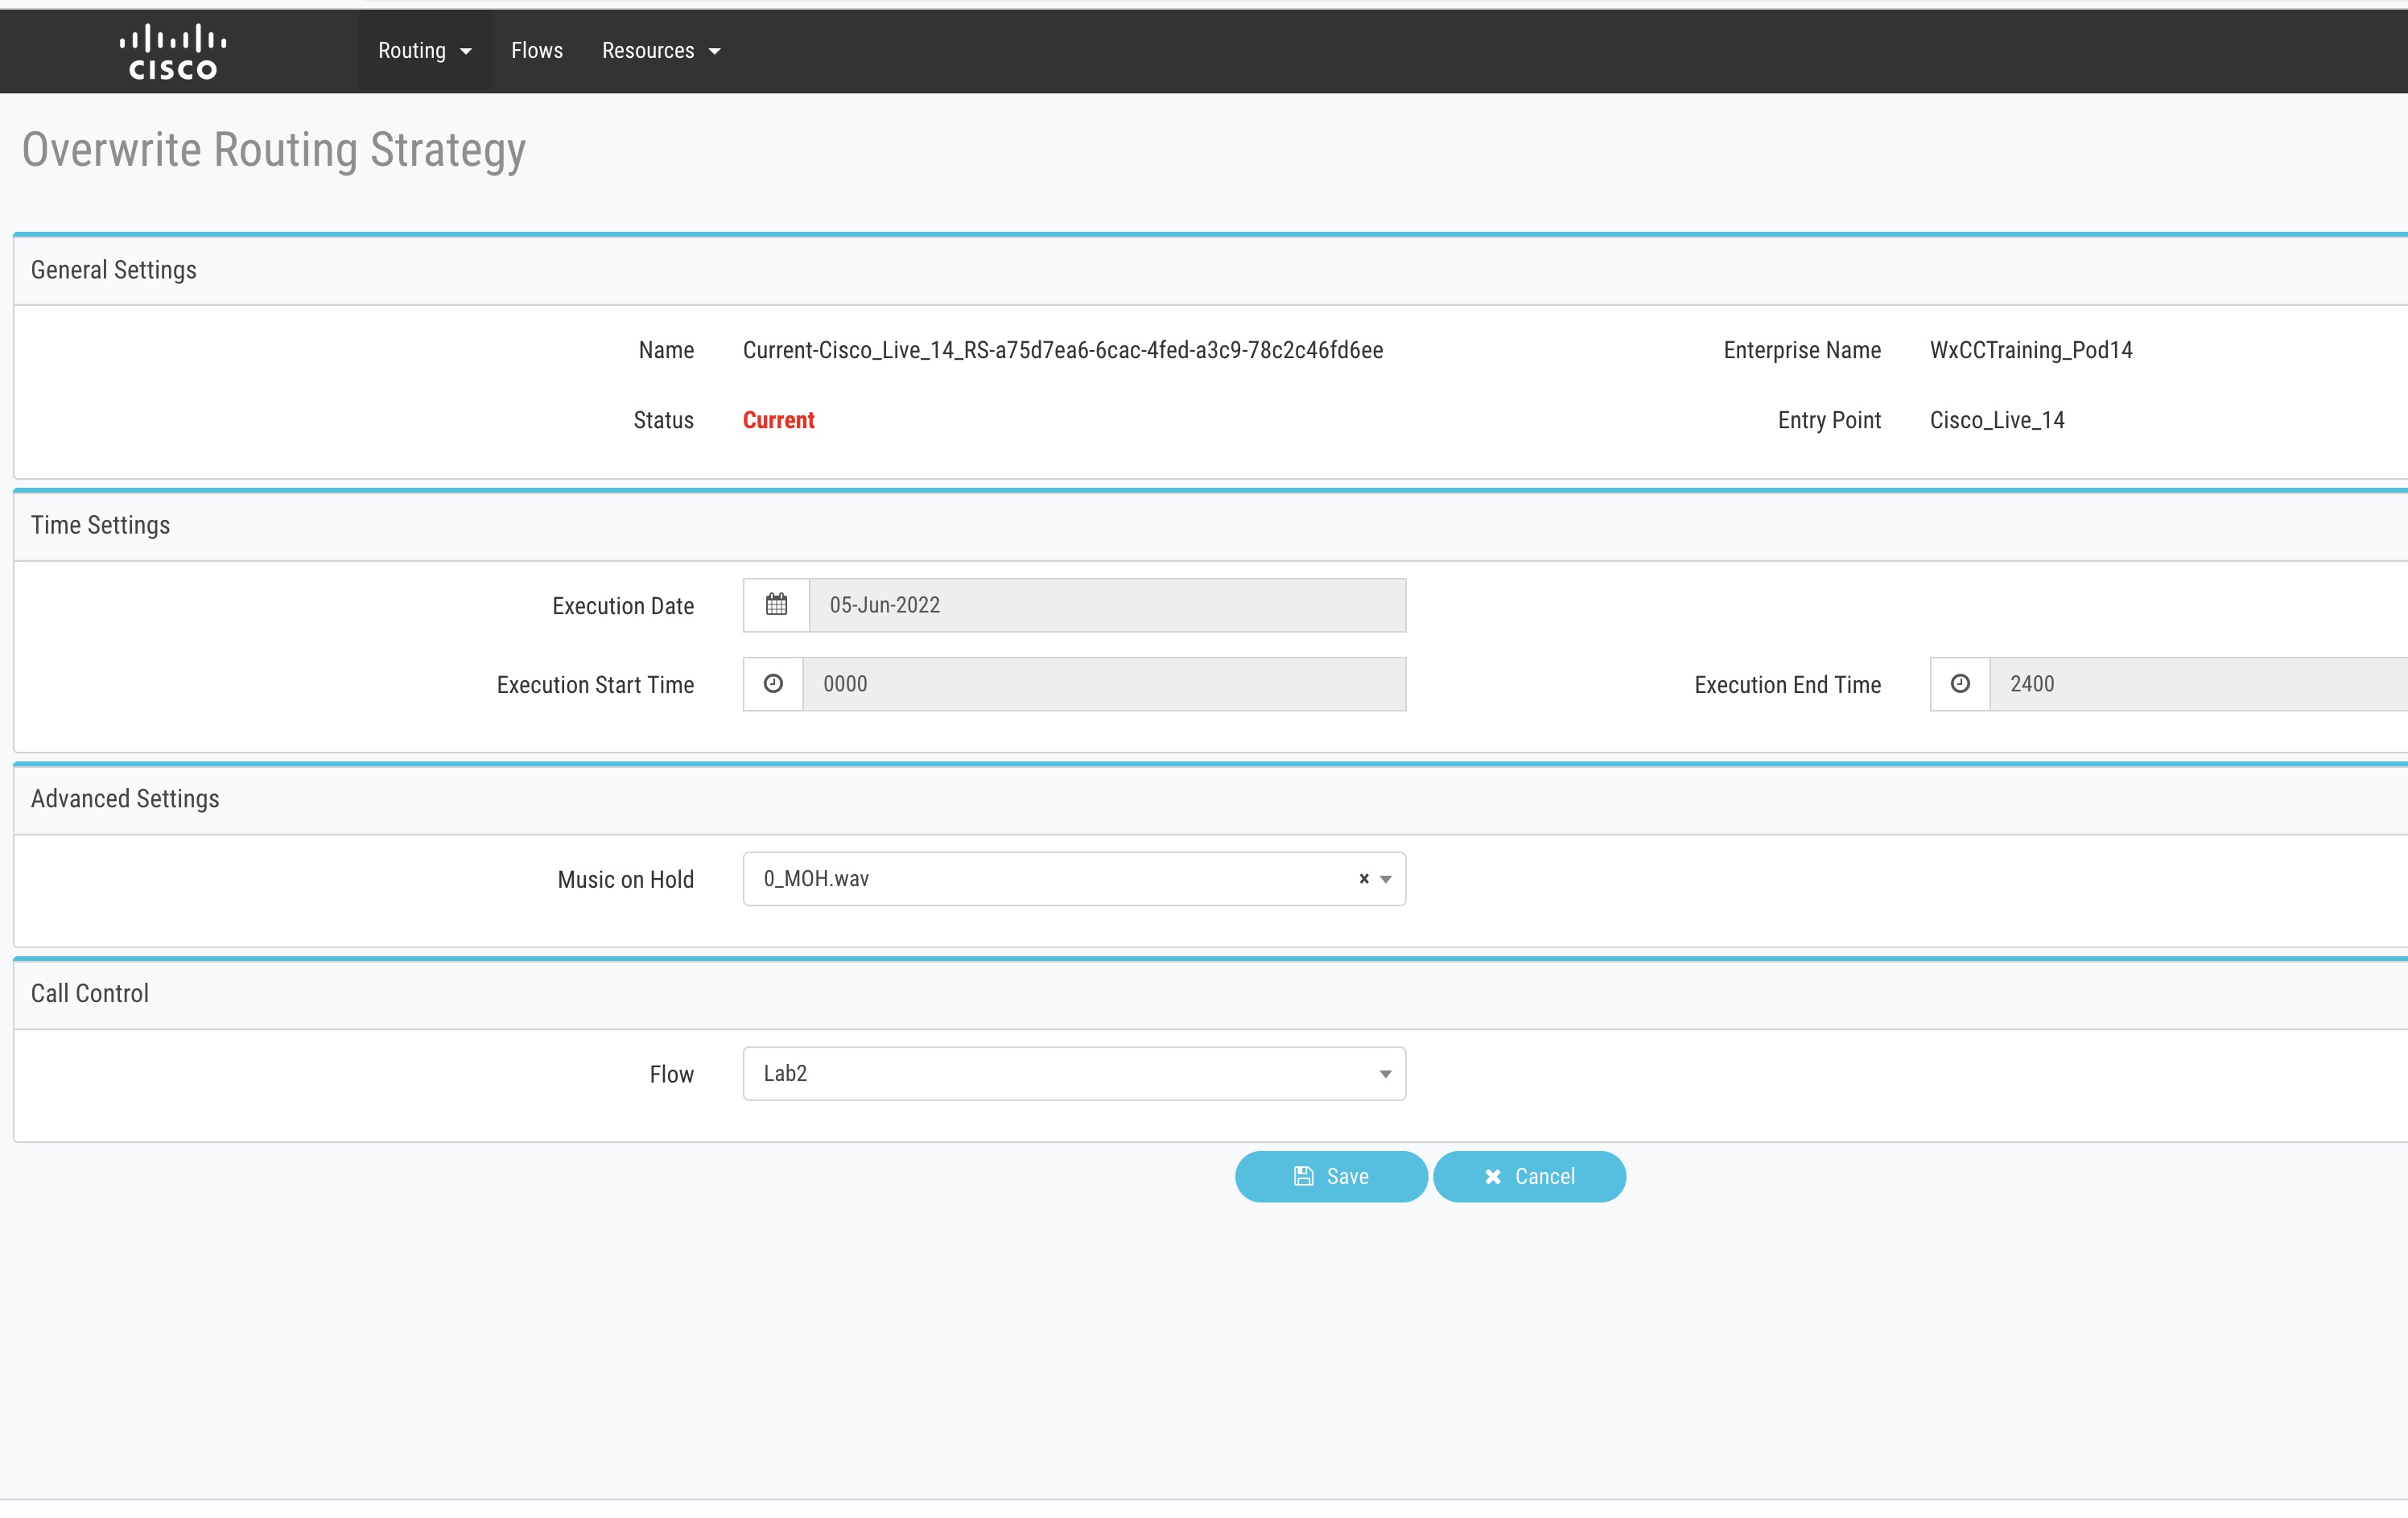
- Edit
CurrentRouting Strategy and change the flow toLab2
Lab Validation
Login to Agent Desktop and Keep the Agent in Not Ready State
i) To test the flow call the Dial Number configured and traverse Main Menu and press 1
ii) On the call back menu press 1 to leave Callback
- Expected results
i) Caller should hear MOH for 10 seconds and then hear high_call_volume
and offered an option to call back
ii) System should call the Agent first and then Customer and call should get connected between Agent and Customer
Expected Result
Dial the Number from your mobile phone and make sure to traverse through different menu and leave CallBack and Voicemail