Lab3 - Advanced HTTP based External Data Dip
Table of Contents
Introduction
Recap
In the first 2 Lab, we Learned
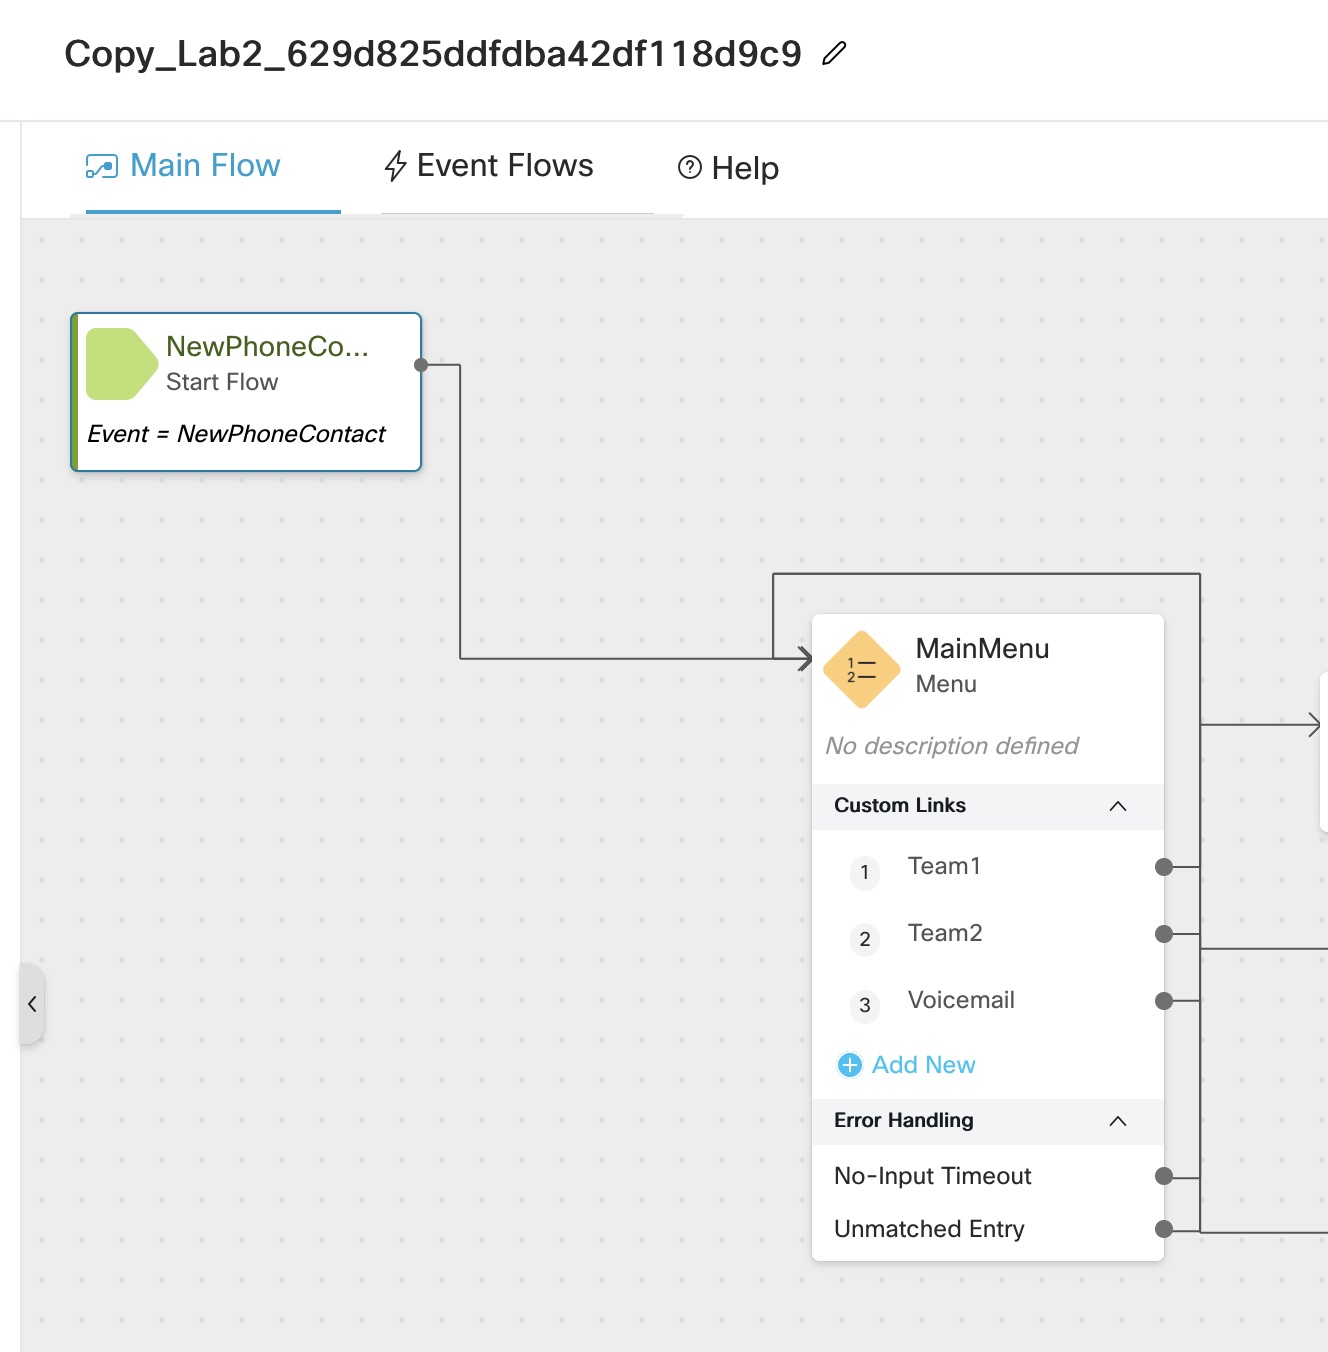
- Bring the contact into Webex Contact Center and hear welcome message
- Queue the contact to Live Agent after hearing welcome prompt
- provide Menu option and an Opt-Out options to customer and validate CallBack Functionality
Lab Objective
In this section, we will go over the steps that are required to do External Data DIP. In this Lab you will learn the following
- External Data Dip to 3rd party Web Services
- Parsing the JSON
- Collect variable dynamically from WebServices and Display it on Agent Desktop
Pre-requisites
- All previous labs are completed successfully
Quick Links
Control Hub: https://admin.webex.com
Portal: https://portal.wxcc-us1.cisco.com/portal
Agent Desktop: https://desktop.wxcc-us1.cisco.com\
Lab Section
HTTP Node
The HTTP Request activity fetches information from an external data source such as a CRM using standard HTTP protocols. Basic Auth and OAuth 2.0 attributes are supported for authenticated endpoints
The request we will construct is :
HTTPS GET -> https://5fd3e1aee9cda40016f5bb94.mockapi.io/Lookup?pin=70747
Use the variable from the CollectDigits1.EnteredPIN variable to inject it in the pin lookup. We will construct it as follows HTTP Request GET https://5fd3e1aee9cda40016f5bb94.mockapi.io/Lookup
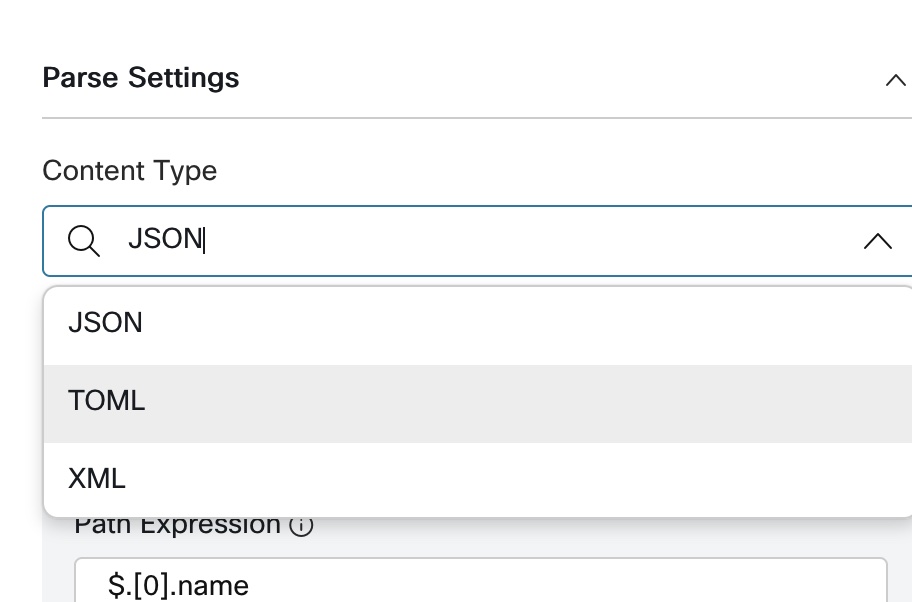
The Parse settings would be :
customerName = $.[0].name
customerPhone = $.[0].phone
Tech-Tip: Here are some practice exercises you can try by going to jsonpath.com
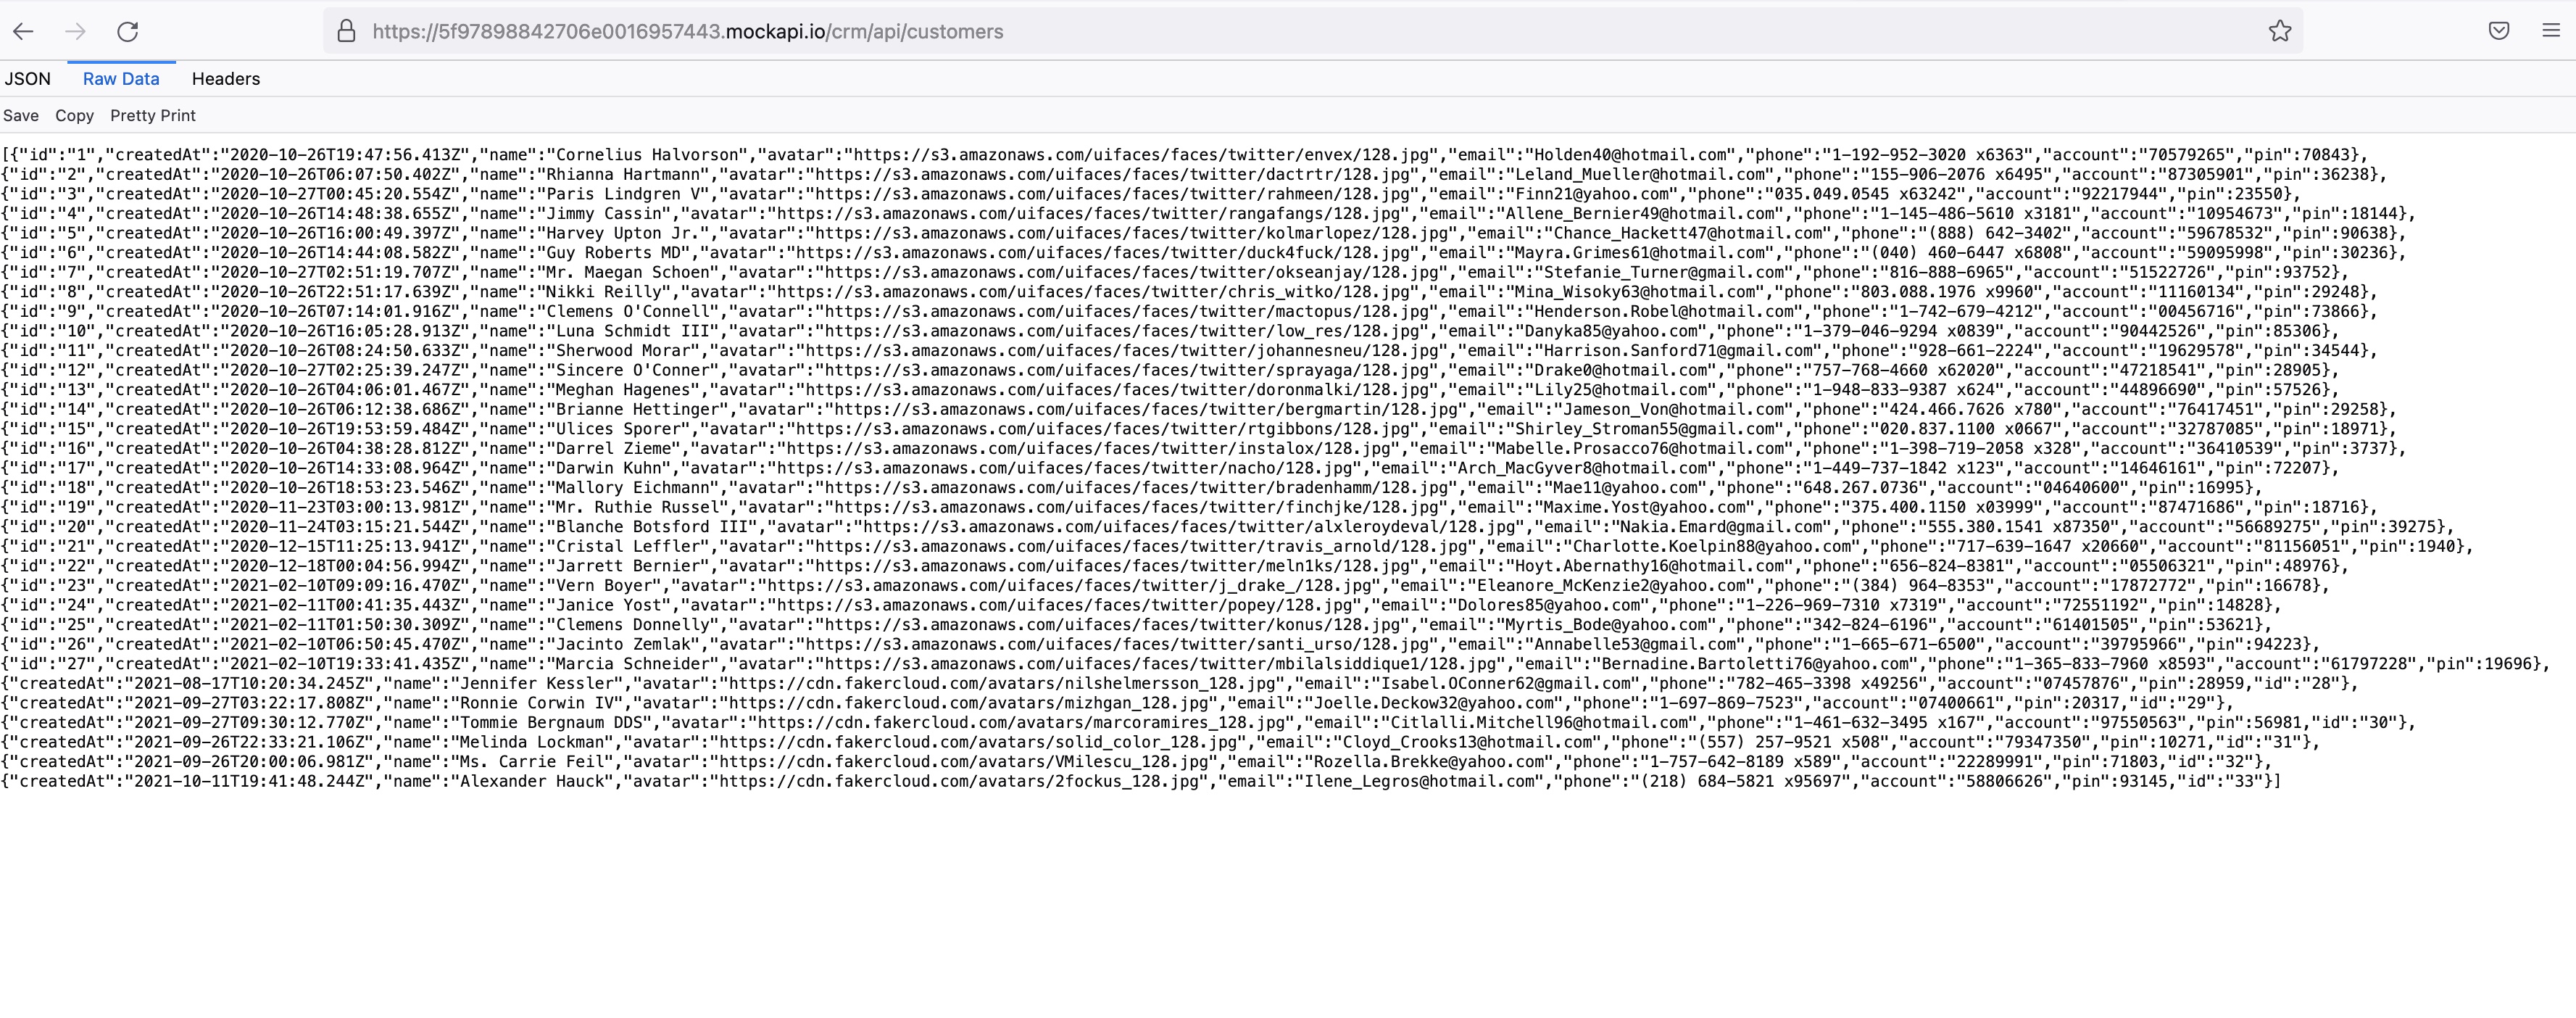
Go to https://5fd3e1aee9cda40016f5bb94.mockapi.io/Lookup Copy out the JSON into https://jsonpath.com on the left pane.
Try out all of these to learn how JSON path works!
| Query For | Parse statement |
|---|---|
| All Customers | $.* |
| First Customer | $.[0] |
| Last Customer | $.[-1:] |
| First two customers | $.[0:2] |
| Last two customers | $.[-2:] |
| Second from last | $.[-2:-1] |
| All the names | $..name |
| All the pins | $..pin |
| All the customers who’s pin value is more than 70000 or 80000 | $..[?(@.pin > 70000)] |
| All details of customer with account number | $..[?(@.account == “87305901”)].* |
| Name of customer with account number | $.[?(@.account == “70579265”)].name |
Flow configuration
-
Copy the Lab2 flow by clicking on 3 dot and open the copied the flow
-
Add Play message node and select
0_welcome_CL.wavfile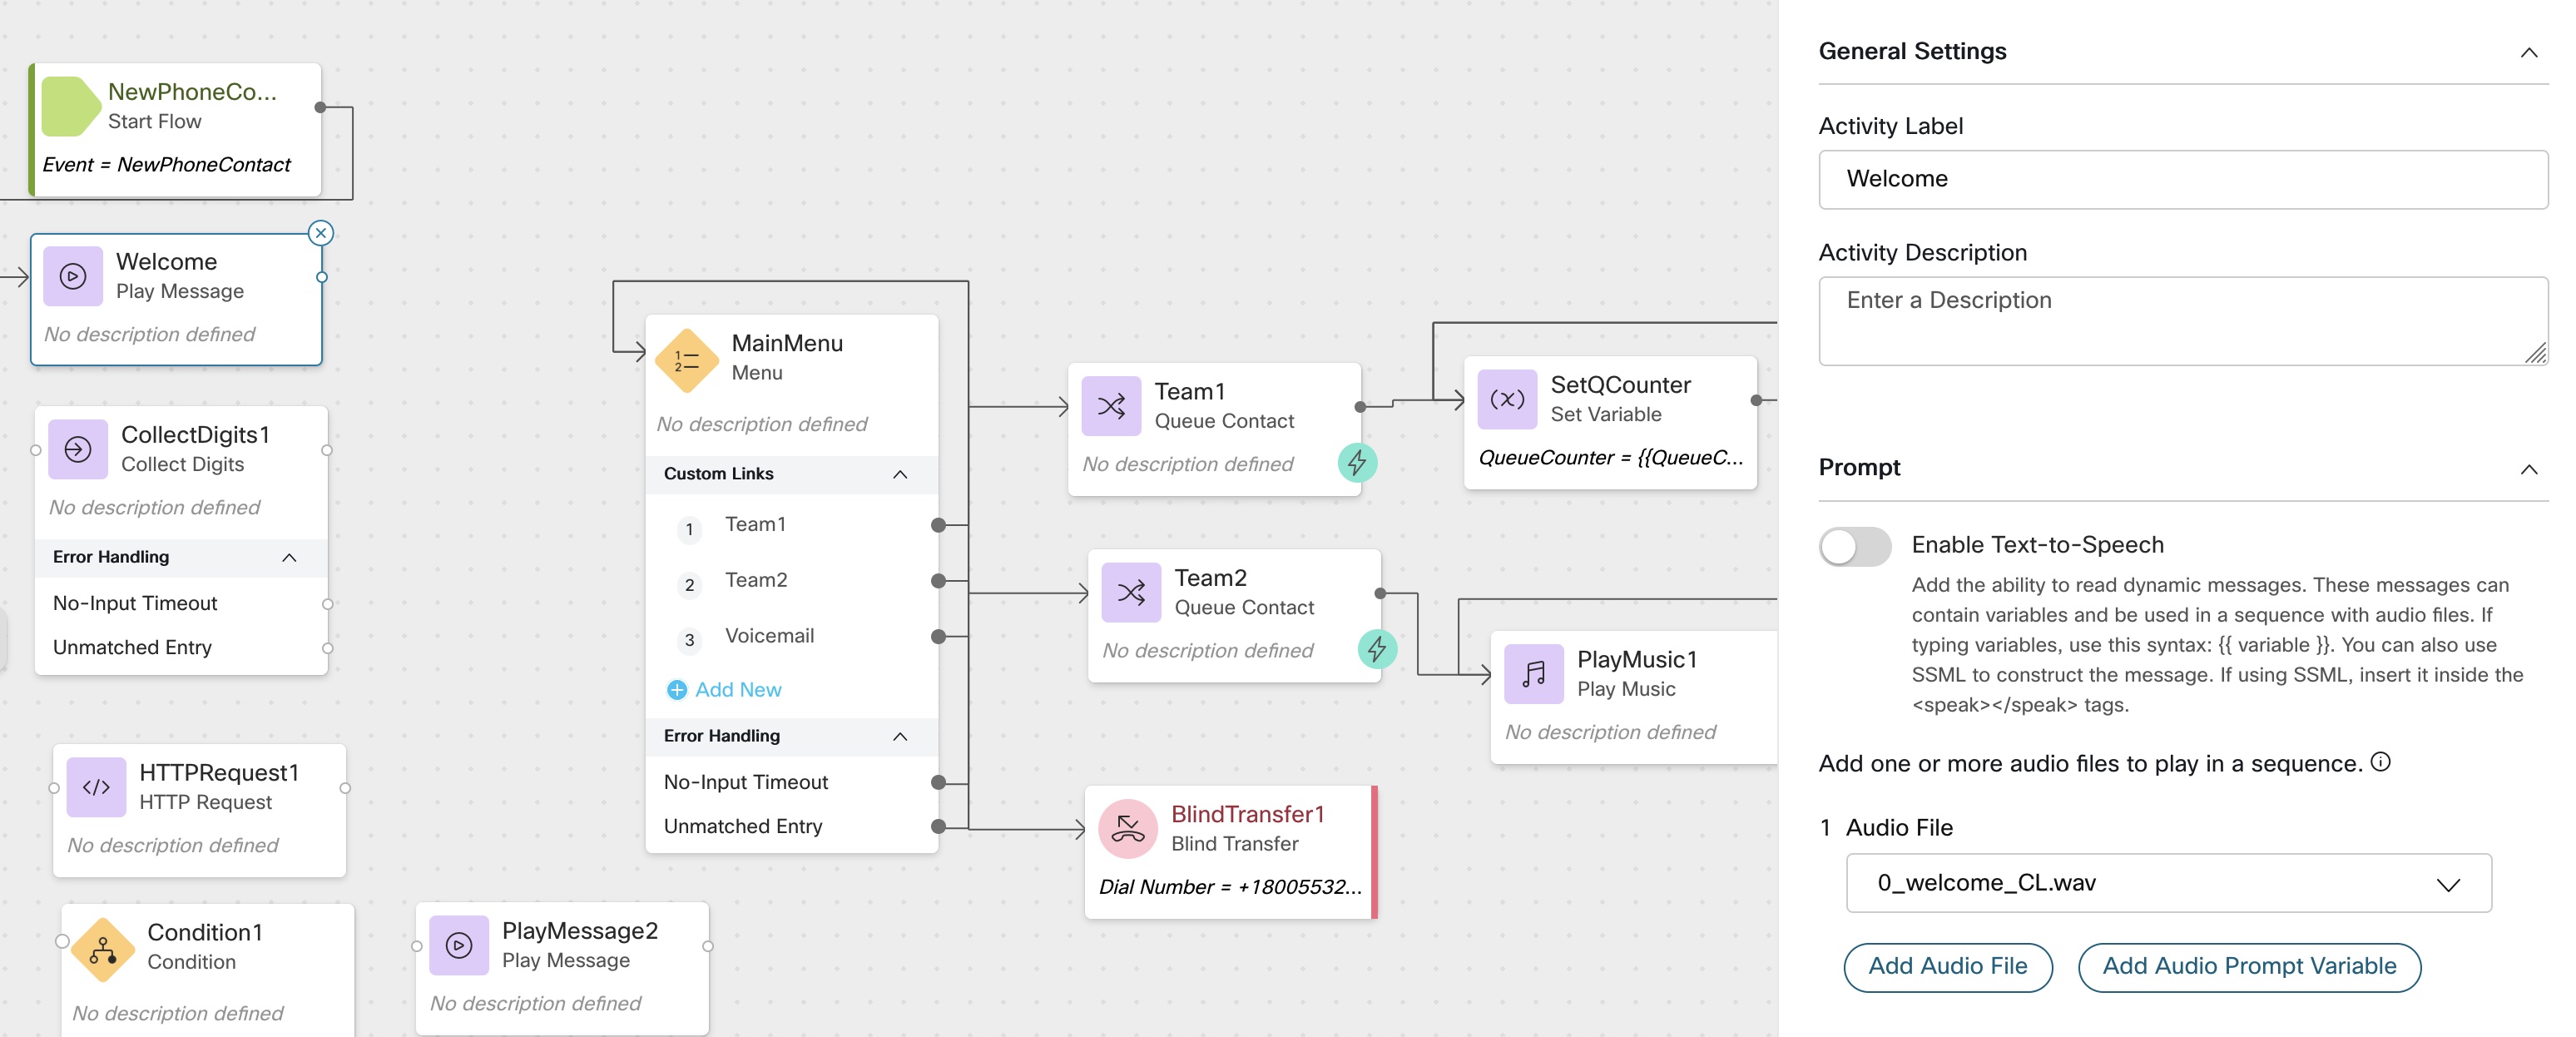
-
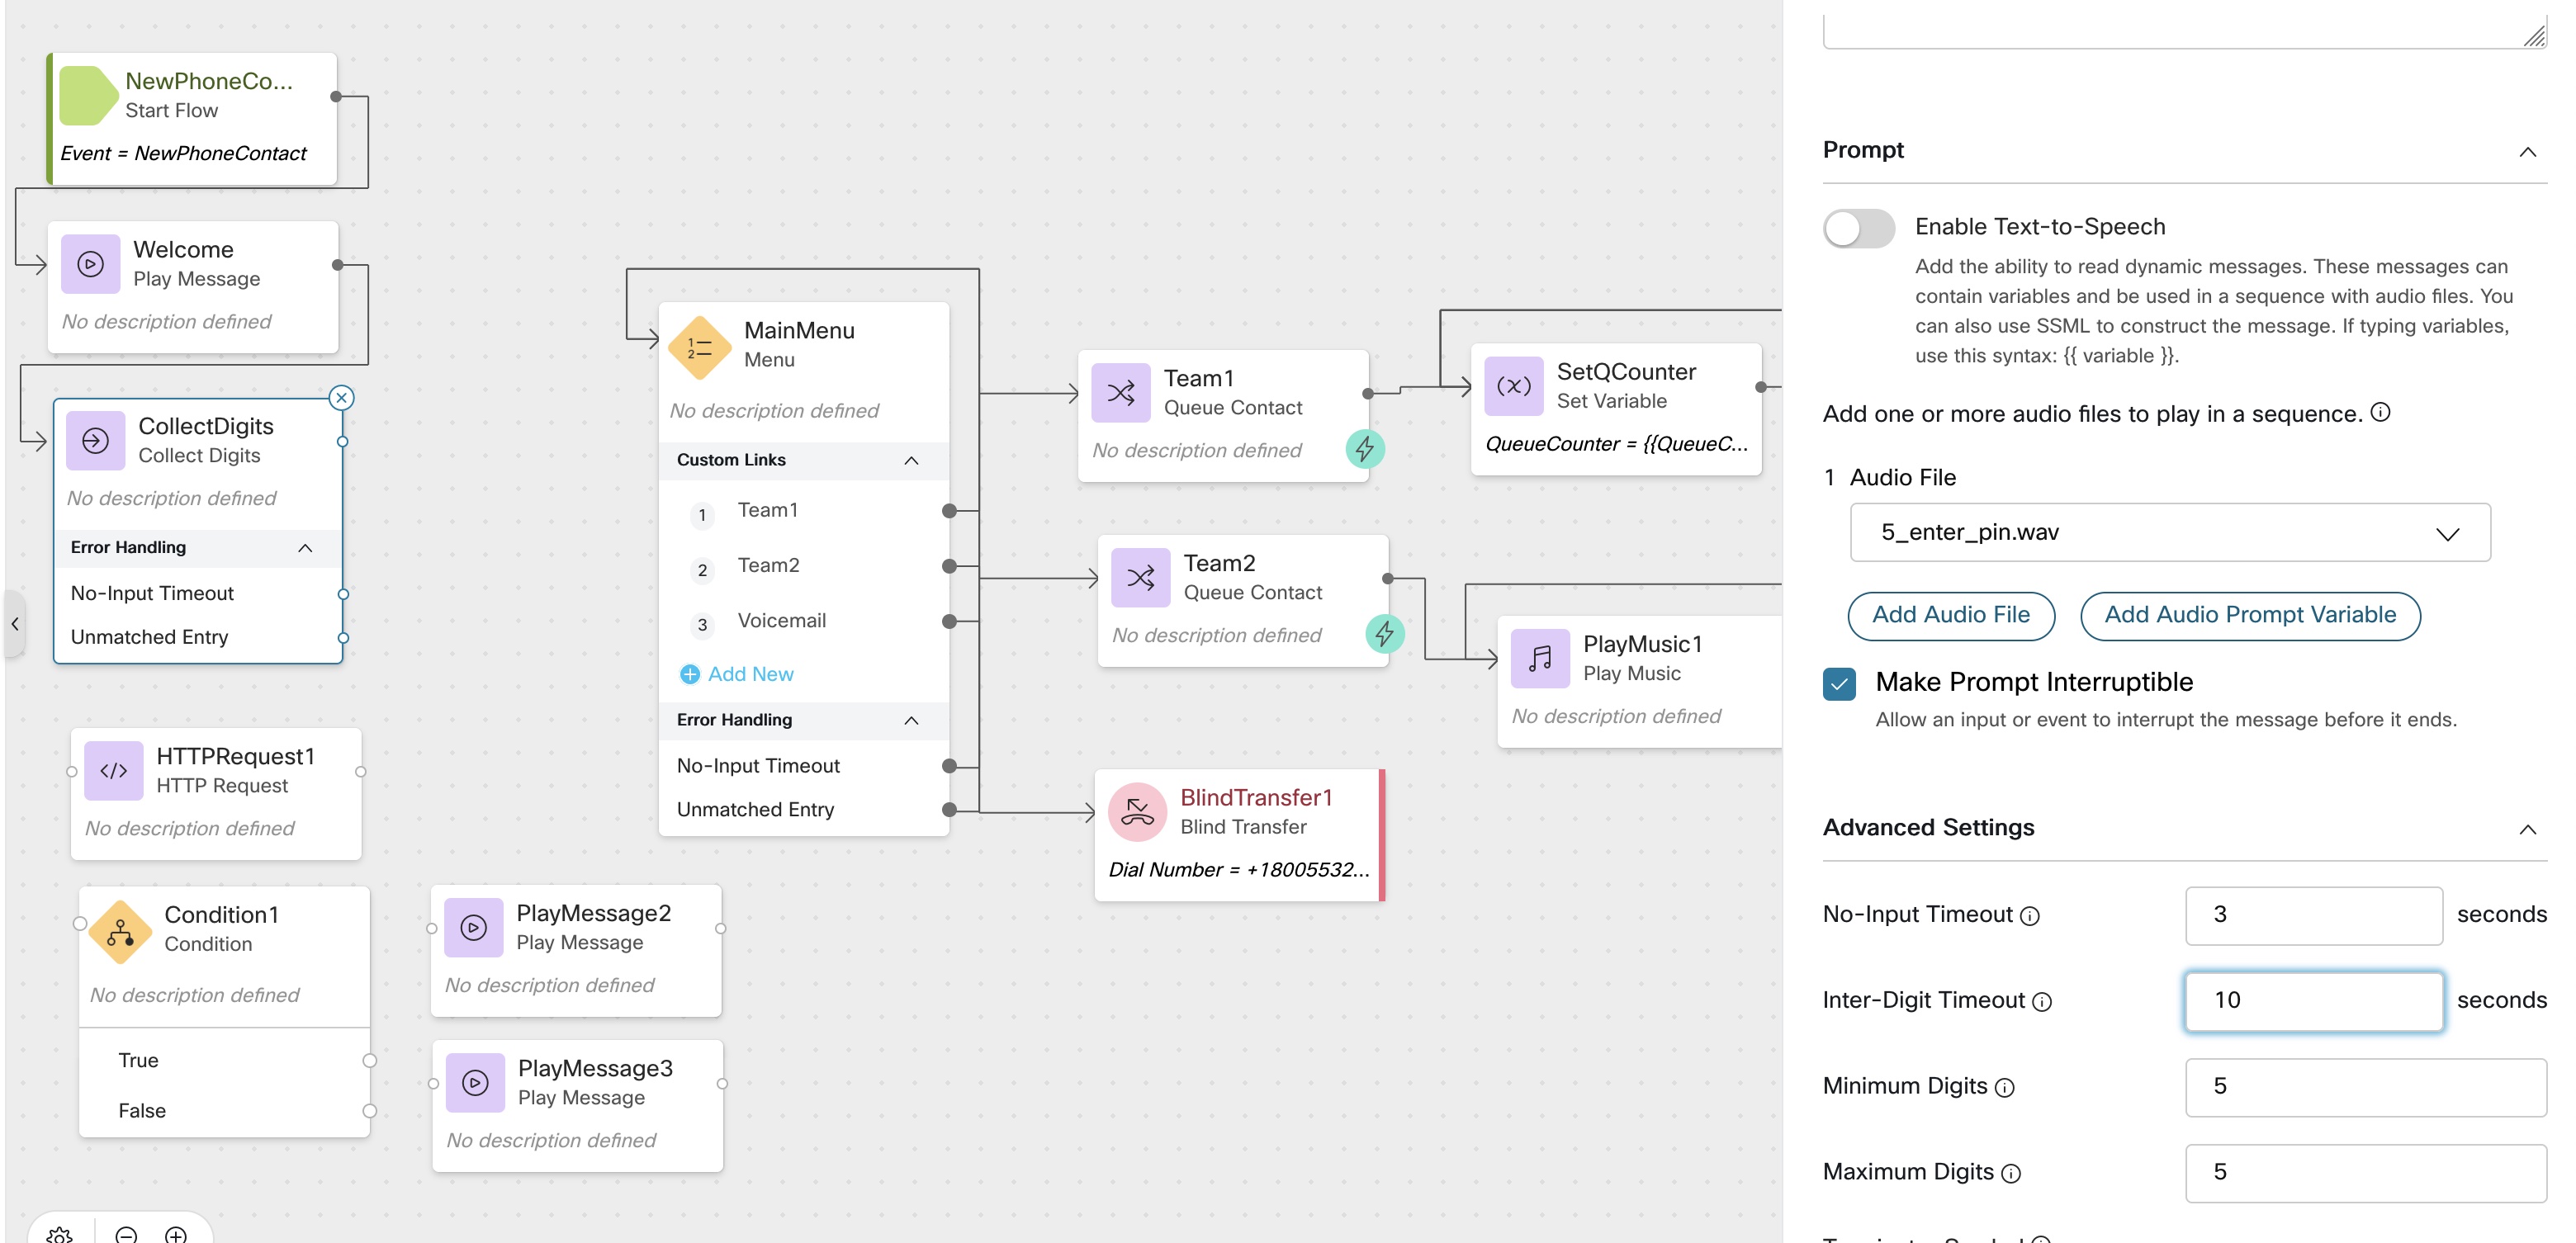
Drag and drop
CollectDigits1node and select5_enter_pin.wavfile, under Advanced setting change min and max Digits to5
as a best practice always enable Make prompt interruptible
Connect No-input timeout as well as unmatched Entry to itself
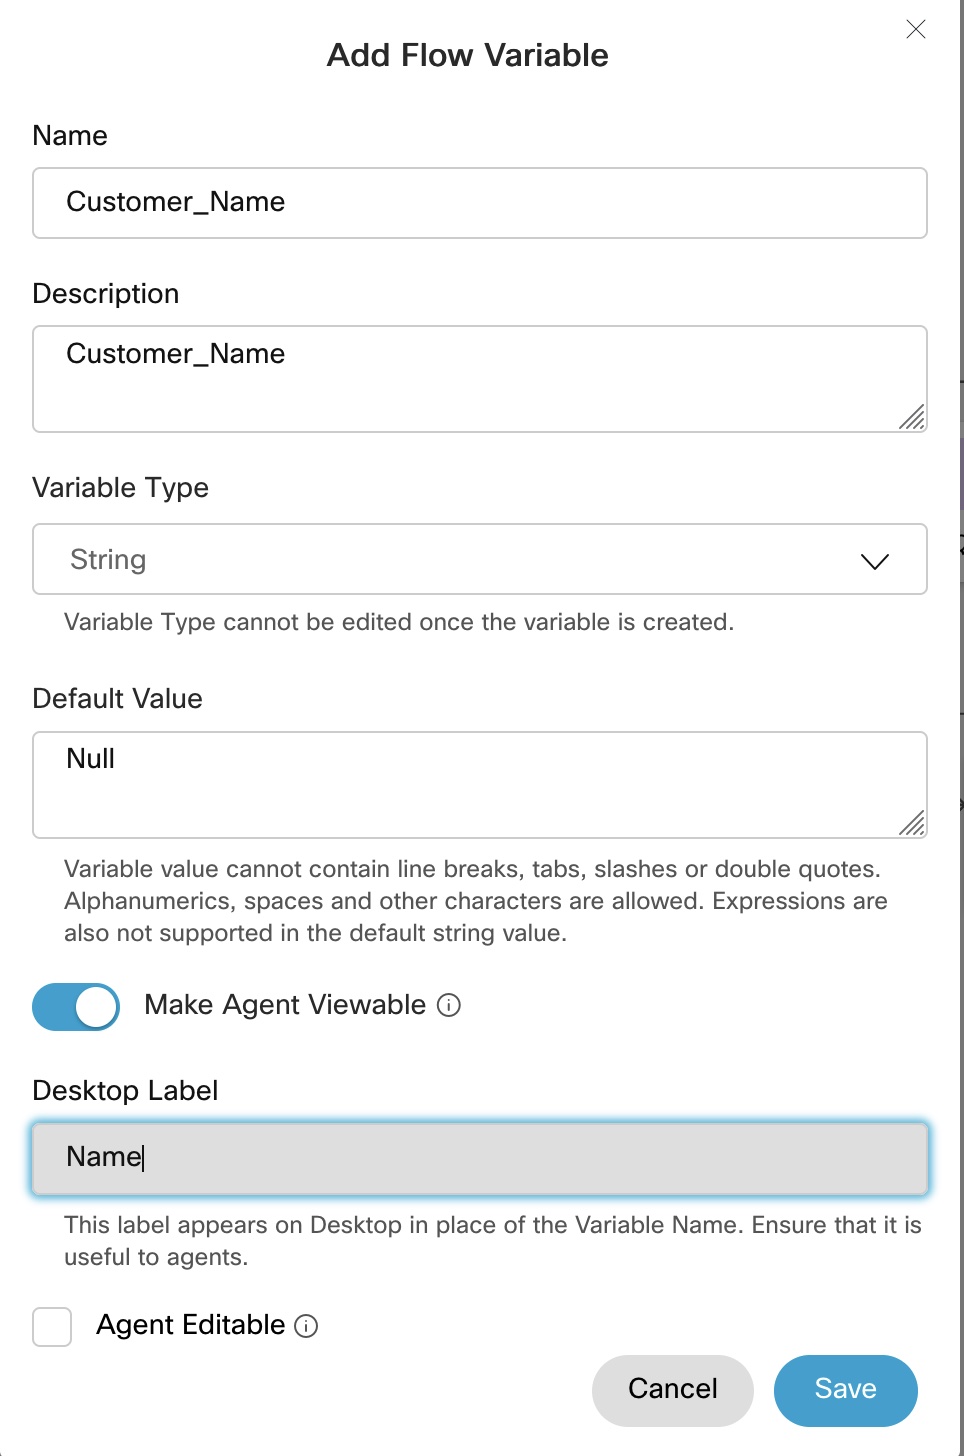
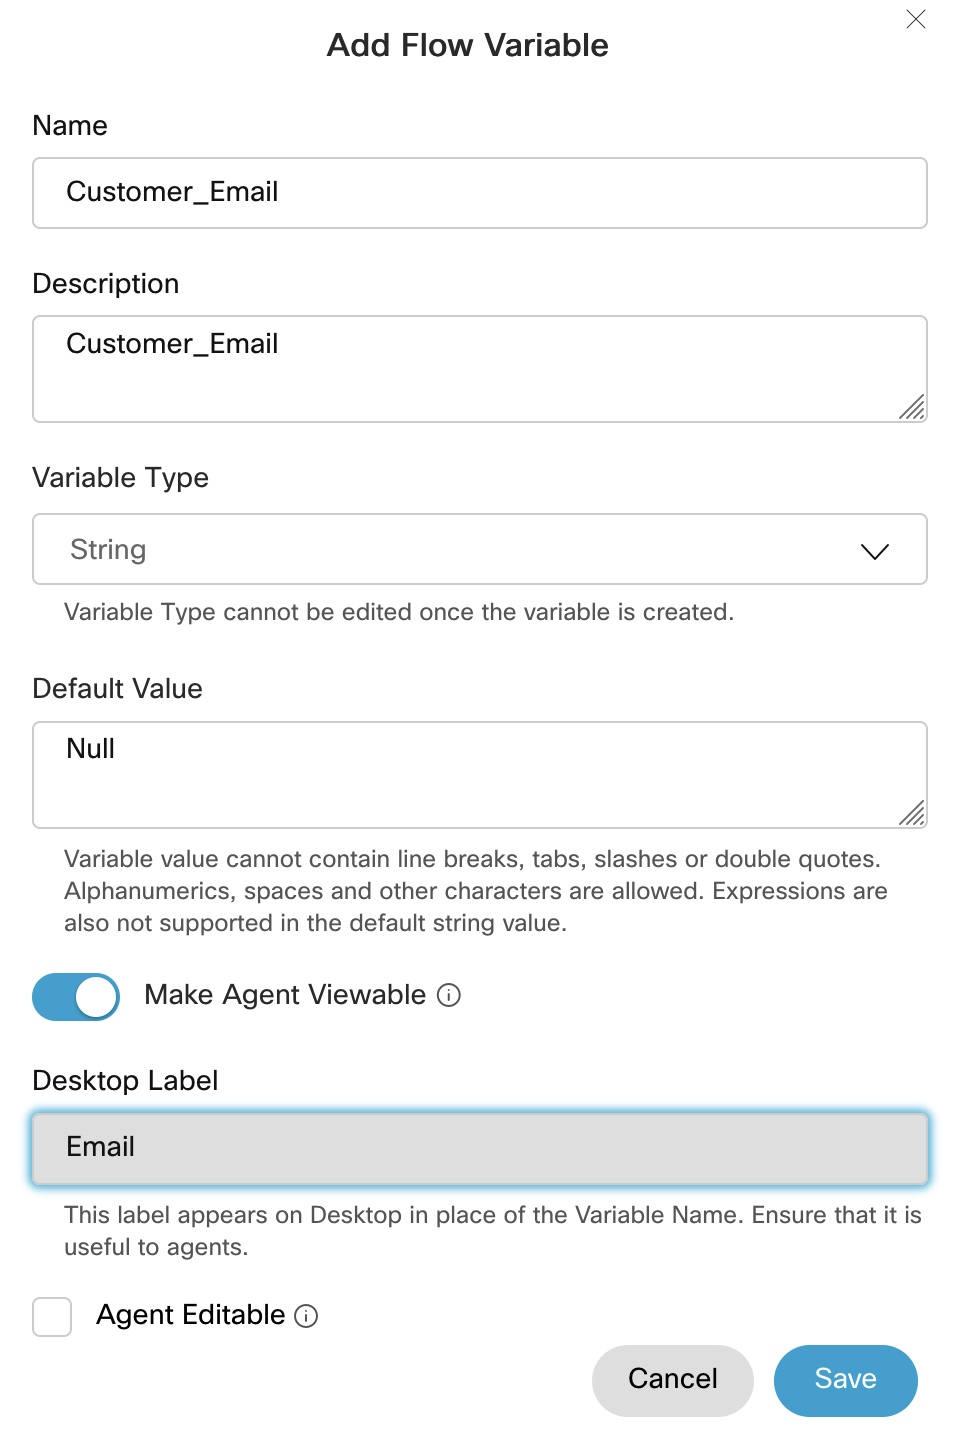
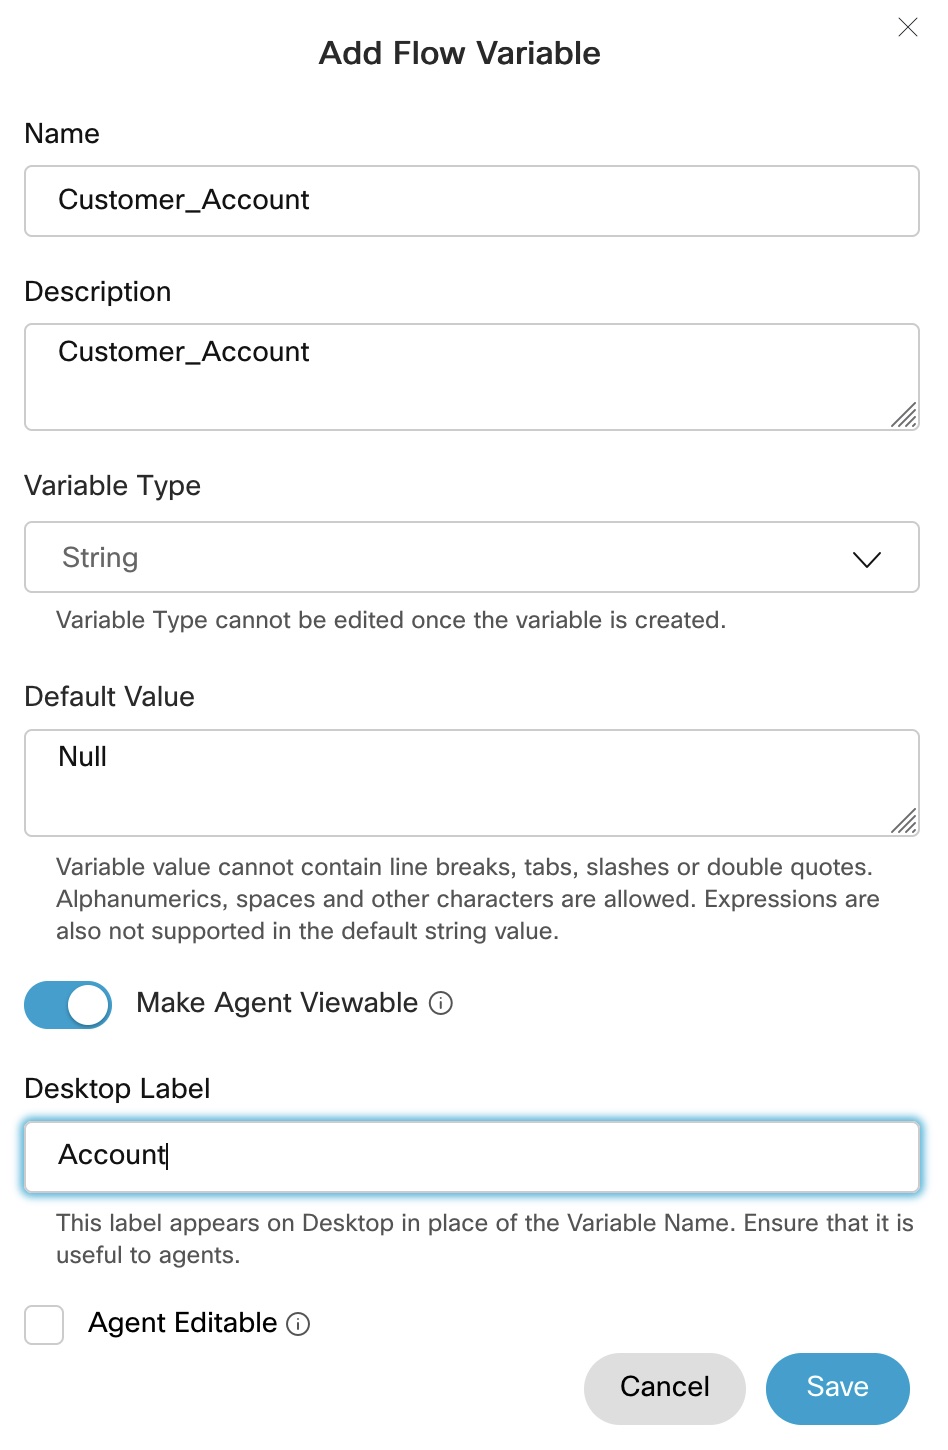
Create 3 string Variable and mark all 3 are
Agent Viewable
Customer_Name
Customer_Email
Customer_Account
- Drag and drop
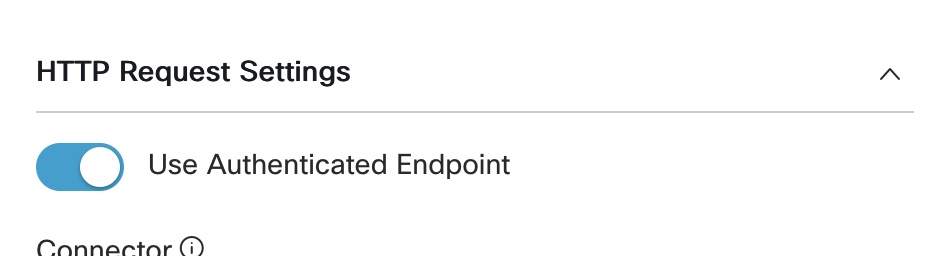
HTTP RequestRename it toDataDip
i) Disable, Use authenticated endpoints
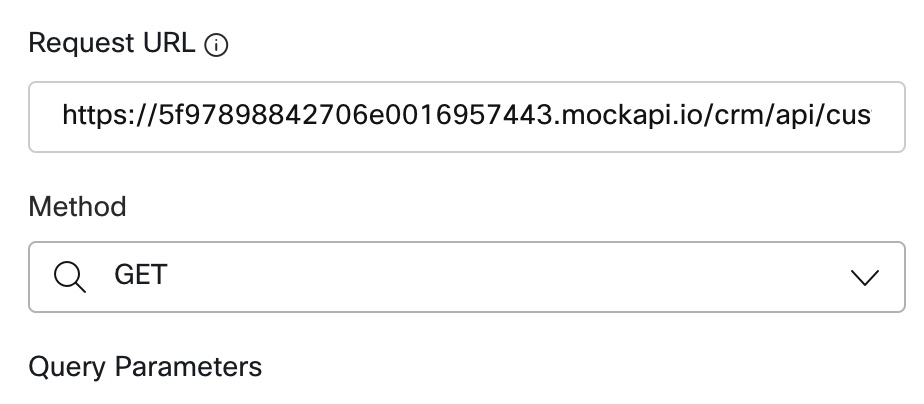
ii) In the Request URL enter https://5fd3e1aee9cda40016f5bb94.mockapi.io/Lookup
iii) Method select GET
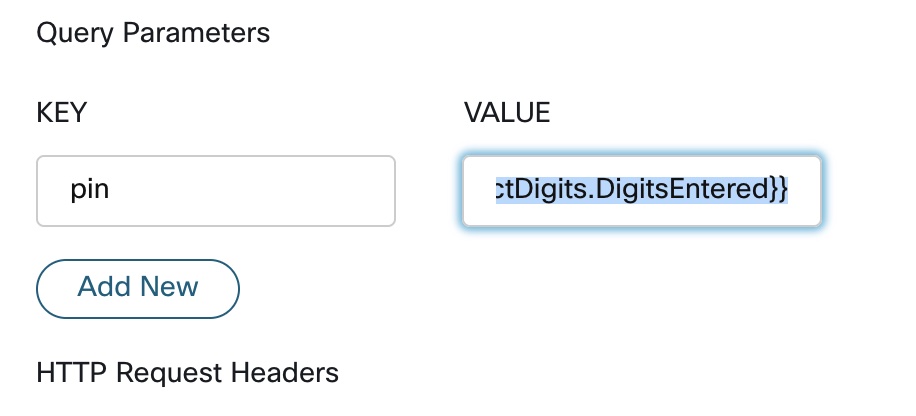
iv) Under Query Parameters
Key==pin
value ==
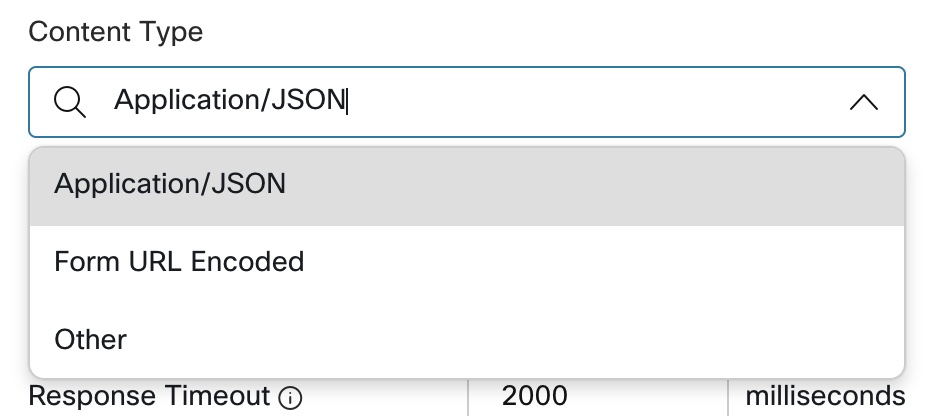
v) Content Type == application/json
- Parse the Json for
NameEmailandAccount
i) under Parse Settings select the Content Type as JSON
Use
https://jsonpath.com/website to parse the value, take the json by entering the webservices in Firefox browser

- Drag and drop
conditionNode and set the condition to
Note: Surround the expression below with
DataDip.httpStatusCode == 200
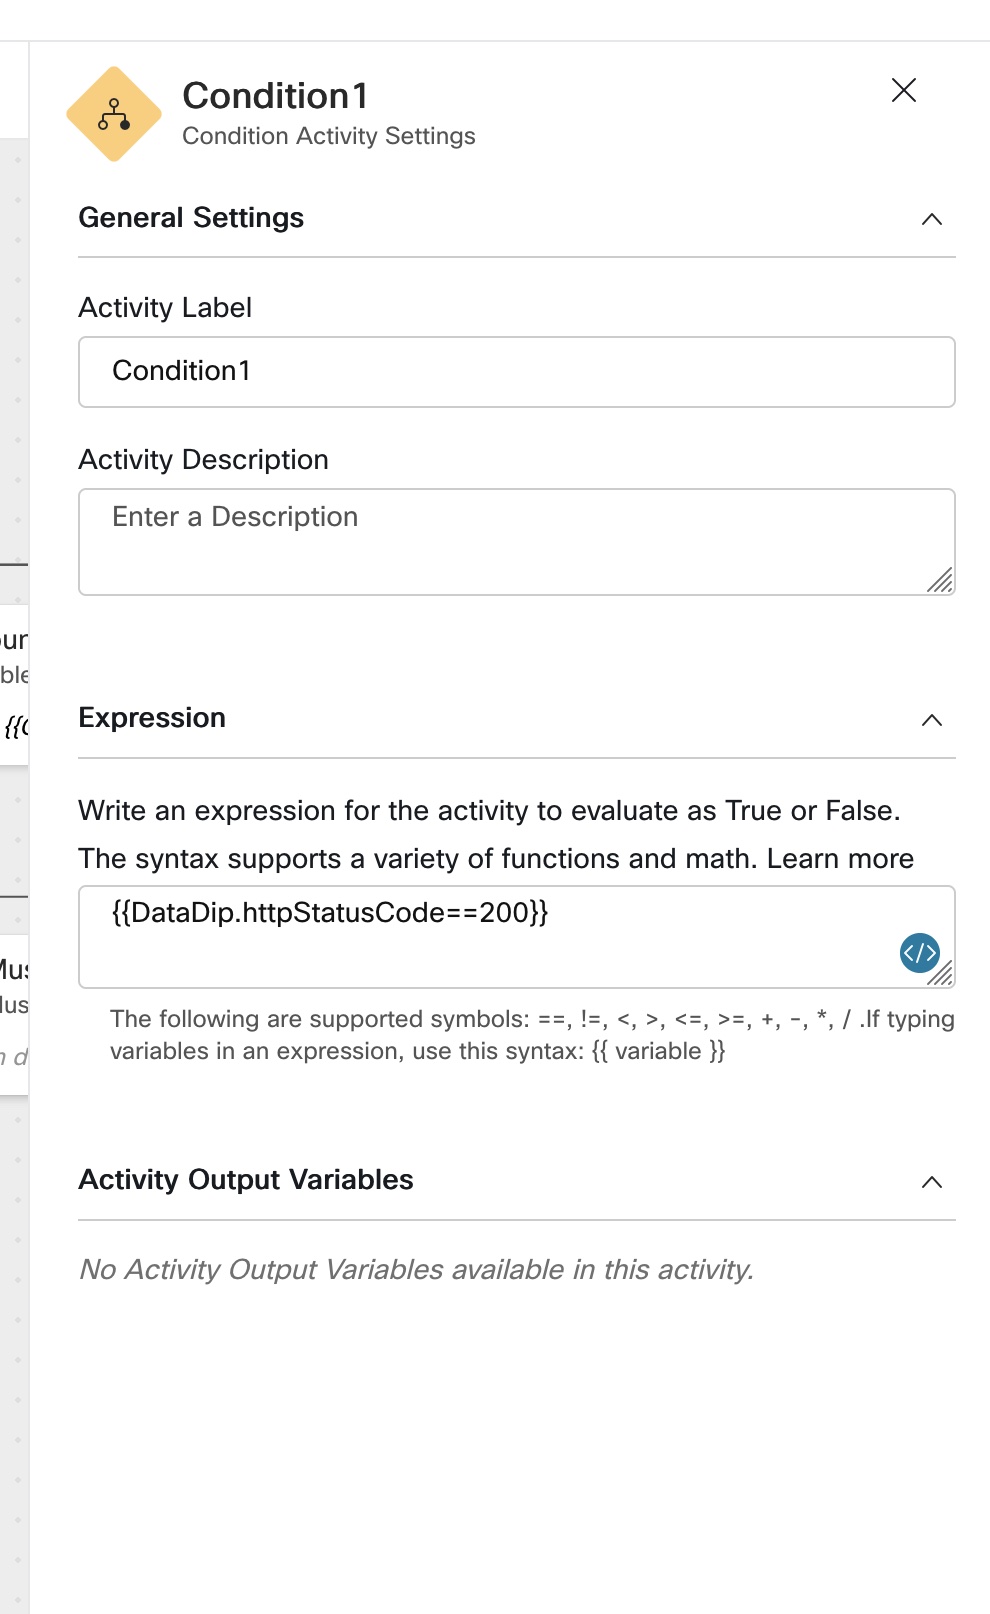
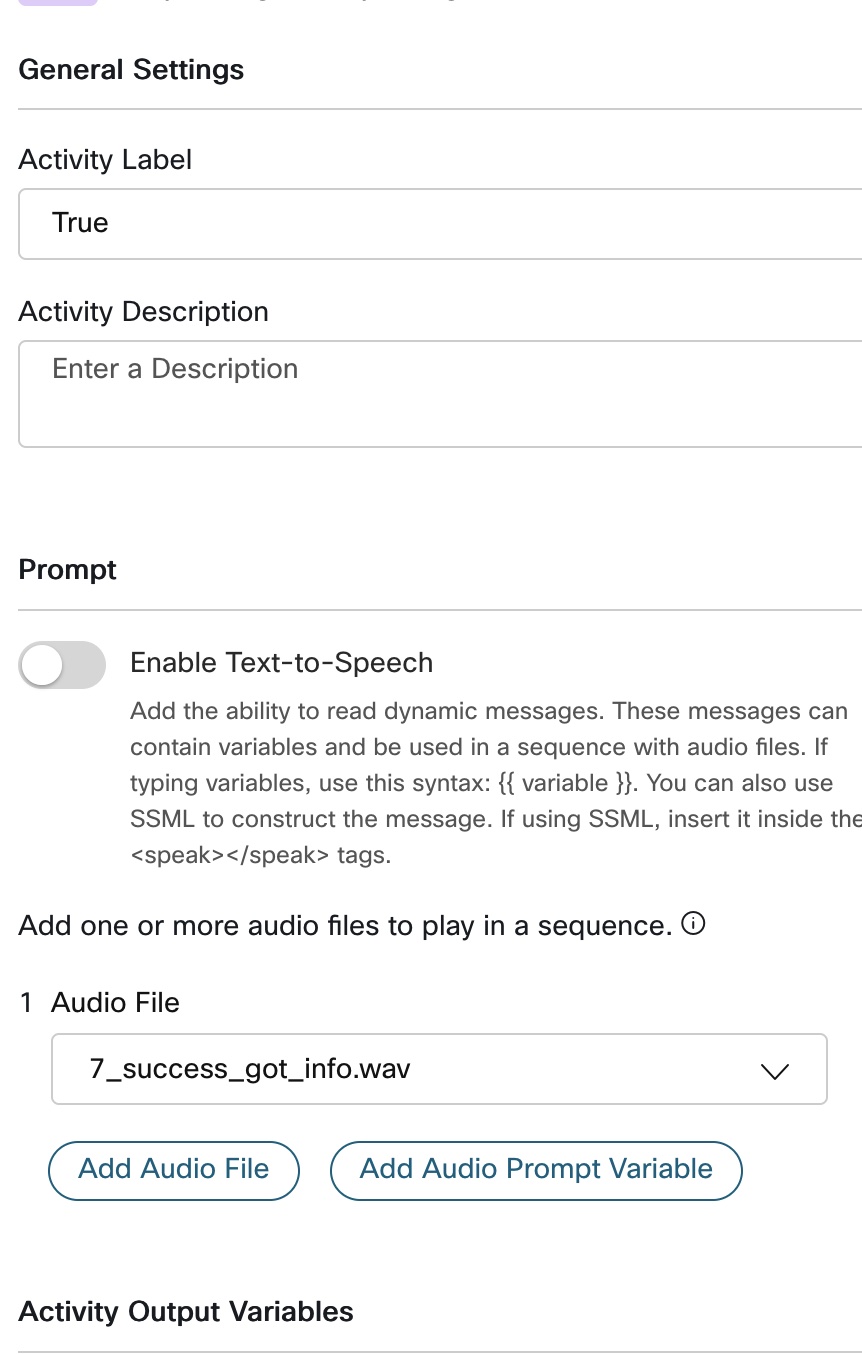
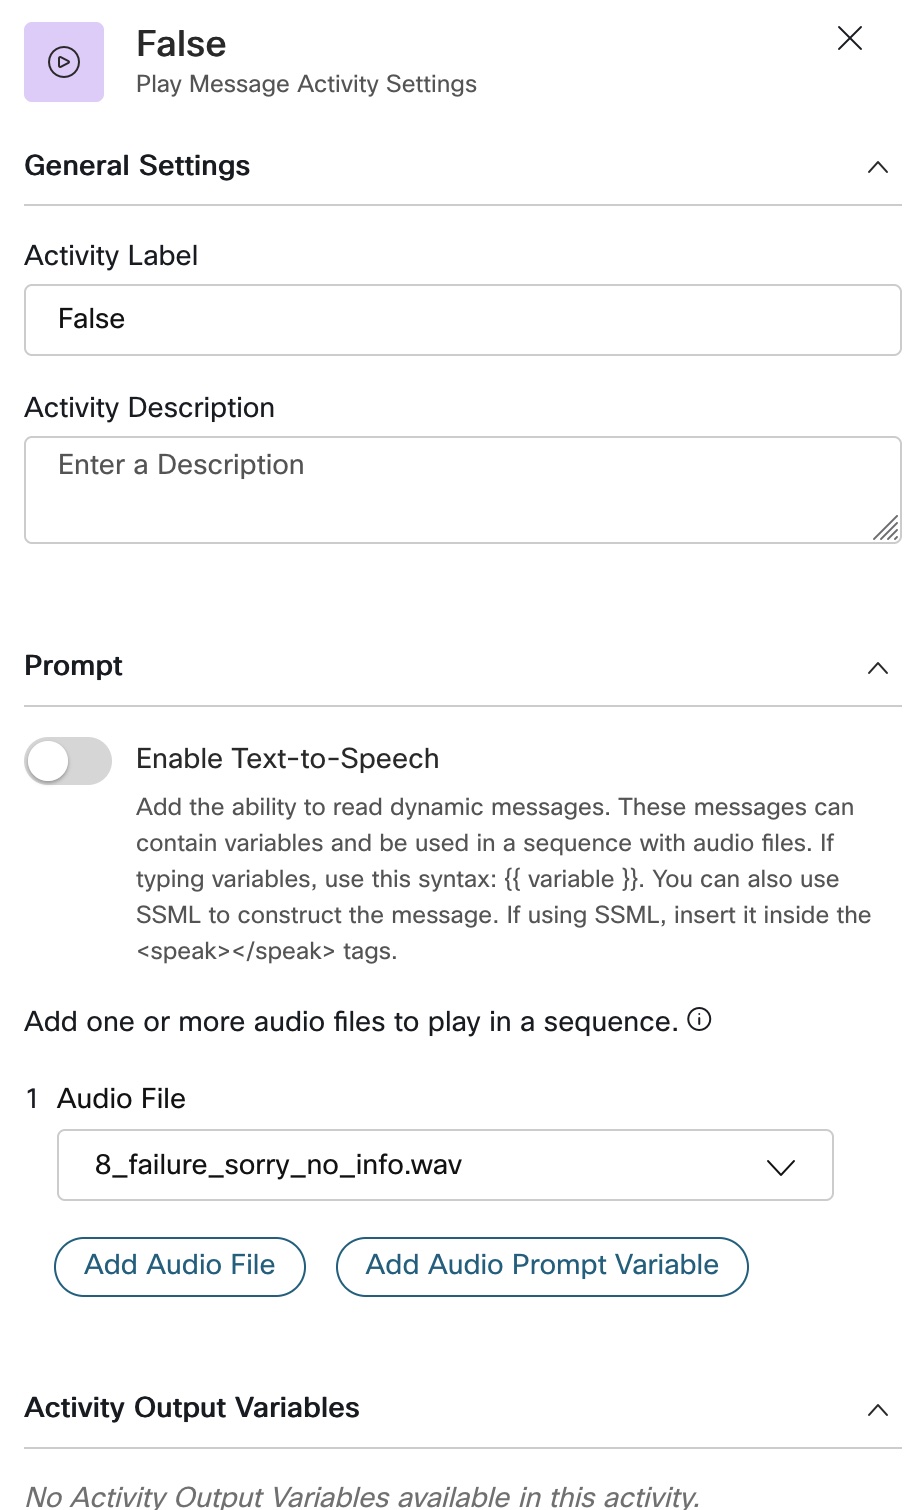
- if the condition is true to connect to
play message
-
Validate and Publish the Flow
-
Edit
CurrentRouting Strategy and change the flow toLab3
Lab Validation
Login to Agent Desktop and Keep the Agent in Not Ready State
i) To test the flow call the Dial Main Number and enter 5 Digit Pin number
ii) On the Main Menu Node press 1
- Expected results
i) System should validates the PIN and fetch Email, Name, Account details
ii) System should fetch data and Pop all those information on Agent_Desktop
Lab Support
Proctors is your number 1 contact. If you need assistance just raise your hand.
All registered participants are also added to the support room where the engineering and Product Management team is added. As an alternative way, you can use that space for any questions related to the Flow Control.