Table of Contents
Table of Contents
Introduction
Recap
In the first 4 Lab, we Learned
- Bring the contact into Webex Contact Center and hear welcome message
- Queue the contact to Live Agent after hearing welcome prompt
- provide Menu option and an Opt-Out options to customer and validate CallBack Functionality
- HTTP based Data Dip to external WebServices to Pull Customer Information and POP that on Agent Desktop
- Dip to external database and validate if customer is premium/ Platinum customer and connect the contact immediately to Agent using Advanced Skill Based Routing
- When premium customer calls back, connect the contact back to preferred or last routed agent
Lab Objective
In this section, we will go over the steps that are required to do External Data DIP to validate customer is premium or not, if yes, connect the contact to preferred Agent
- External Data Dip to 3rd party Web Services
- Parsing the JSON to validate the customer is premium
- Connect to premium customer to preferred Agent using QueuetoAgent node
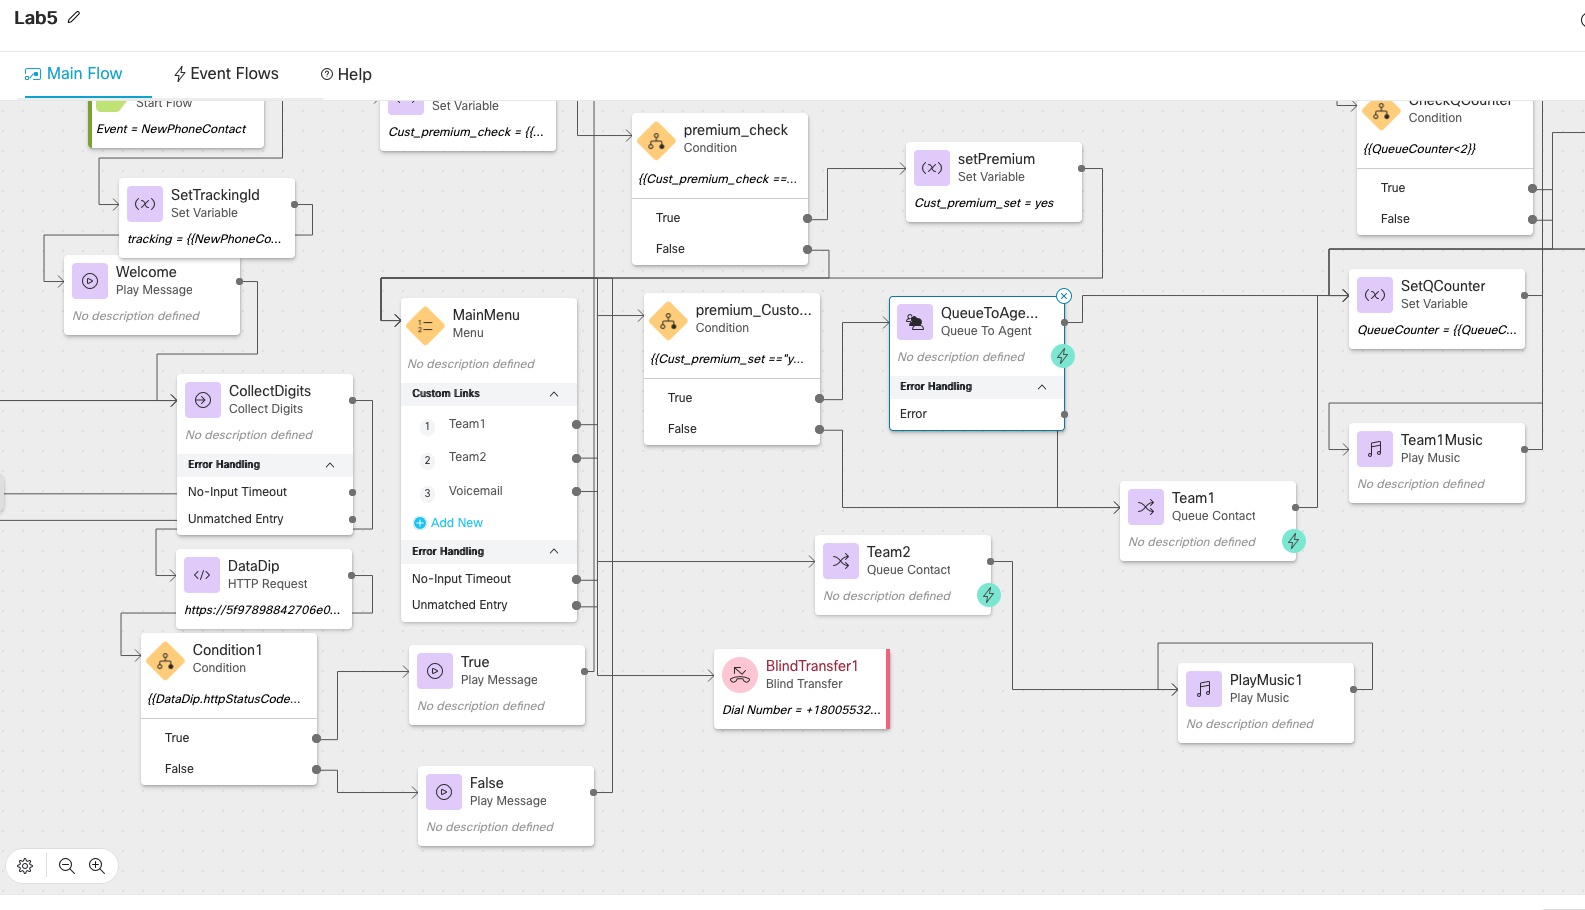
we are going to take this lab forward from Lab4, by copying the same Lab and adding a condition node to check if the customer is premium customer, if yes customer will be routed immediately to last agent routed based using QueuetoAgent Node
Pre-requisites
- Basic IVR flow worked, caller can connect to WXCC and hear welcome music
- Caller Successfully connect to Agent Desktop
-
Menu and Opt Out lab completed
Quick Links
Control Hub: https://admin.webex.com
Portal: https://portal.wxcc-us1.cisco.com/portal
Agent Desktop: https://desktop.wxcc-us1.cisco.com\
Lab Section
PreferredAgentRouting
PreferredAgentRouting feature using QueuetoAgent Node gives the ability for a flow designer to directly target an agent(Last Agent routed) instead of making the contact wait in a Queue.
FlowConfiguration
Copy the Lab4 flow by clicking on 3 dot and open the copied the flow
- Add a Flow Variable name
Agent_Emailand
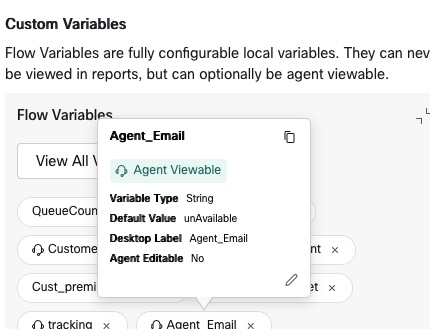
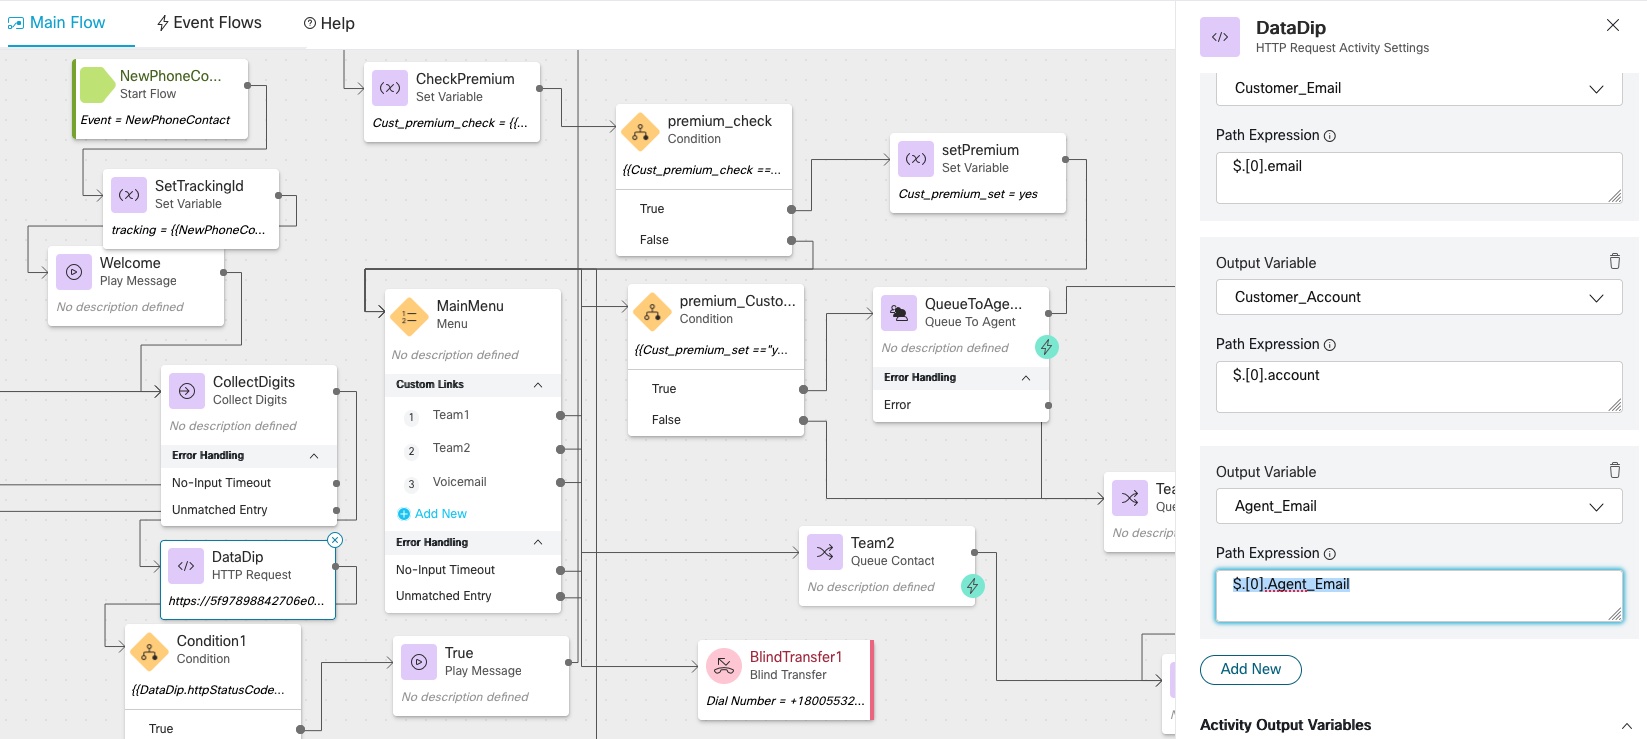
Under HTTP Node Parse setting parse for Agent Email
Add the path expression as $.[0].Agent_Email
- Add a
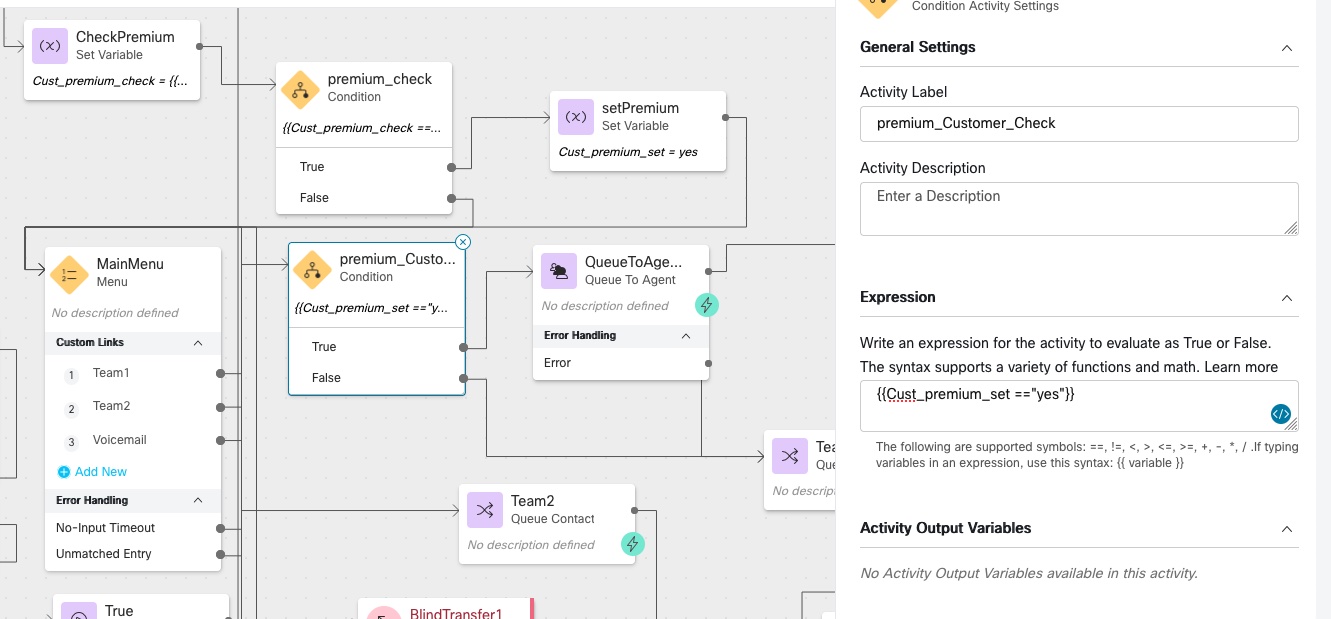
Conditionnode afterMainMenunode and rename it topremium_Customer_Checkand set the condition to
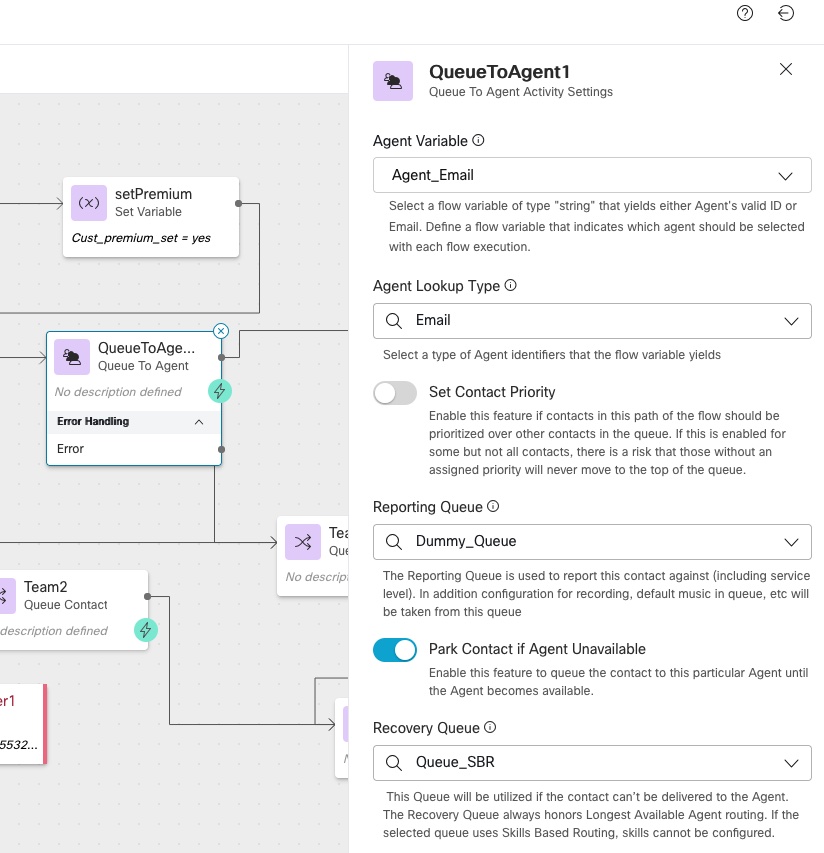
- Drag and drop
QueuetoAgentnode and select
| Form | options |
|---|---|
| Agent Variable | Agent_Email |
| Agent Lookup Type | |
| Reporting Queue | Dummy_Queue |
| Recovery Queue | Queue_SBR |
After completely 3 steps mentioned above, the flow would look like below
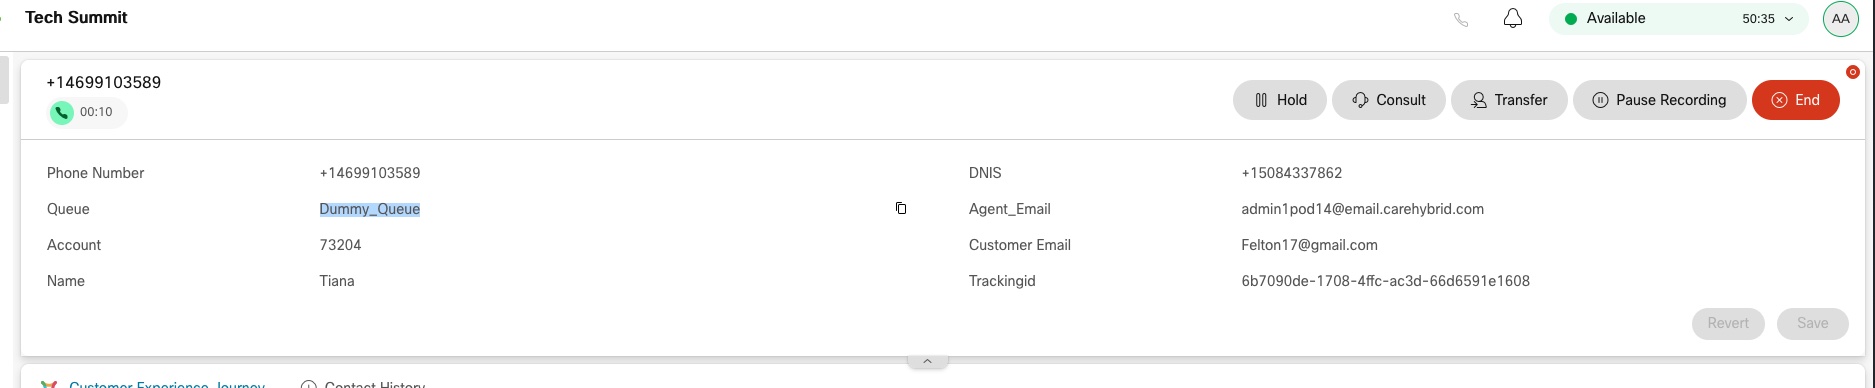
Lab Validation
Dial the Number from your mobile phone
- Enter the Pin number of Gmail customer
- Upon hearing main menu option, press
1to queue to Team 1
Expected Result
The call should get routed to Agent immediately with the queue name on Agetn Desktop as Dummy_Queue
Lab Support
Proctors is your number 1 contact. If you need assistance just raise your hand.
All registered participants are also added to the support room where the engineering and Product Management team is added. As an alternative way, you can use that space for any questions related to the Flow Control.