Lab 3.1: Dialogflow - Dialogflow setup
Table of Contents
Introduction
Lab Objective
In this Lab, we will go through the tasks that are required to complete the general pre-configuration of CCAI bot in Webex Connect.
Pre-requisites
- You have received the access credentials with a full admin access
Quick Links
Control Hub: https://admin.webex.com
Portal: https://portal.wxcc-us1.cisco.com/portal
Agent Desktop: https://desktop.wxcc-us1.cisco.com
Connect: [https://labtenant.us.webexconnect.io/]
AI Terminology
-
Utterances: Anything a user says to the bot
-
Intents: Task or action that the user wants to perform
-
Entities: Metadata that specifies the user’s intent
-
Responses: Message sent from the bot to converse to the user
-
Fallback: The state when a bot is unable to understand the utterance
-
Handover: Bot stops processing messages and transfers to an agent
-
NLU (Natural Language Understanding): engines used to assess the intent from the consumer inputs and respond with an accurate response
Lab Section
Step 1. Create a gmail account (Optional)
-
We will need a Gmail account to get started with this lab
-
You can use your own personal Gmail account for this lab or create a free account by following the steps here: https://support.google.com/mail/answer/56256?hl=en
Step 2: Create OAuth client ID and secret
-
Login to https://console.cloud.google.com/ using the Gmail account mentioned in Step-1.
-
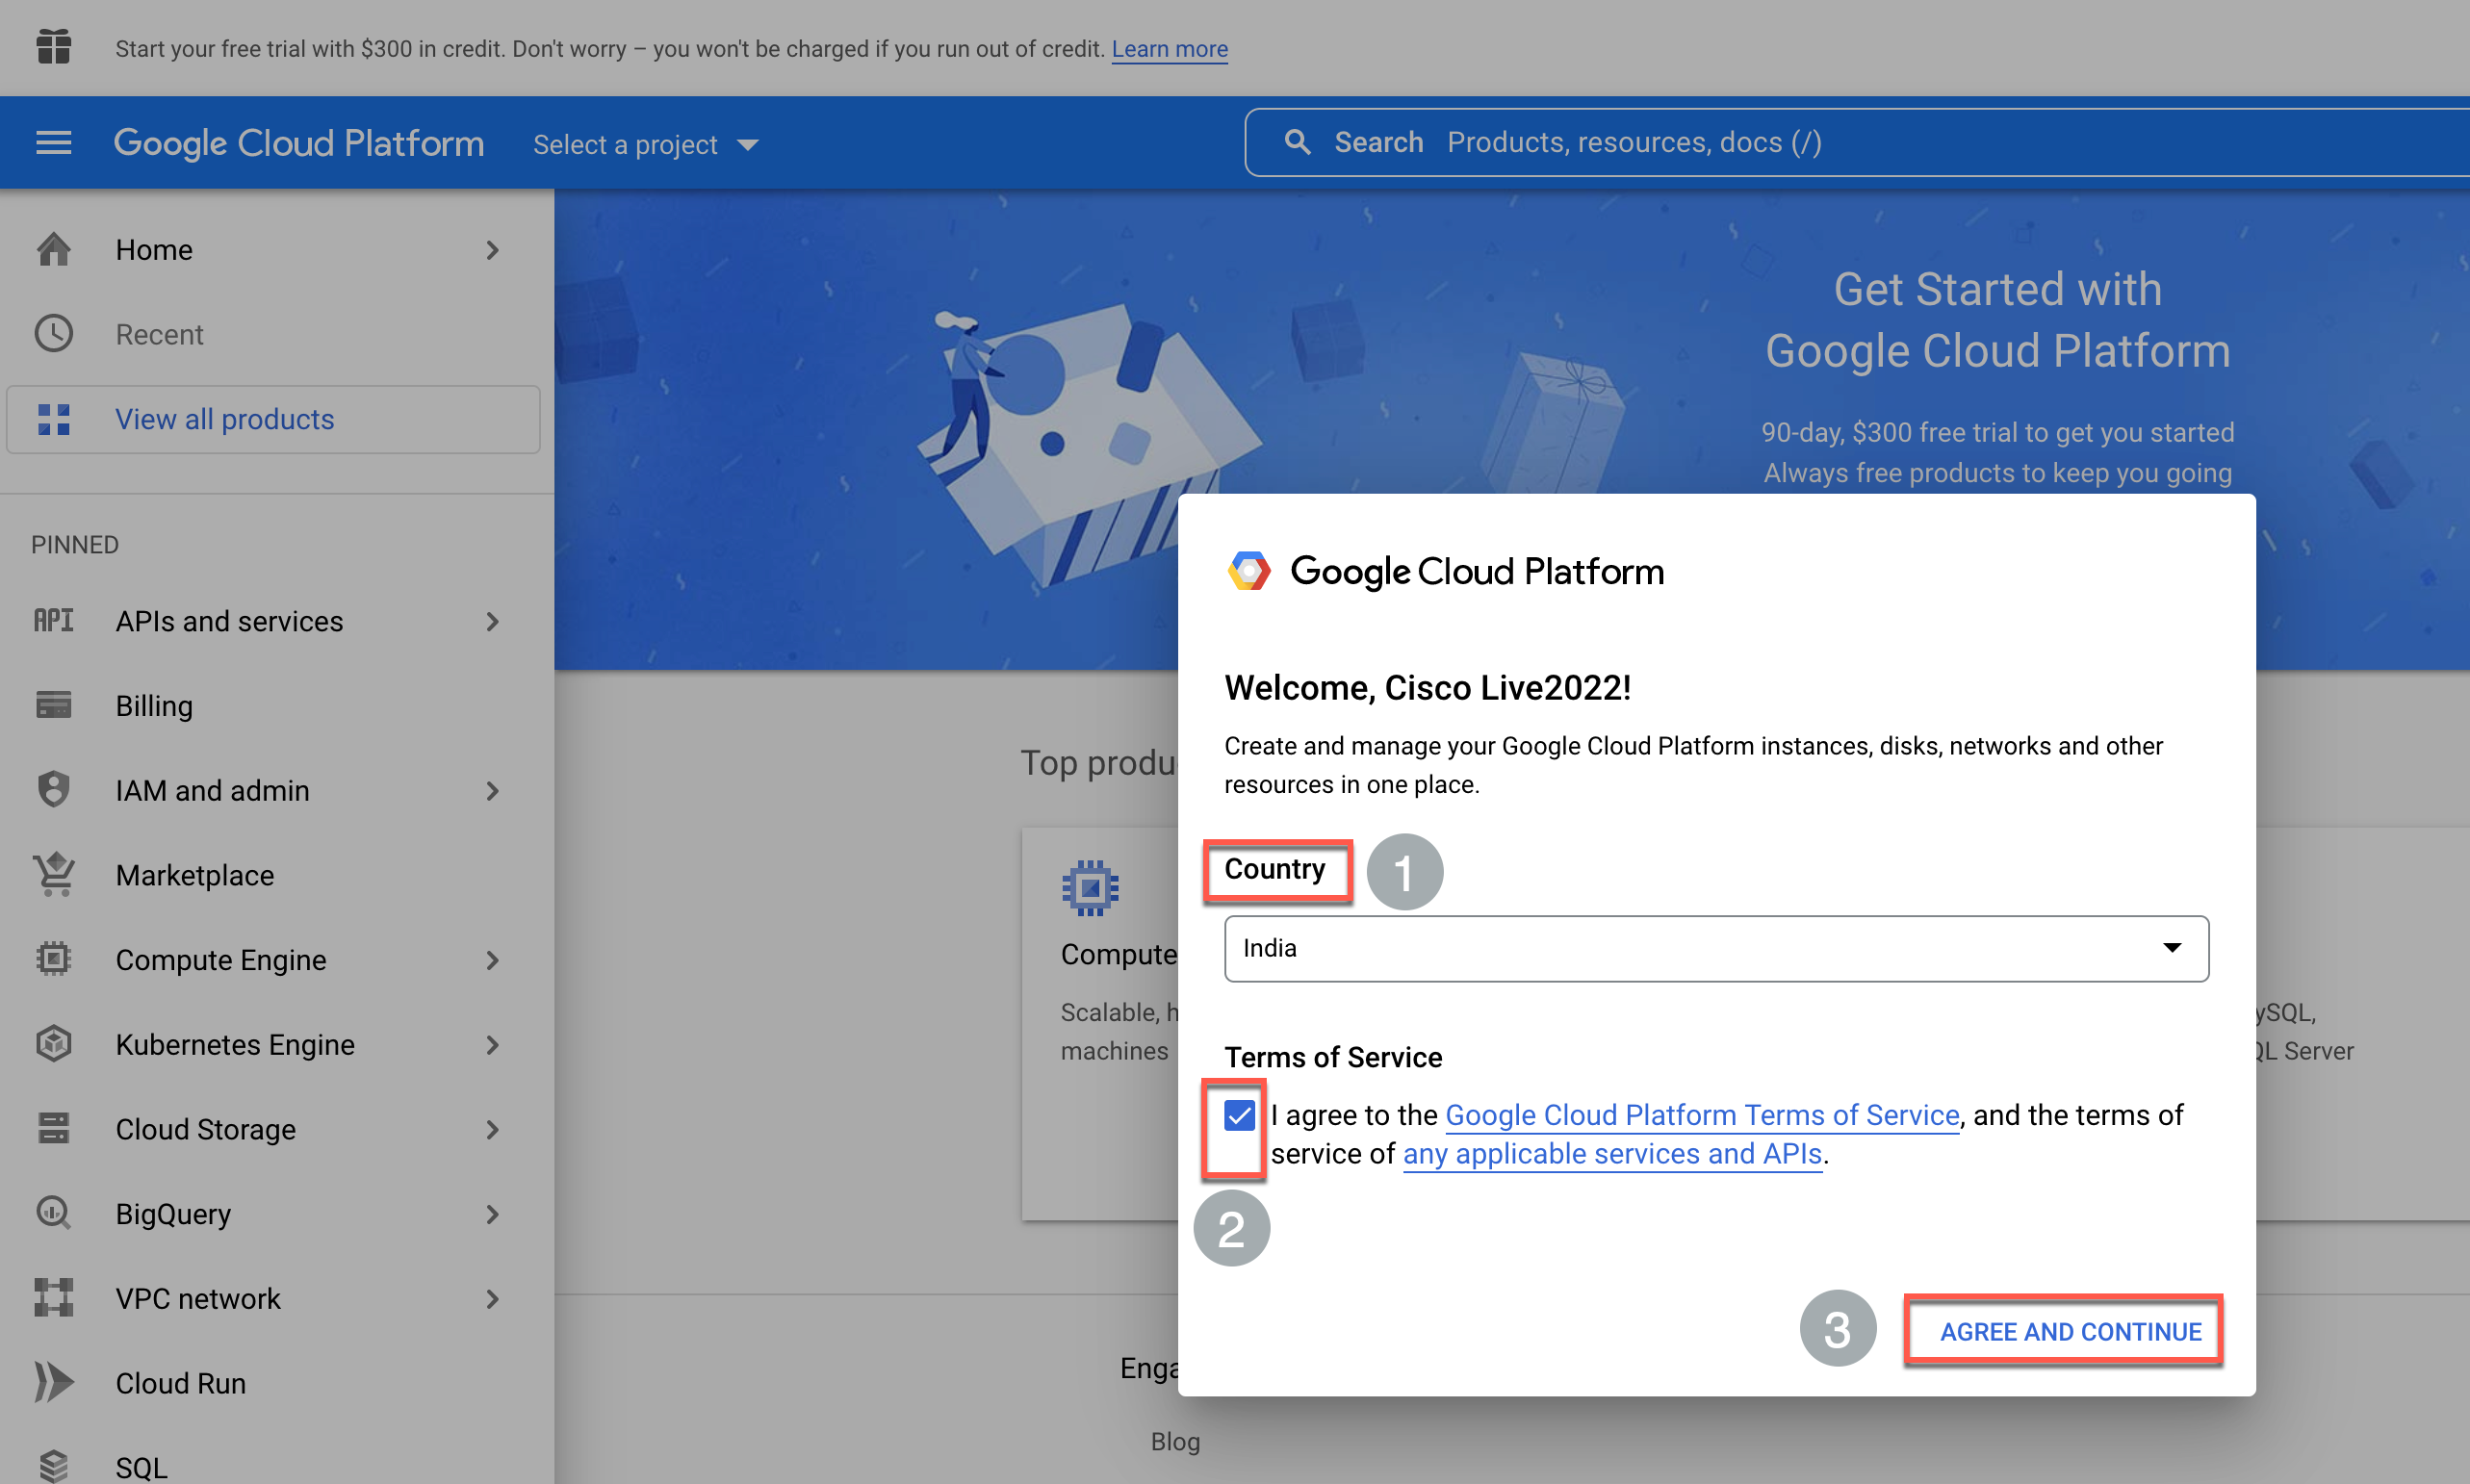
Select Country , Accept the terms of service and Click Agree and Continue
-
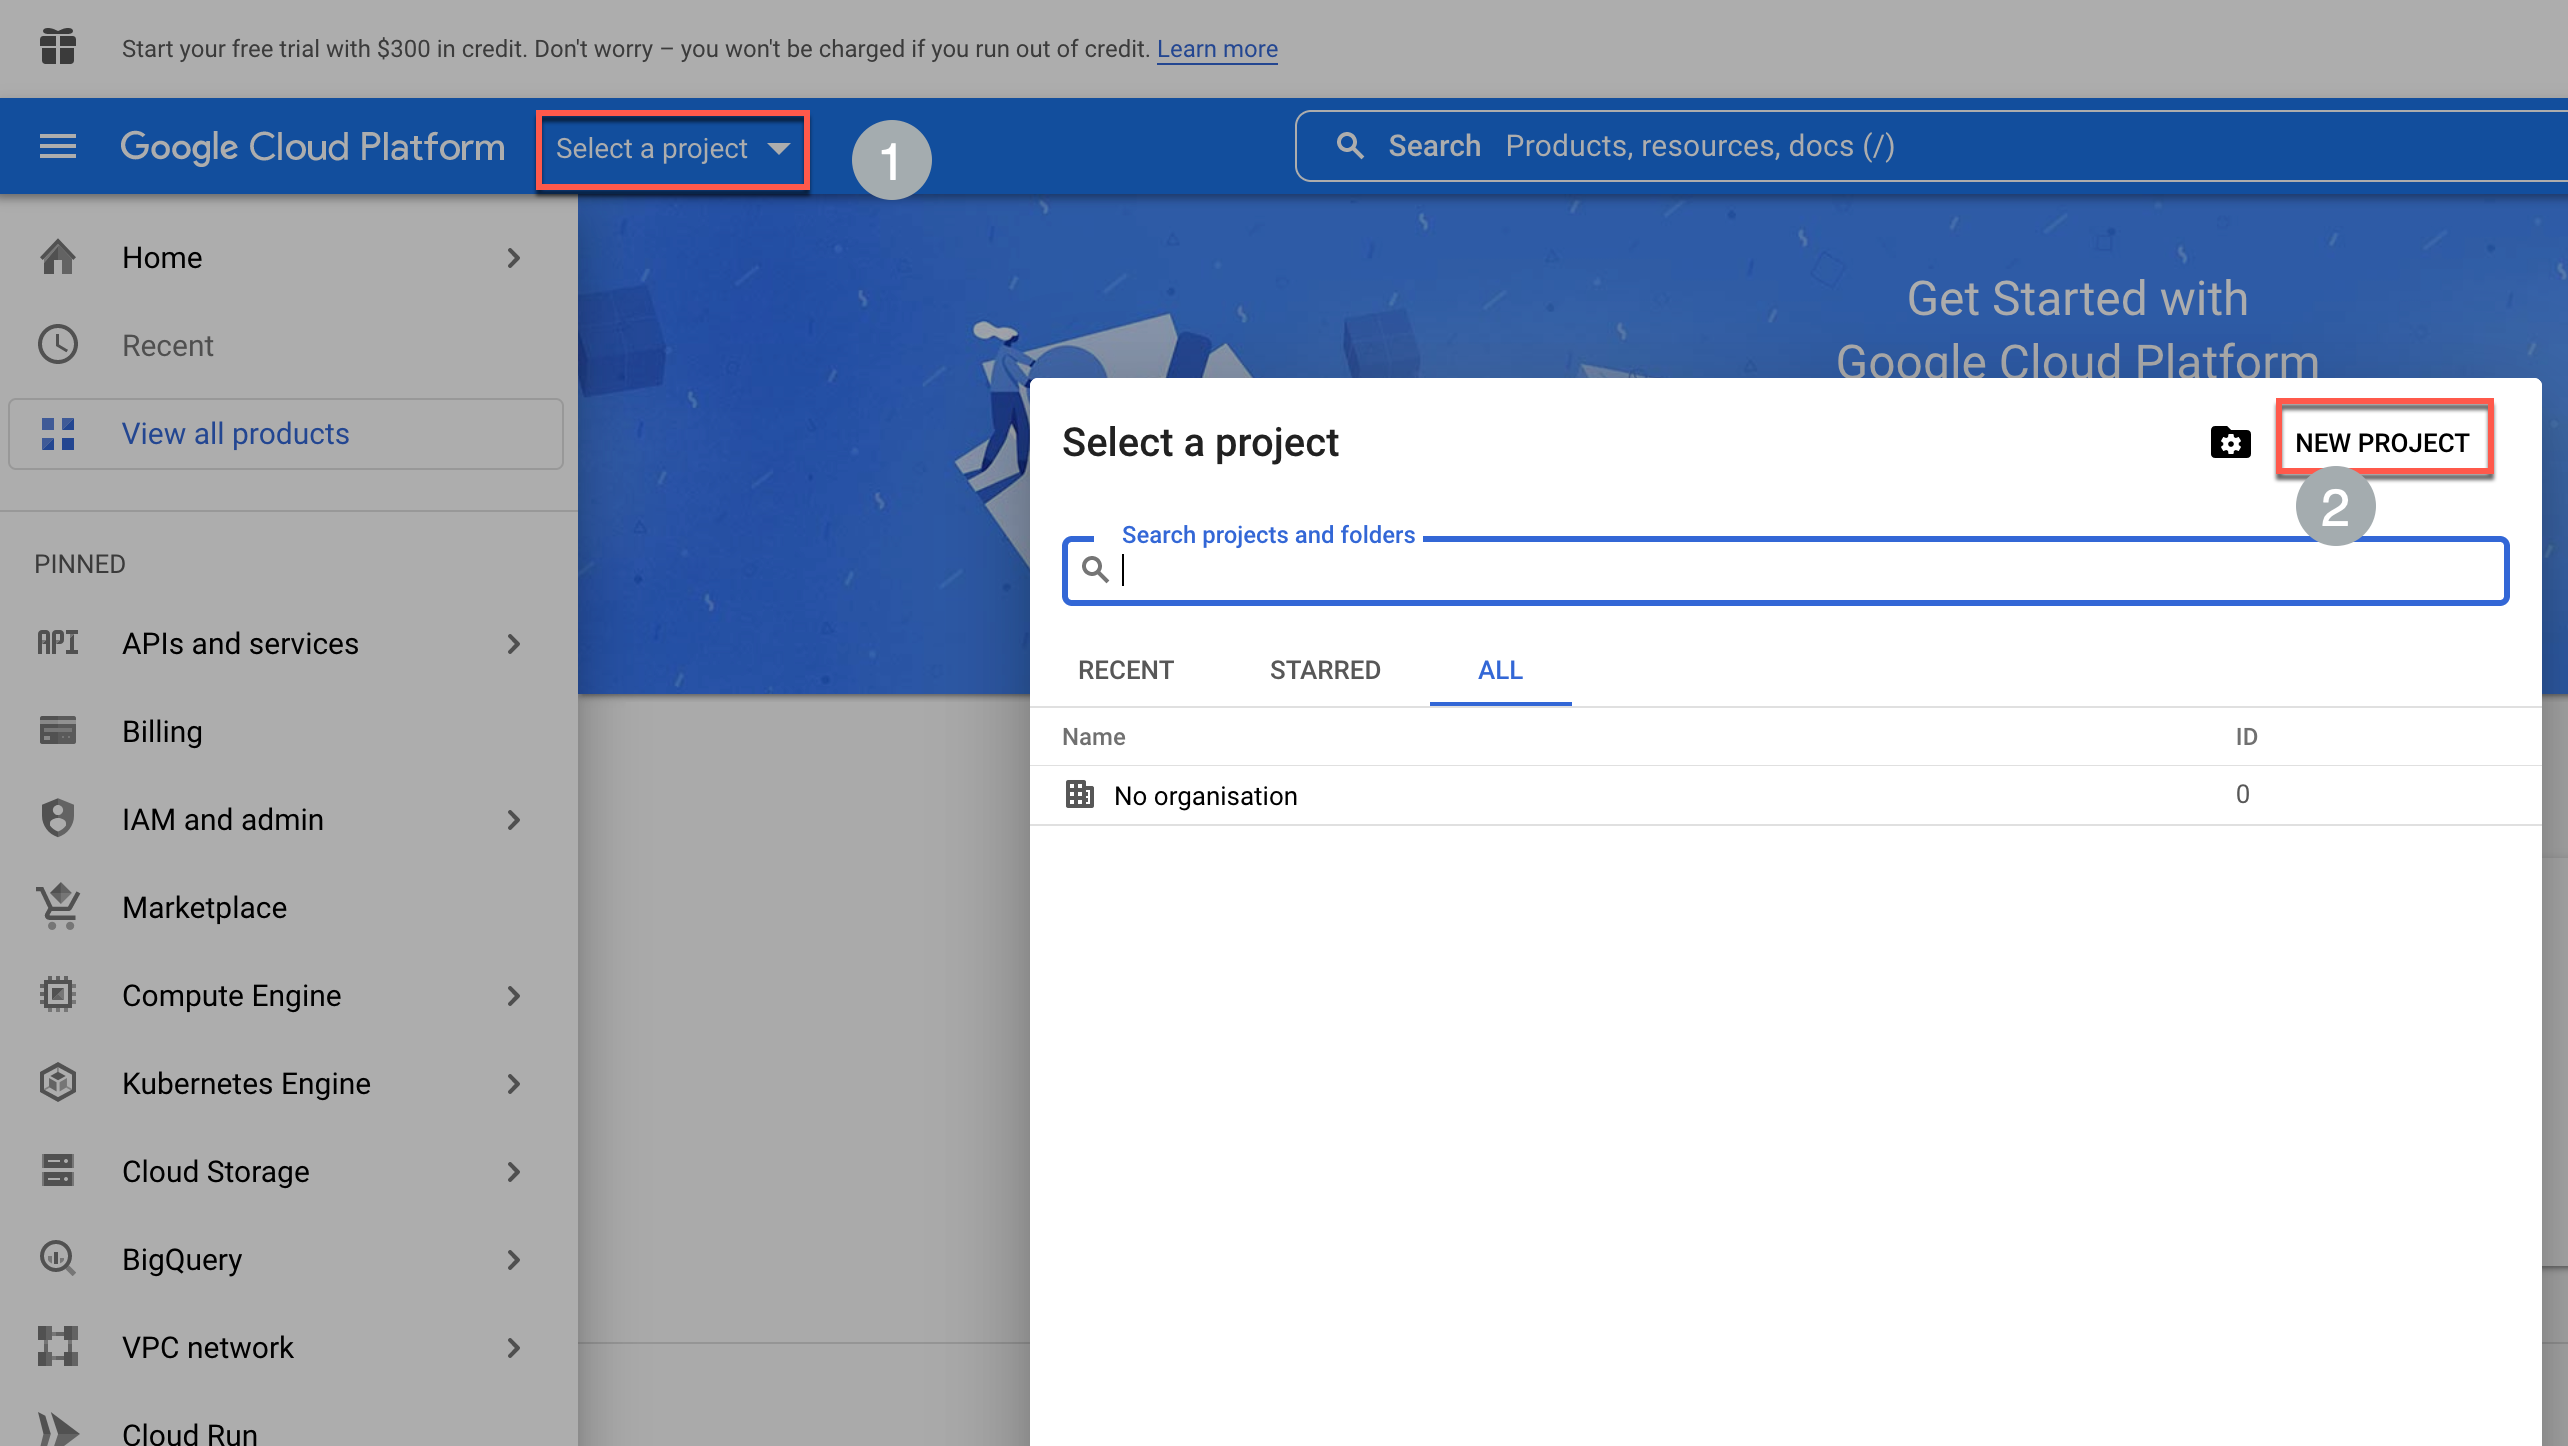
On the top left, click Select a Project and then New Project
-
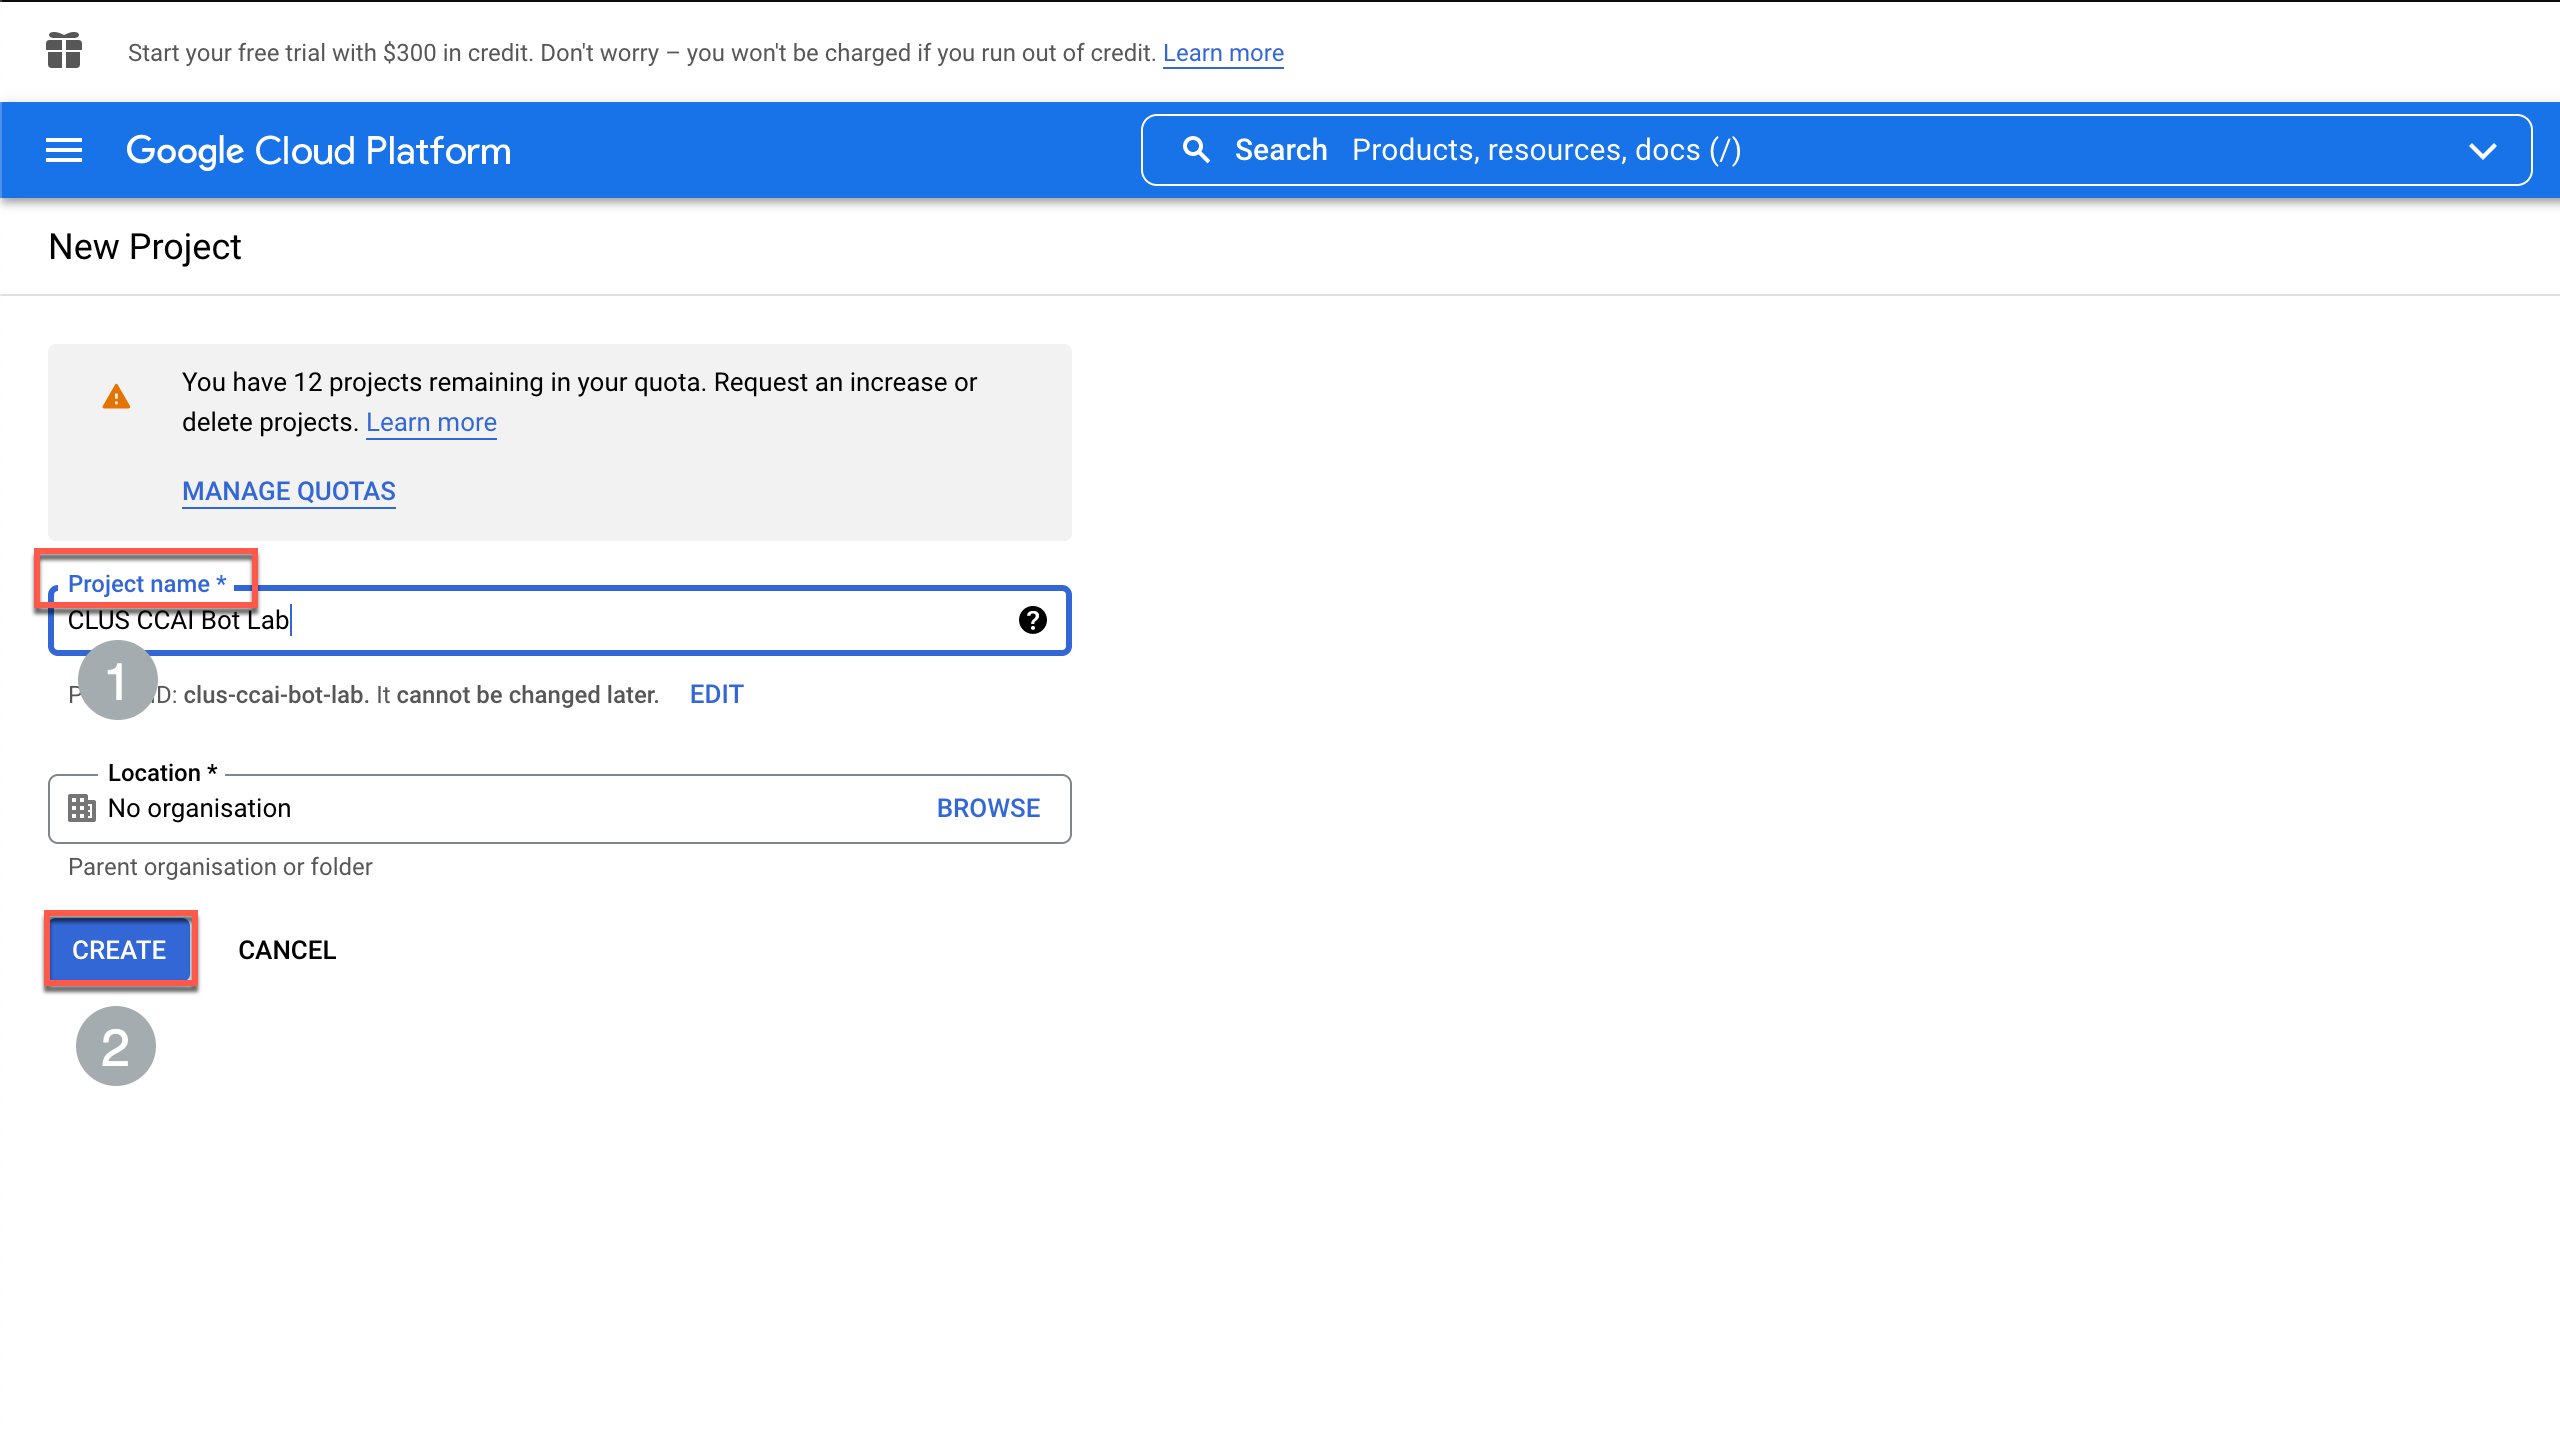
Enter a desired Project Name and click Create
-
Once the project is created, under Notifications section, click Select Project
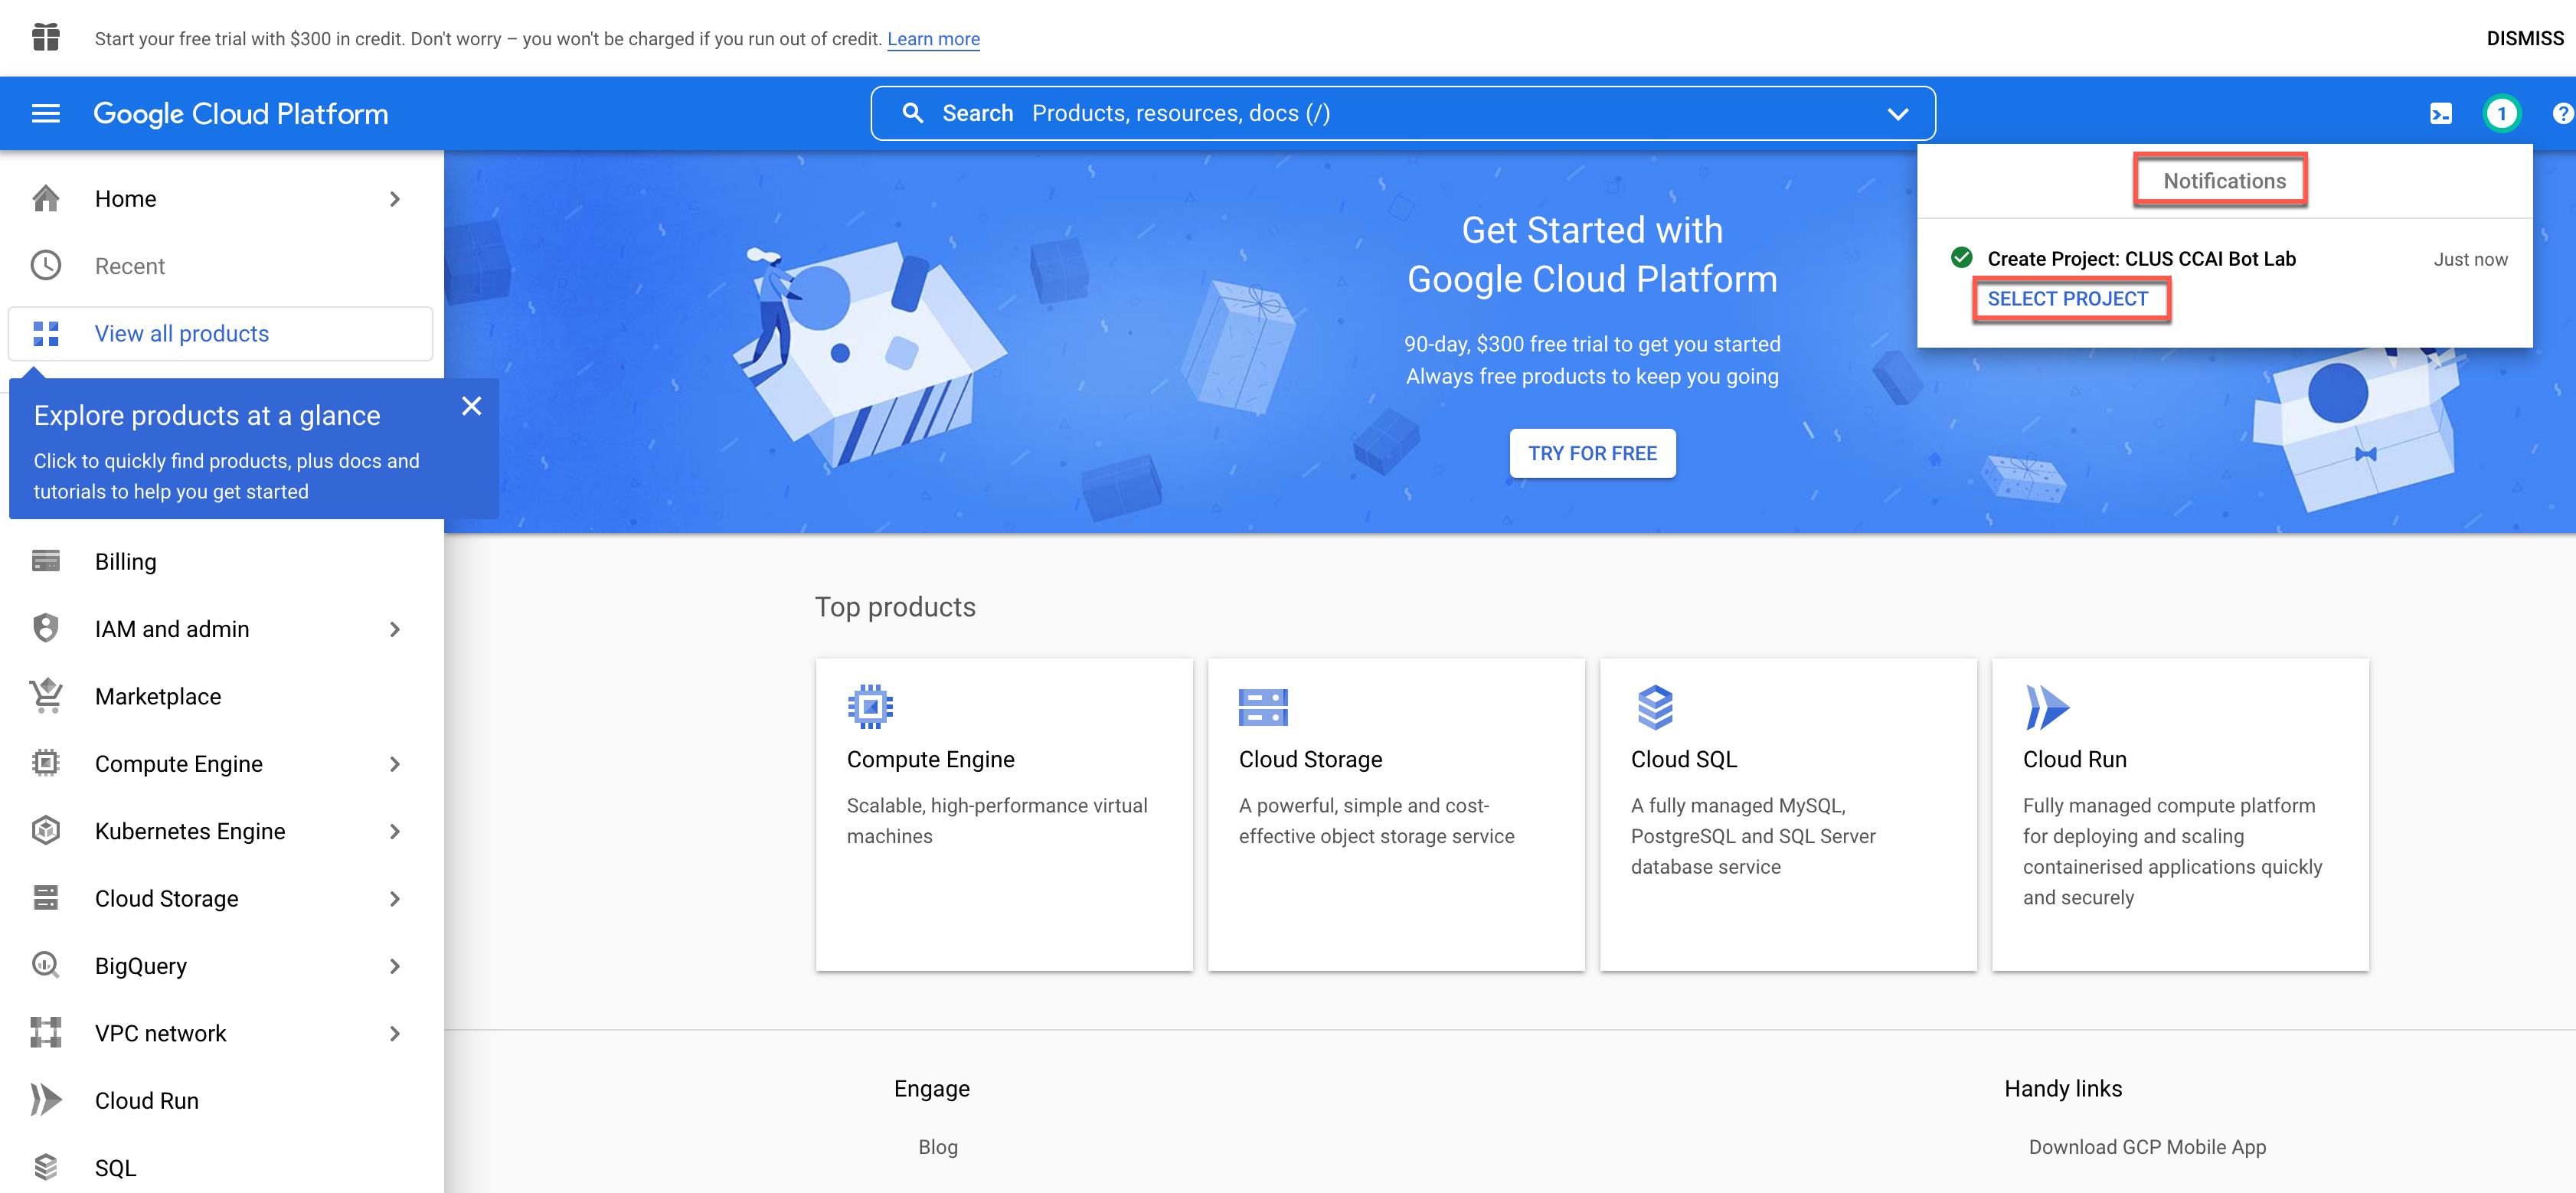
-
Verify that the project created in the previous step is selected on the top left.
-
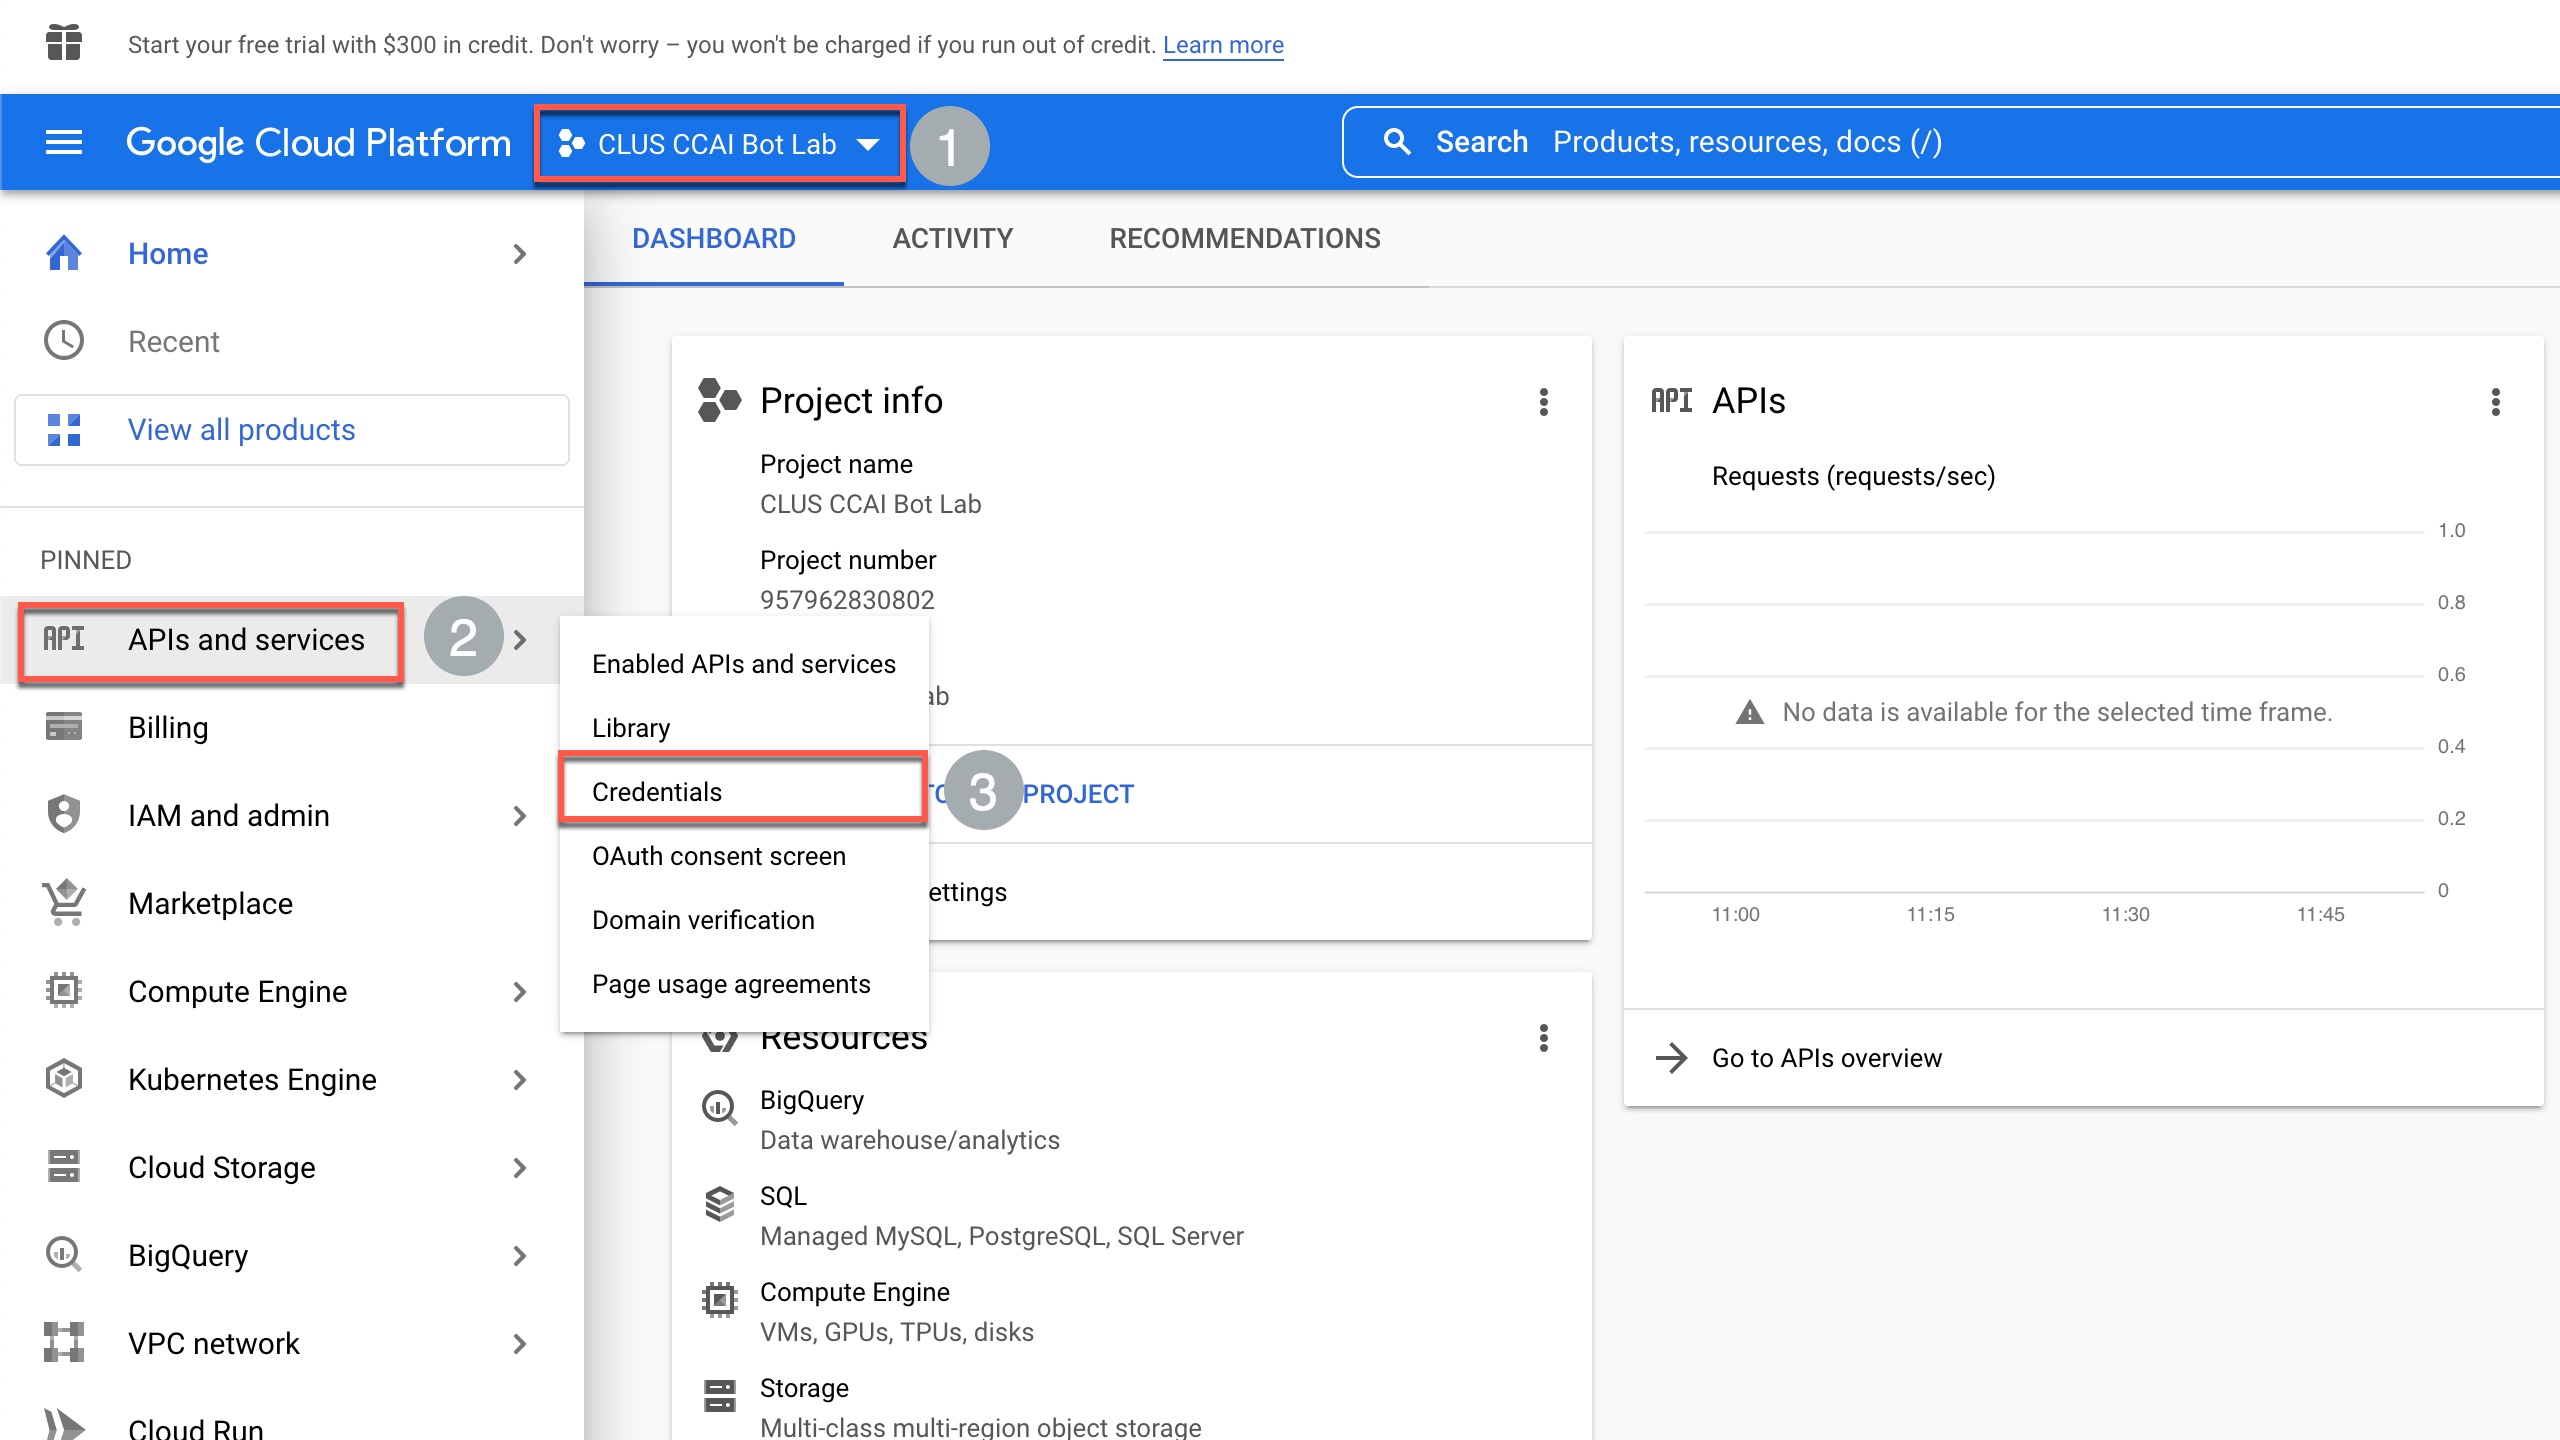
Navigate to API and services > Credentials
-
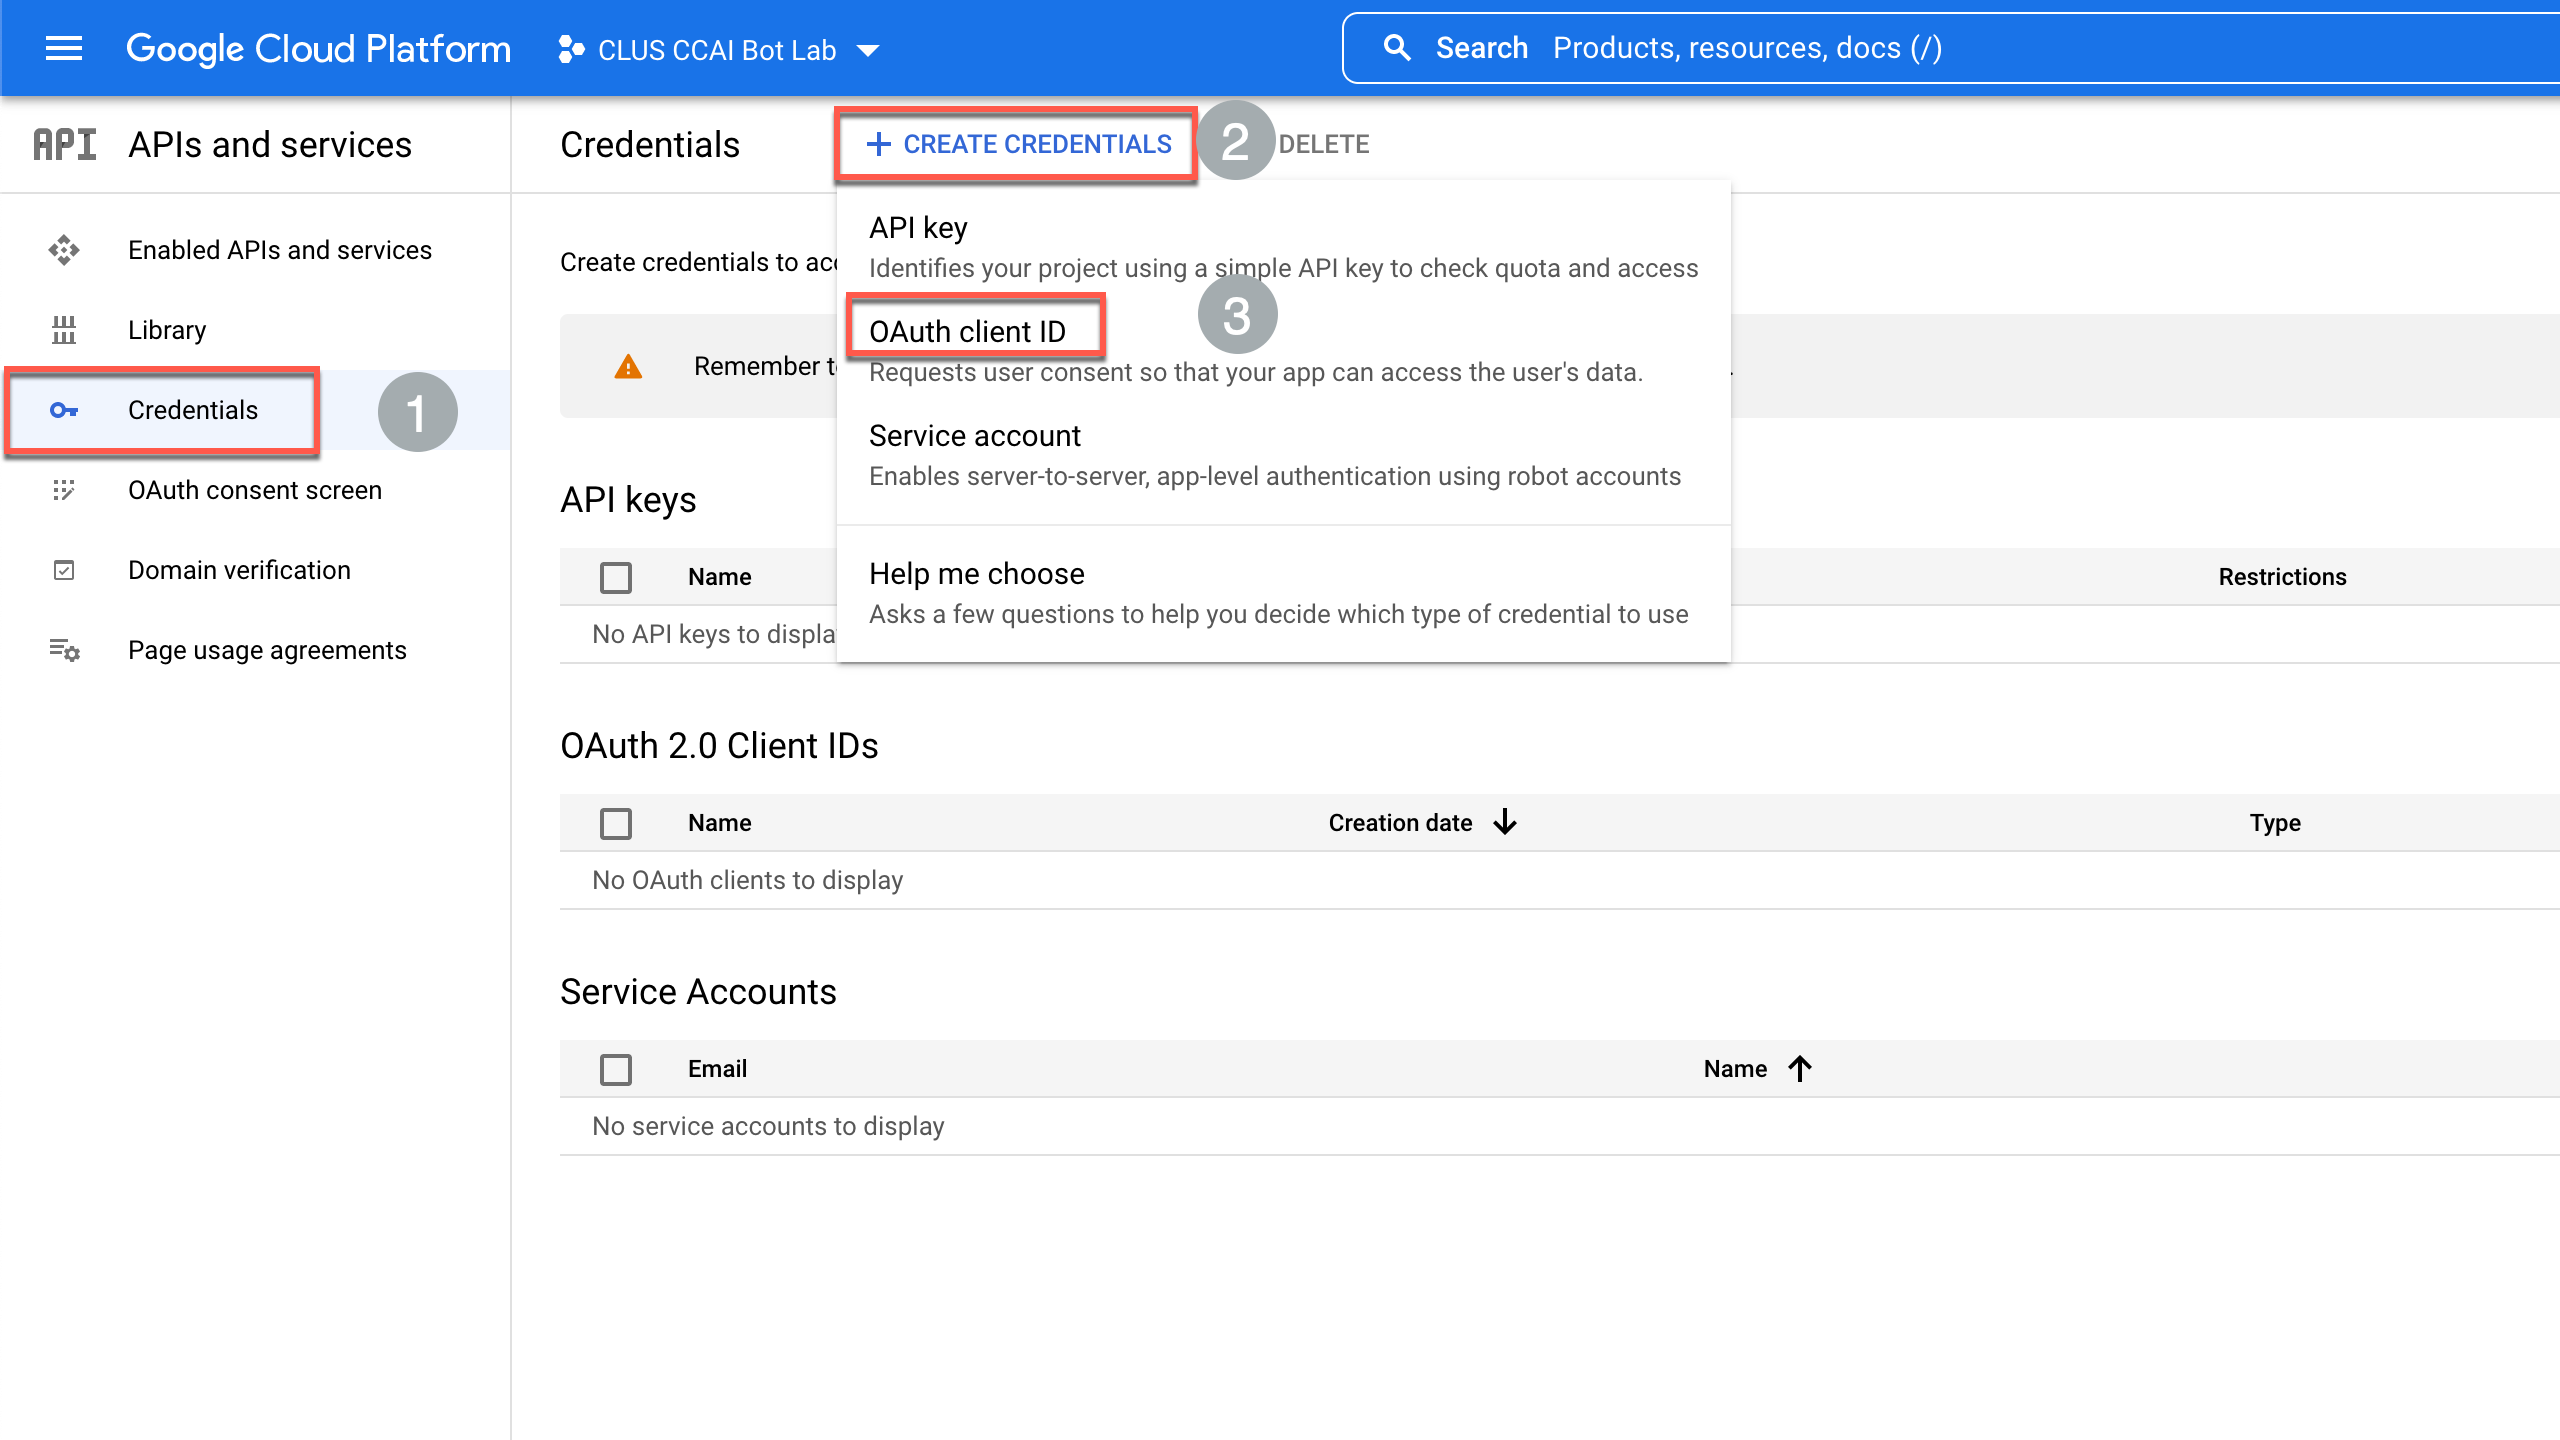
Navigate to Credentials > Create Credentials > OAuth client ID
-
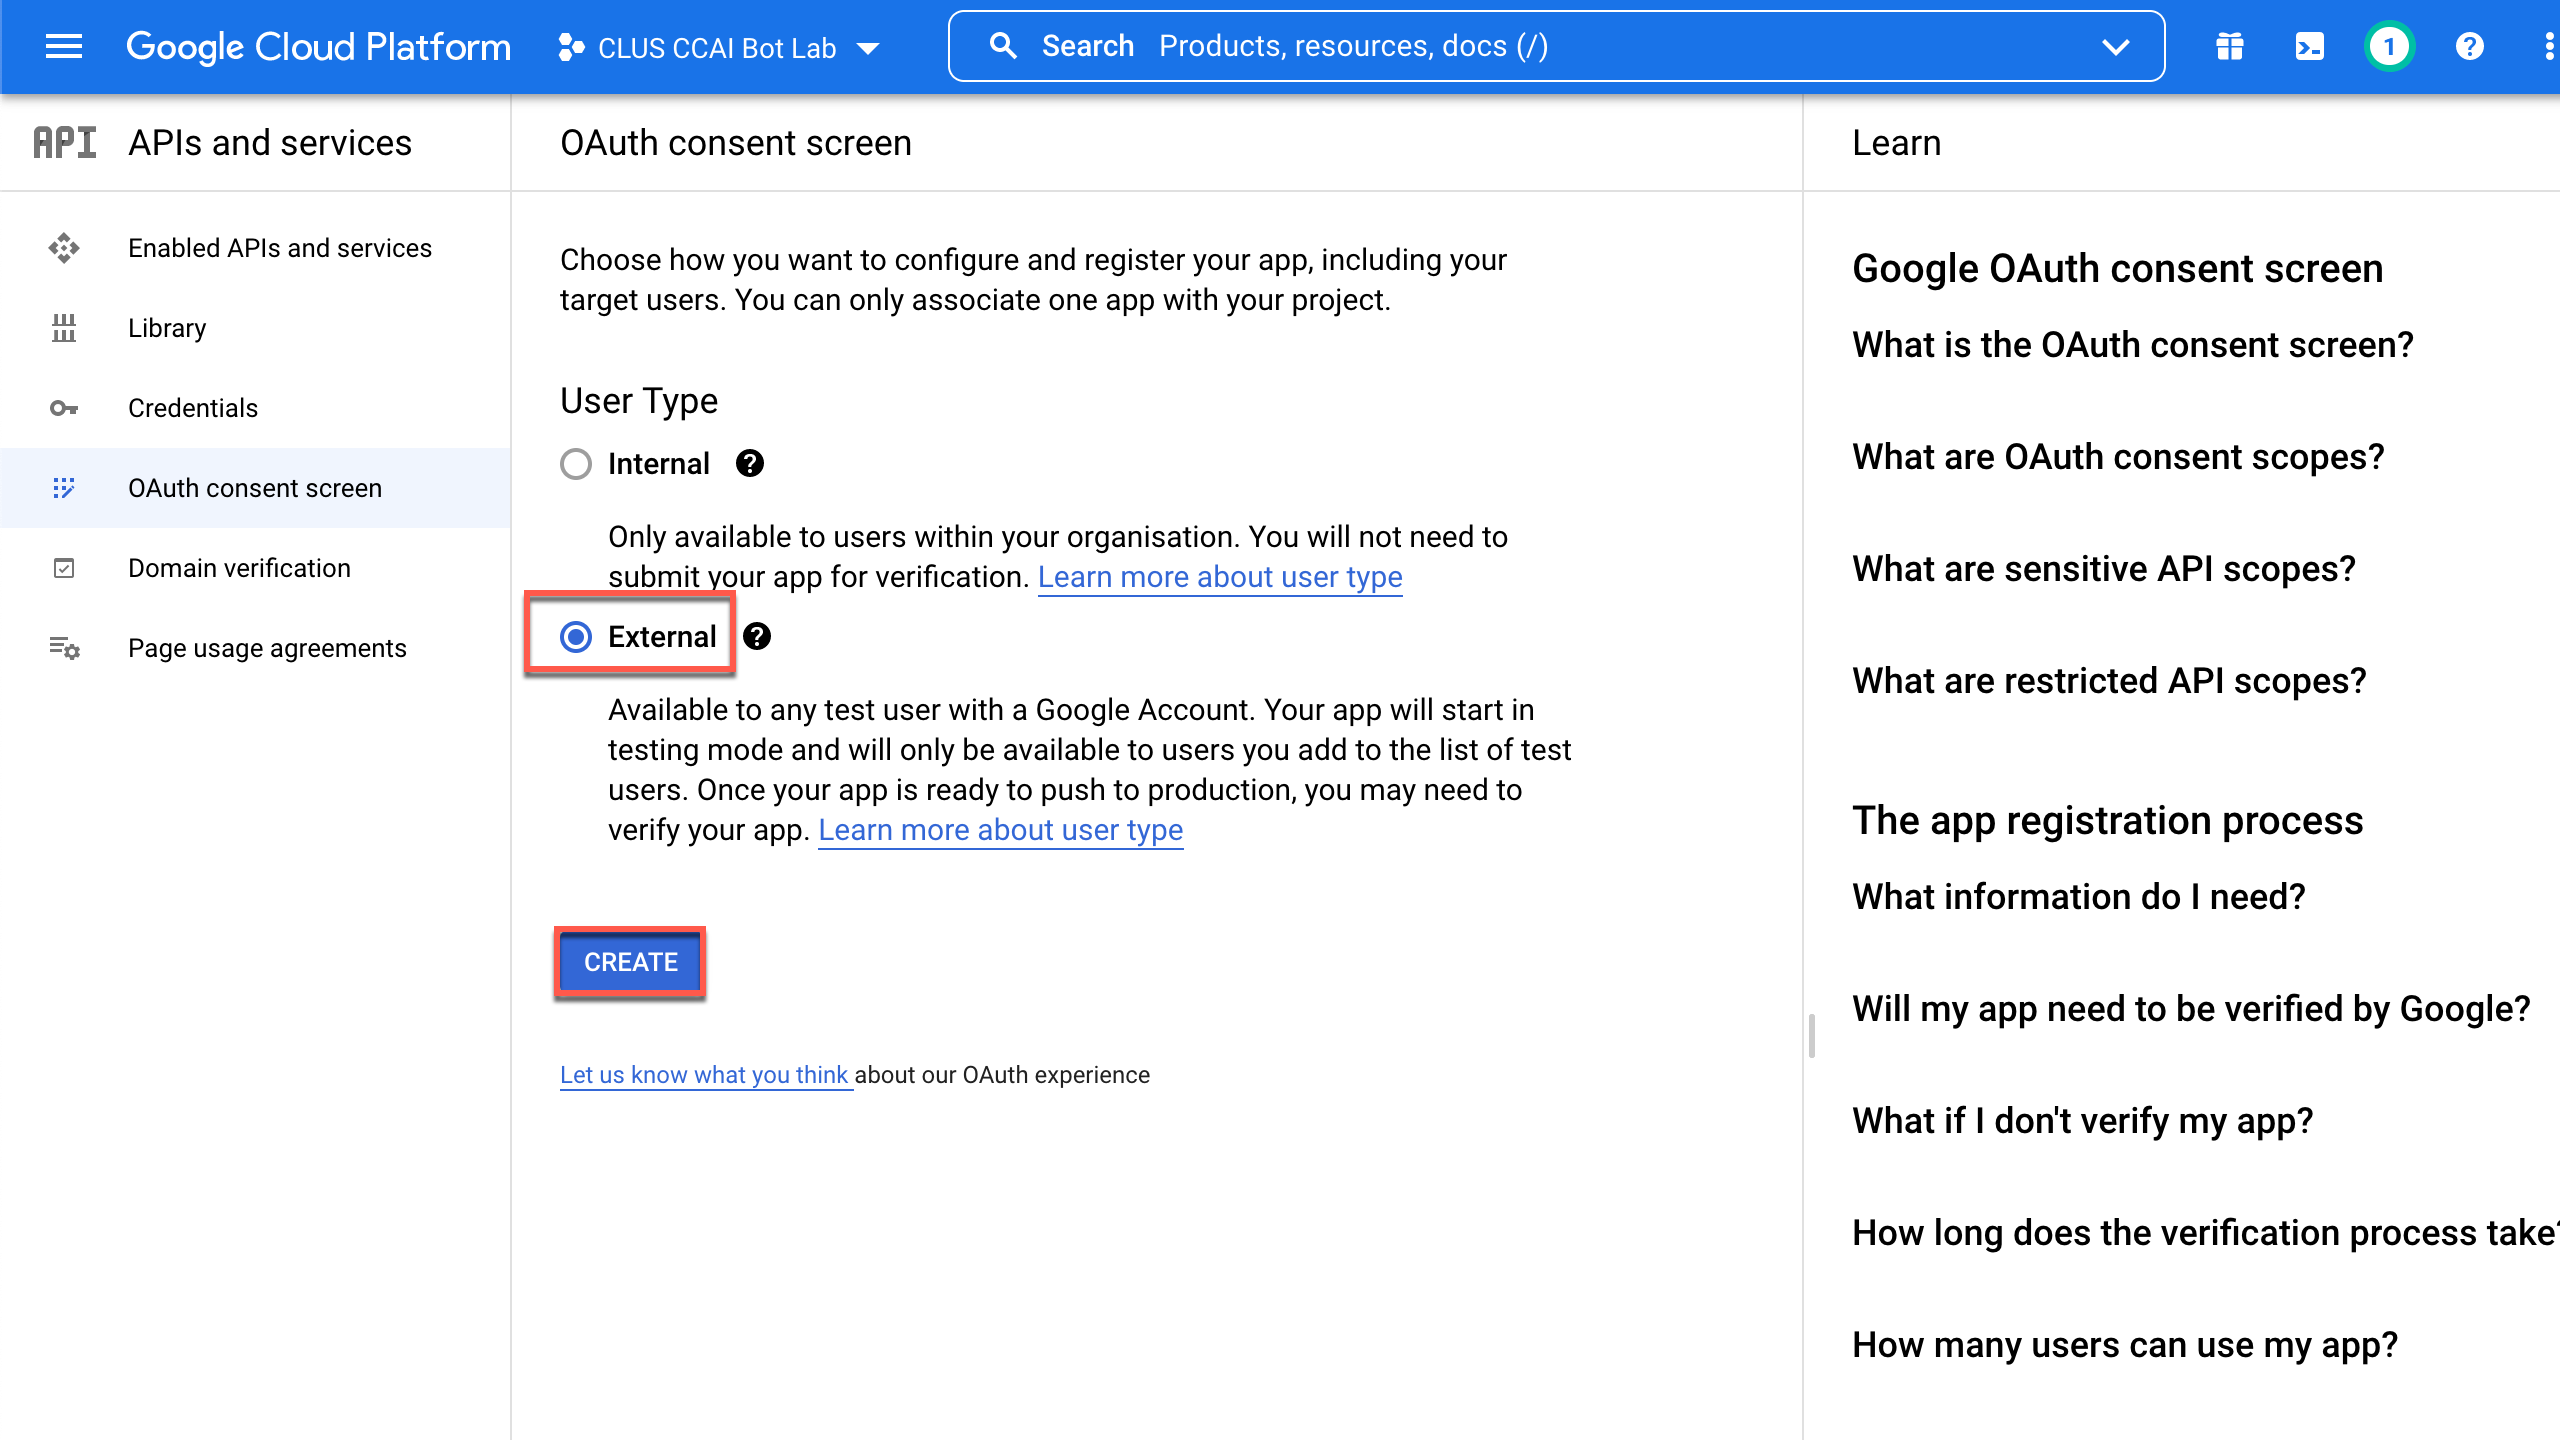
Click Configure Consent Screen
-
Select User Type as External and click Create
-
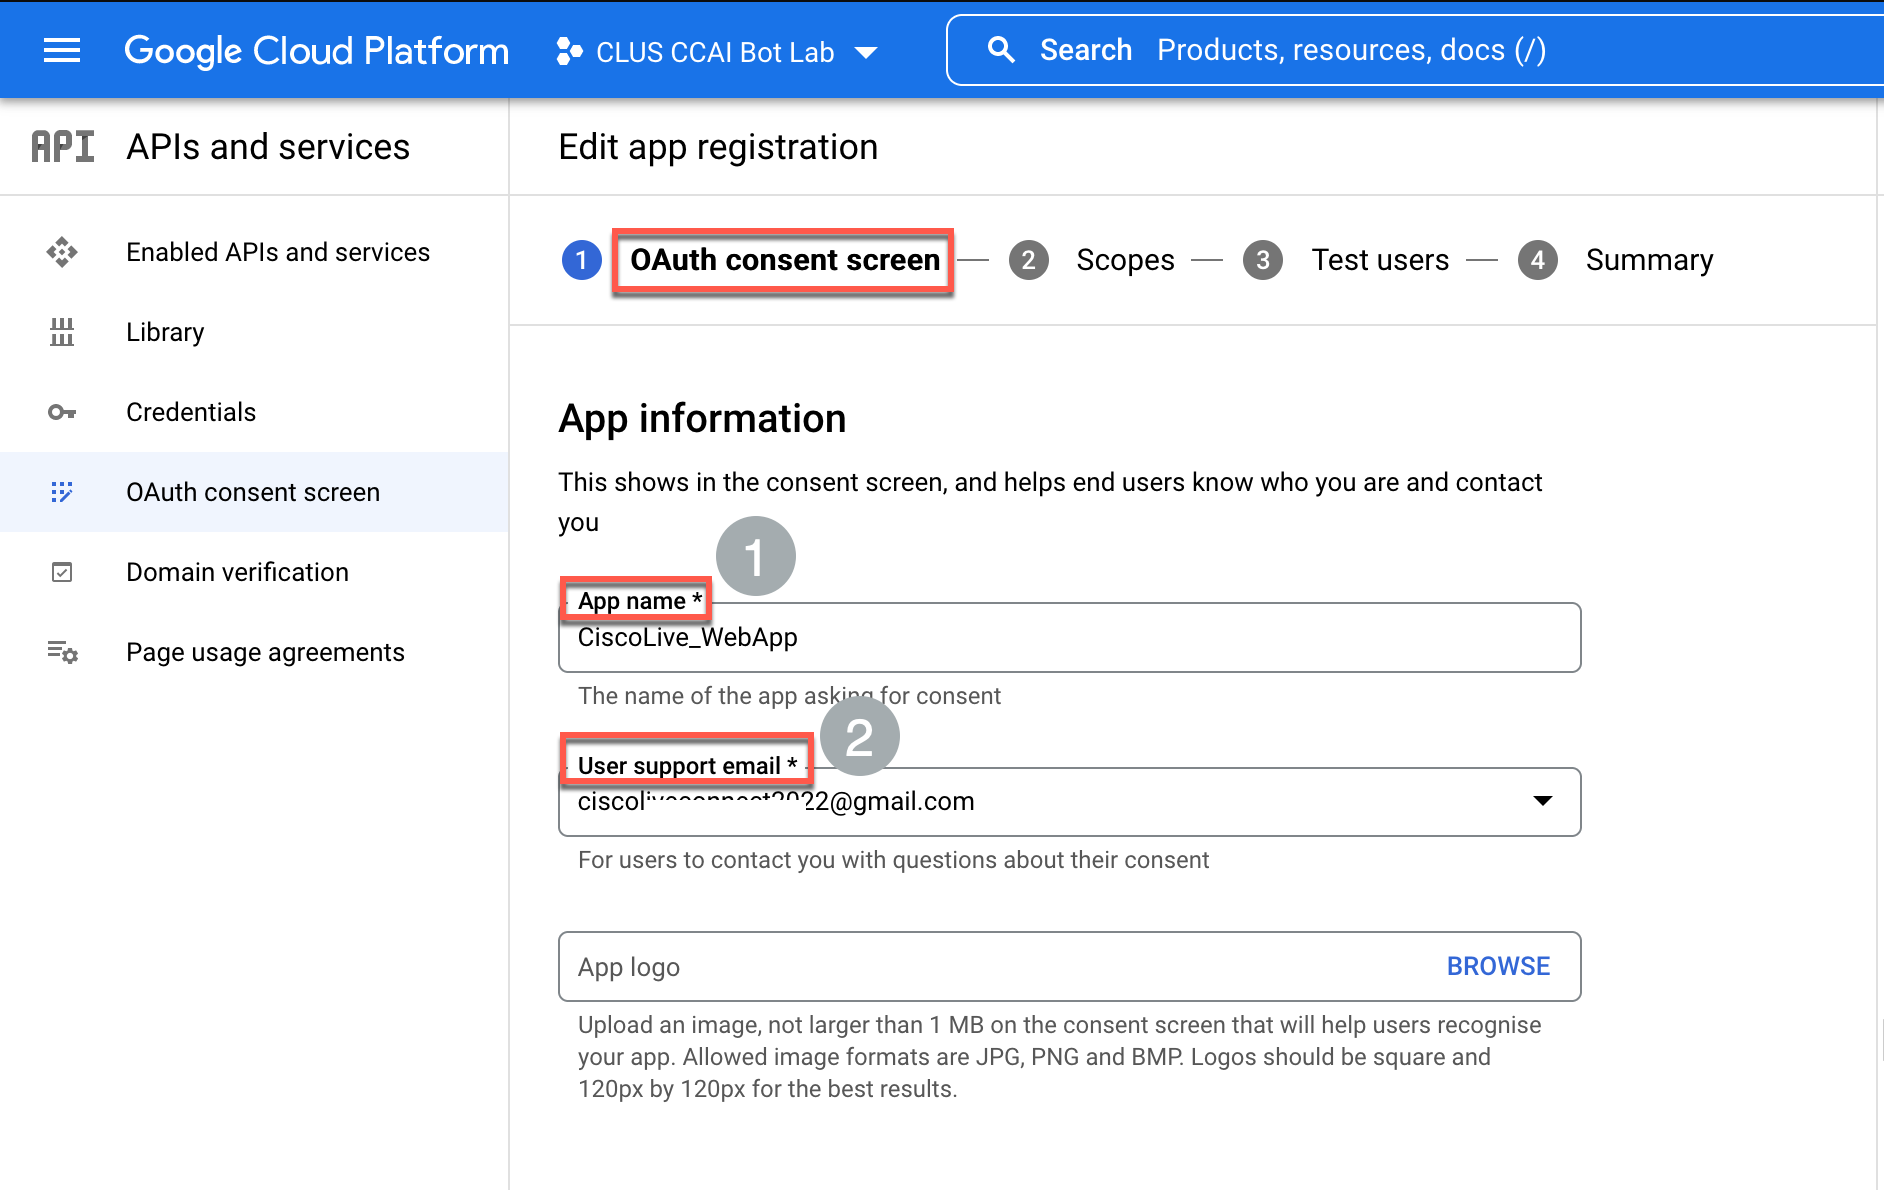
Input a desired App name and select the User supported email (Enter the Gmail account mentioned in Step-1 )
-
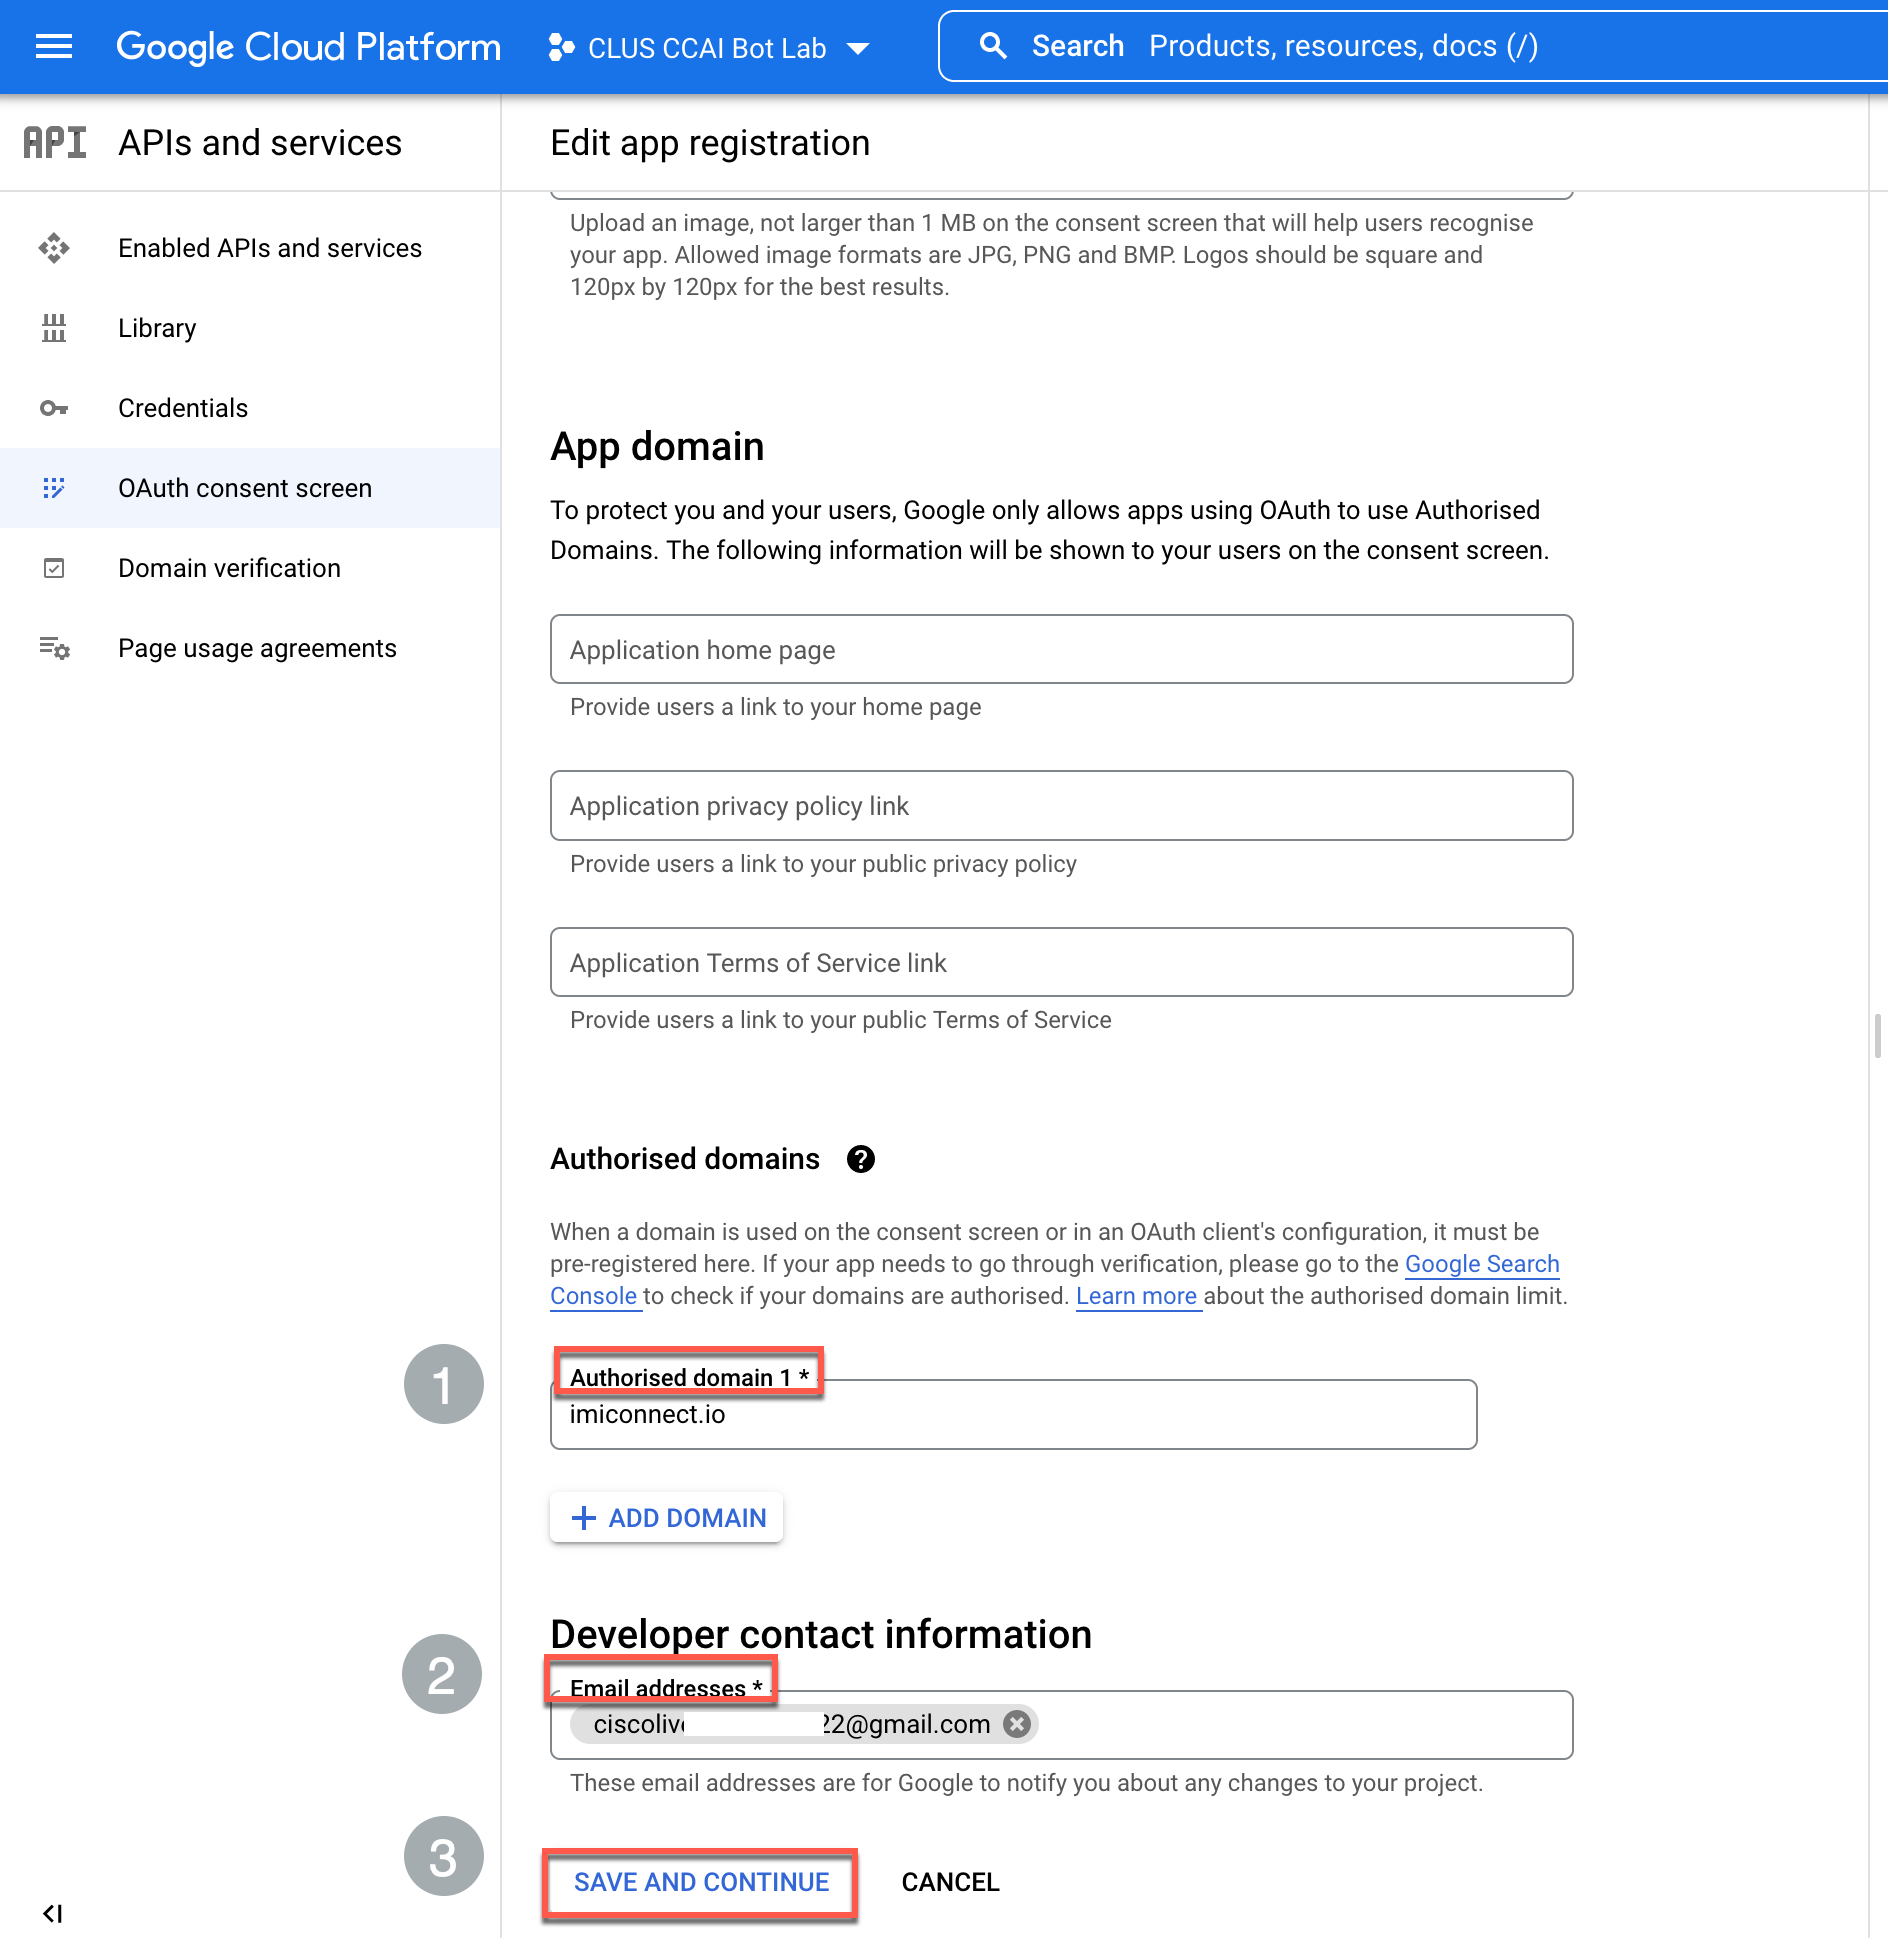
Input Authorized domain as webexconnect.io
-
Input Email addresses as the Gmail account mentioned in Step-1. Click Save and Continue
-
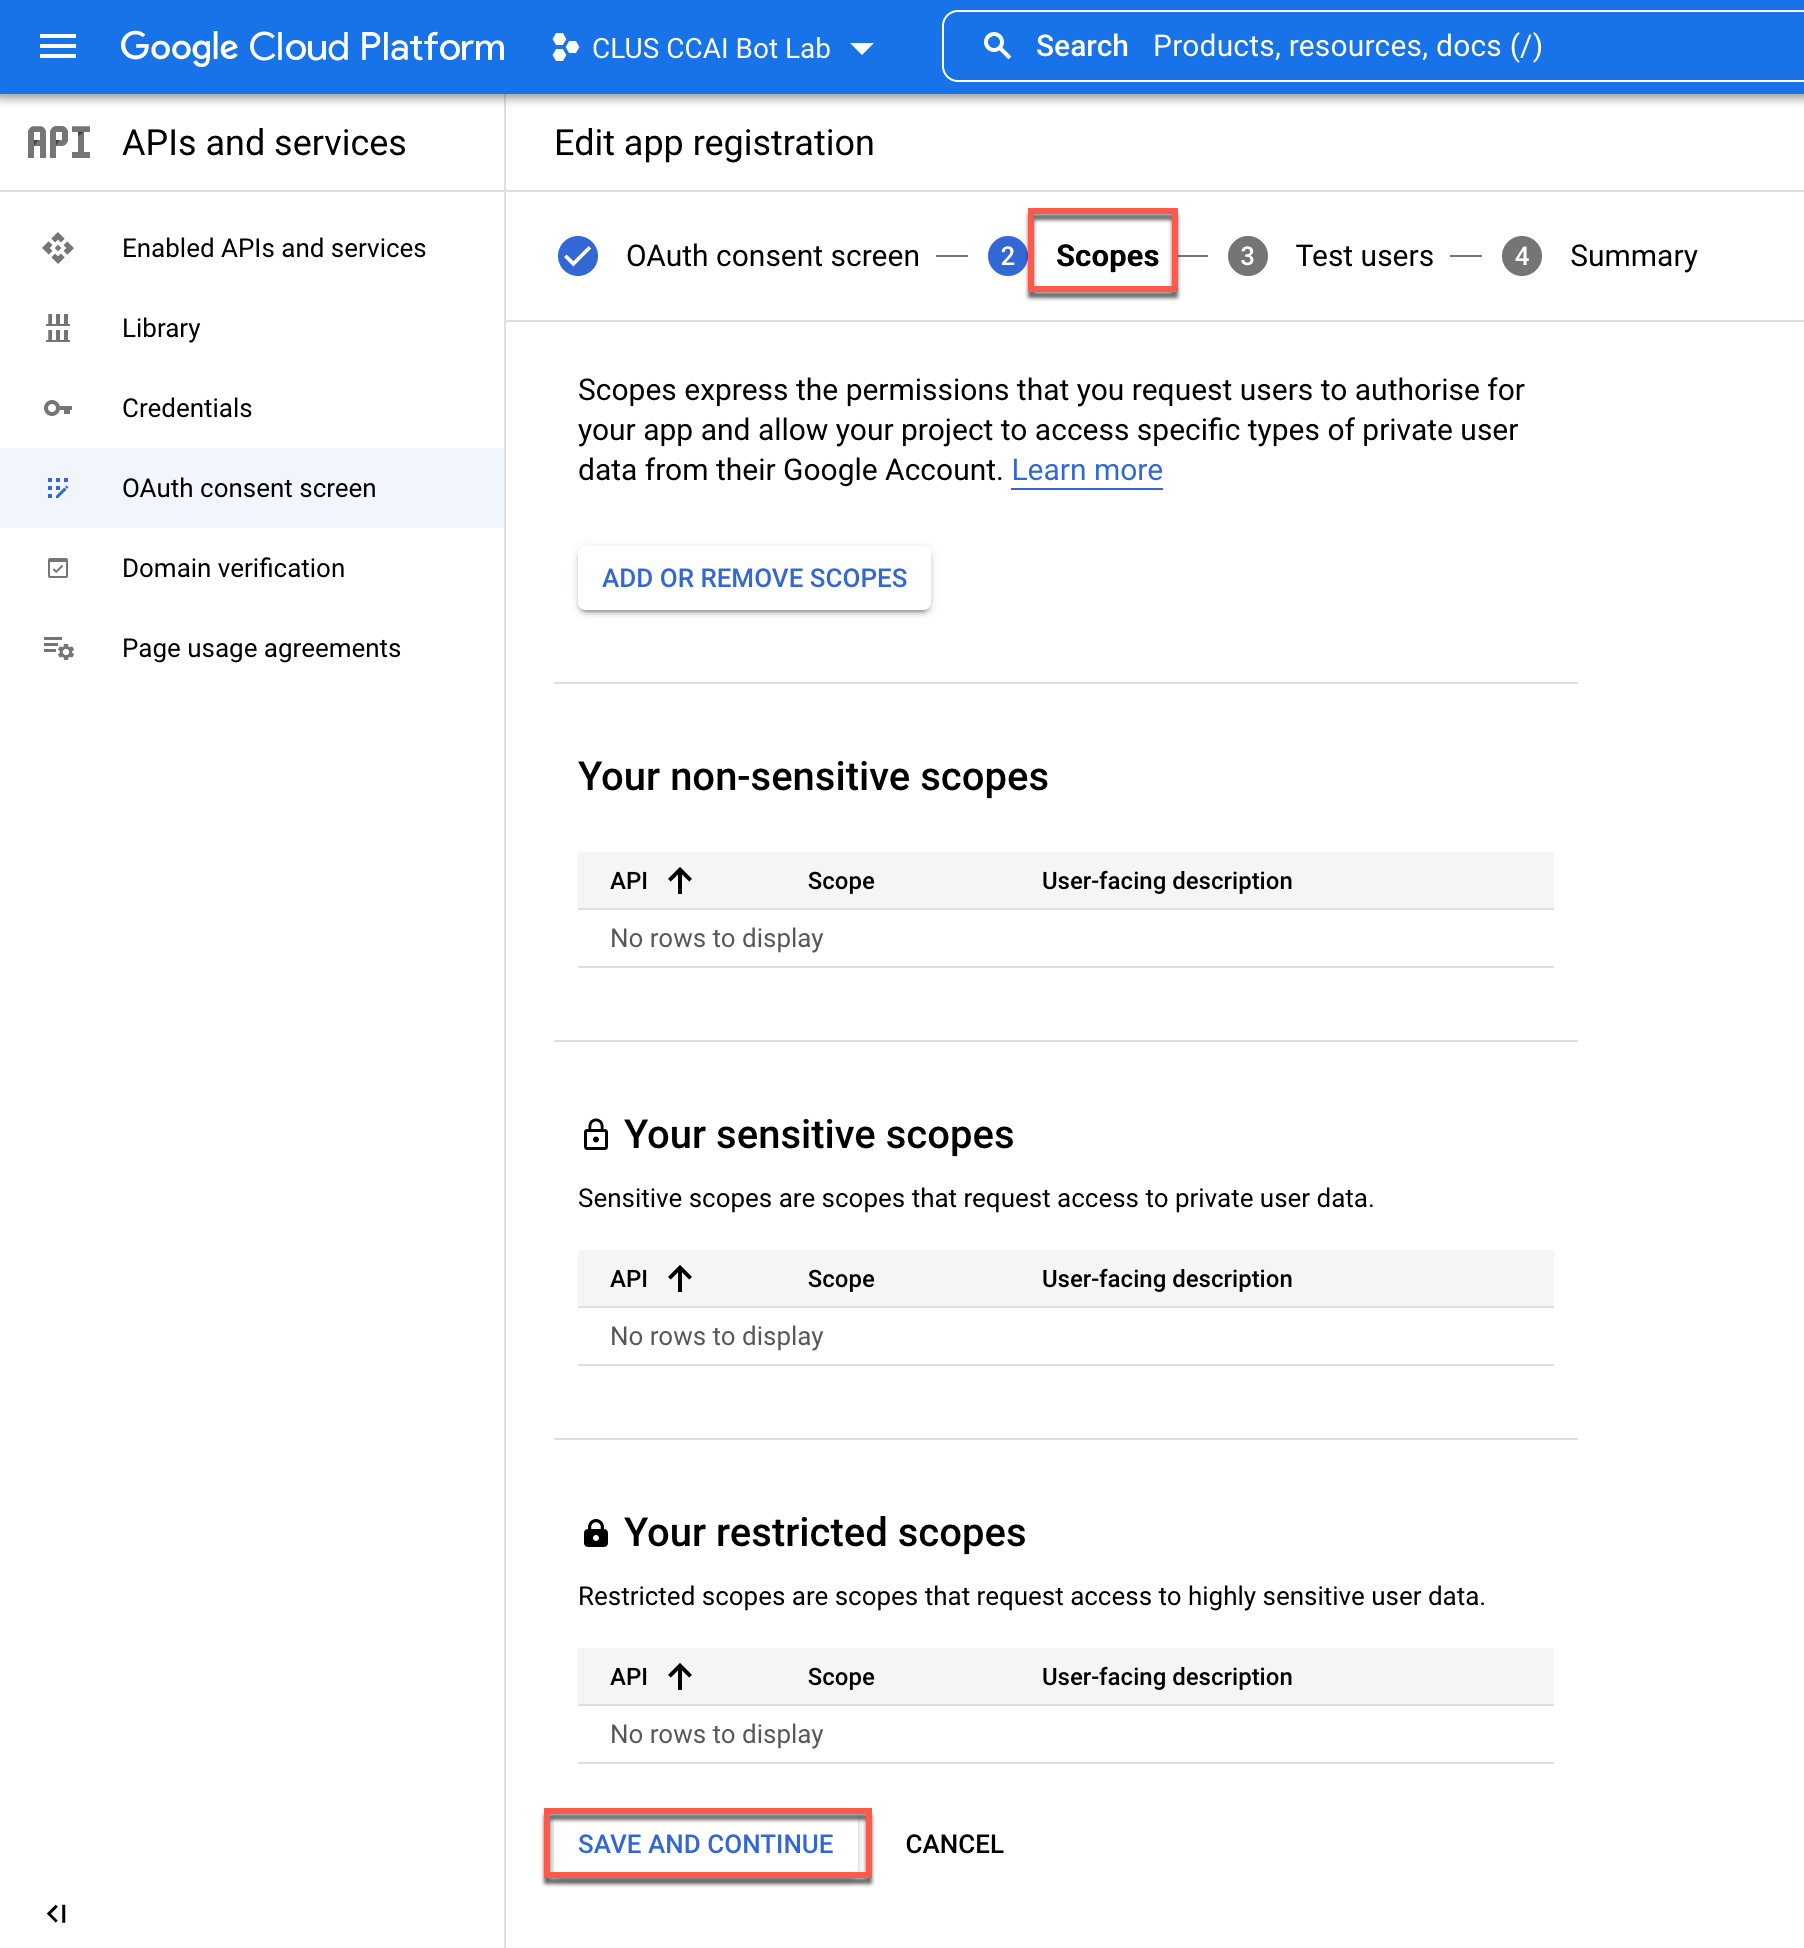
In the Scopes section, no configuration is required. Click Save and Continue
-
In the Test users section, click Add Users
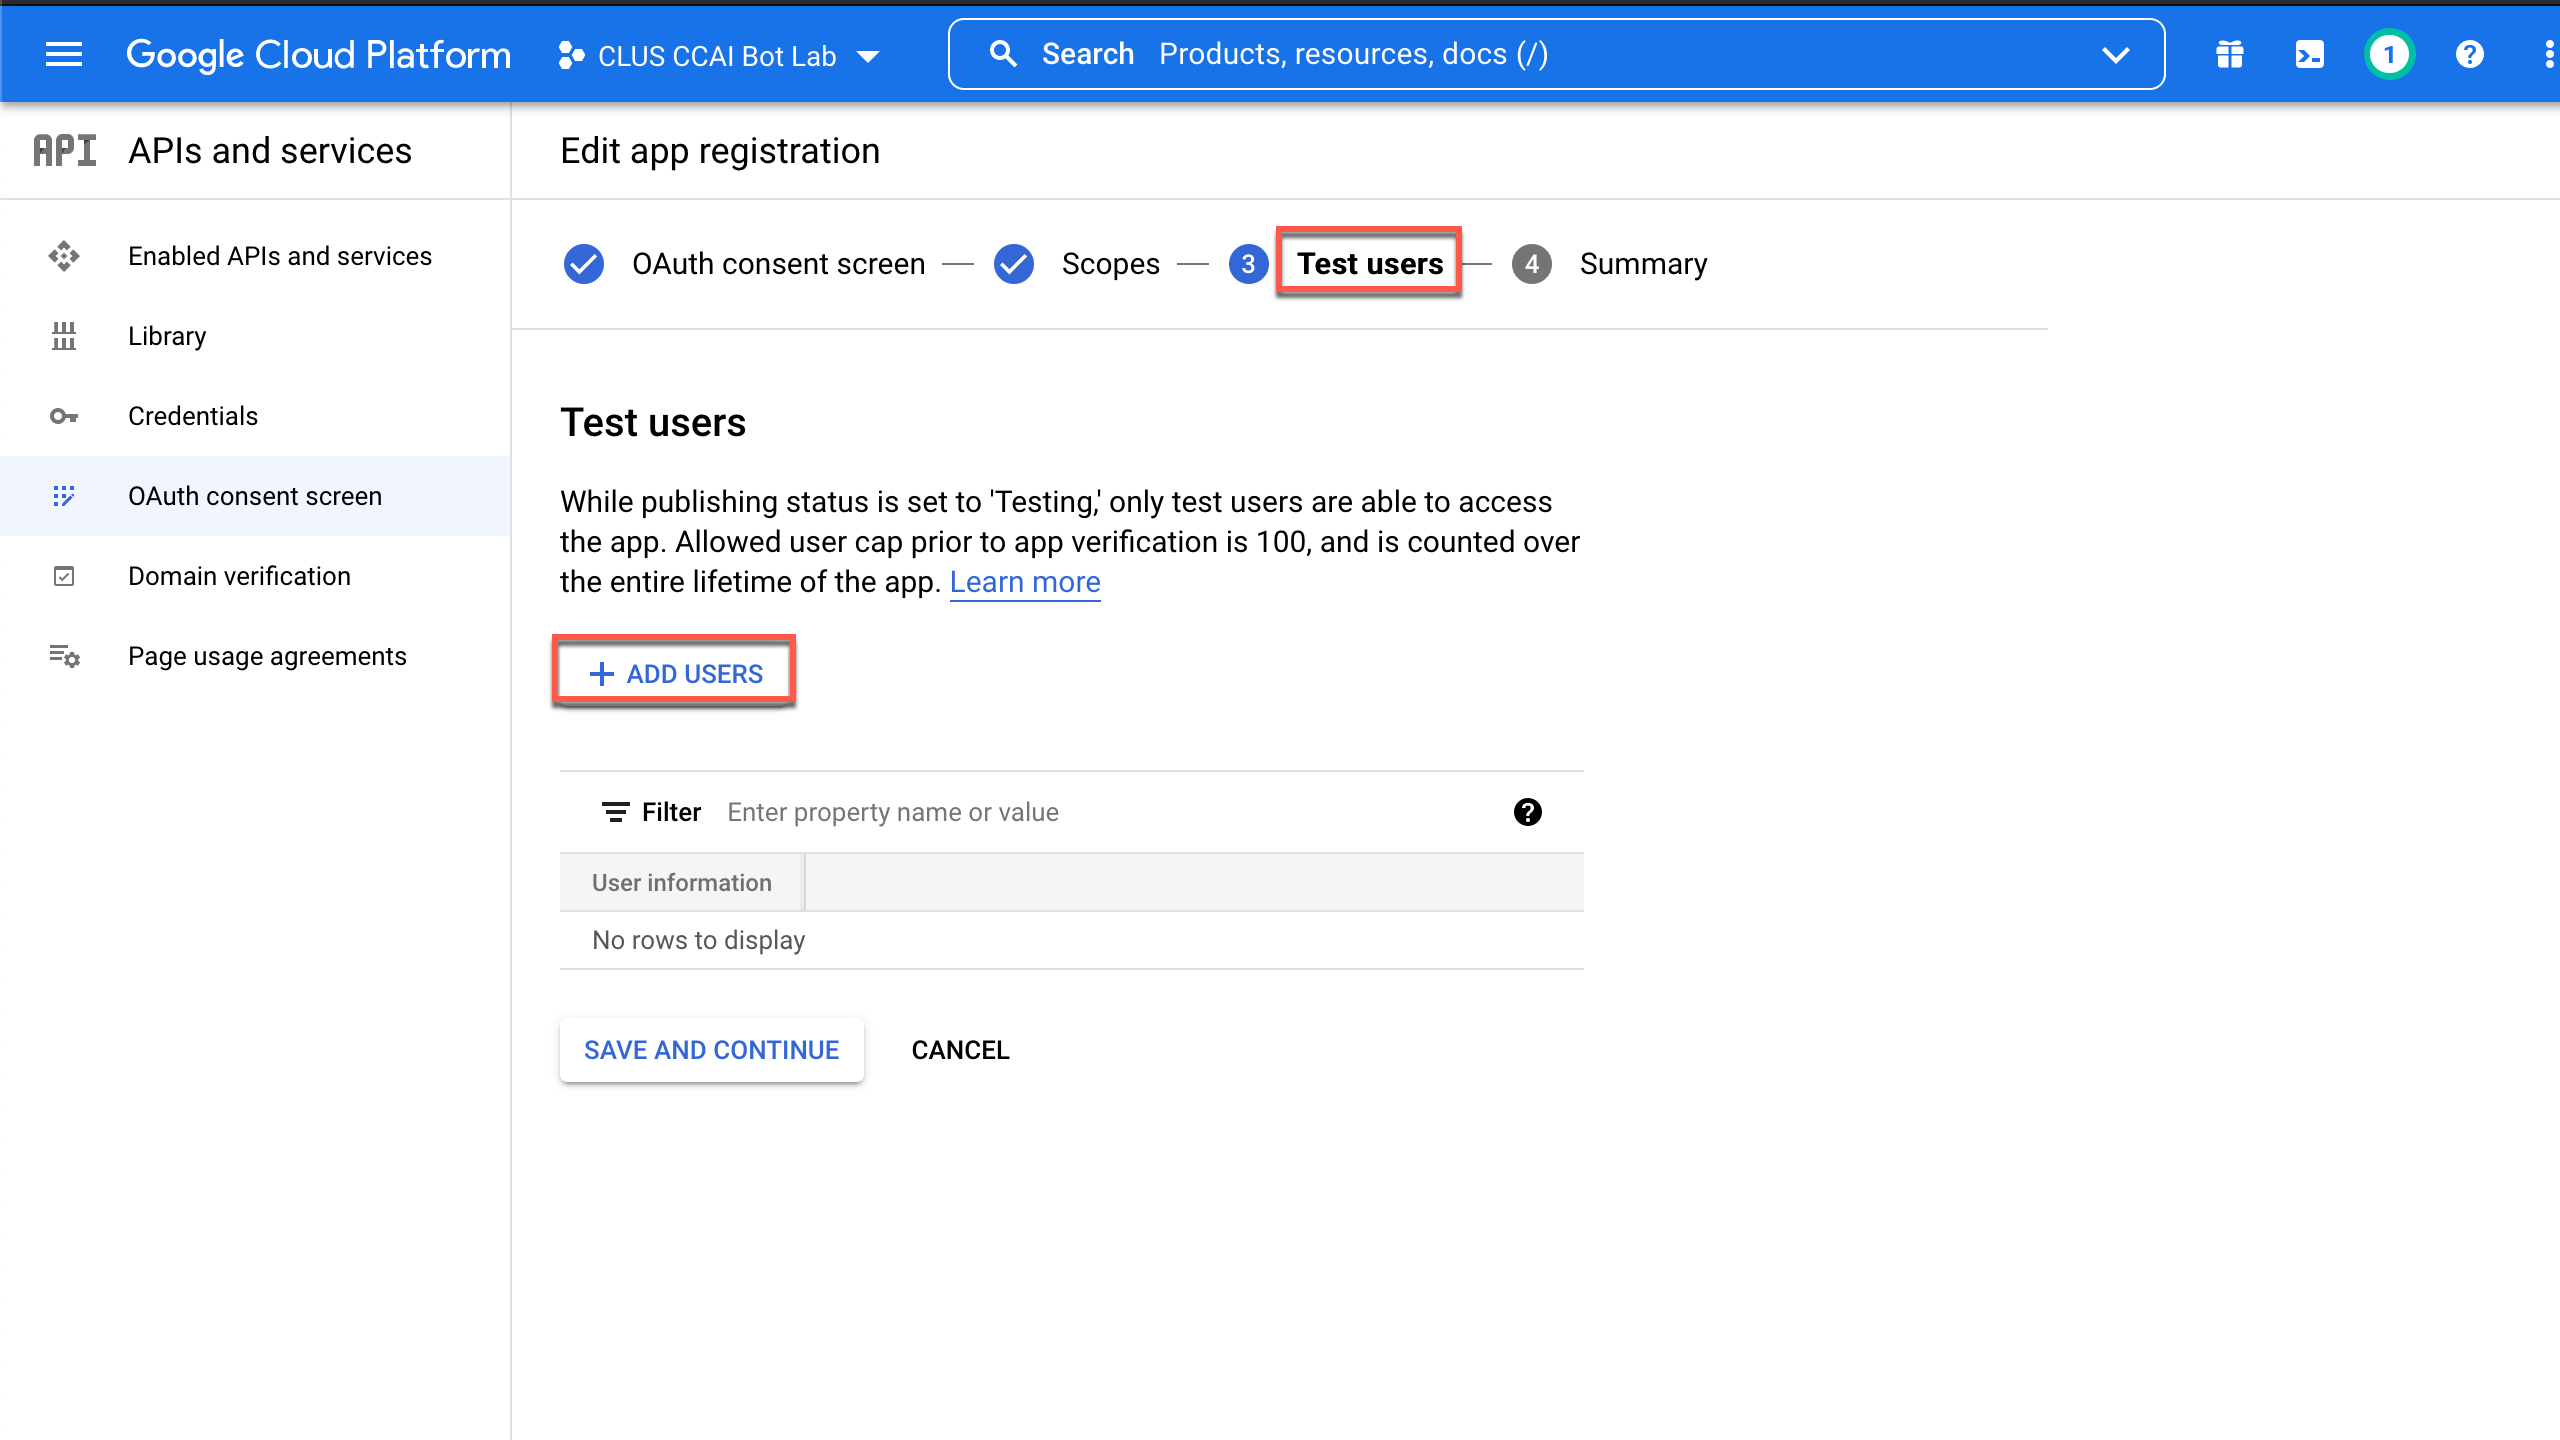
-
Input email address in the add users section (Use the Gmail account mentioned in Step-1) and click Add
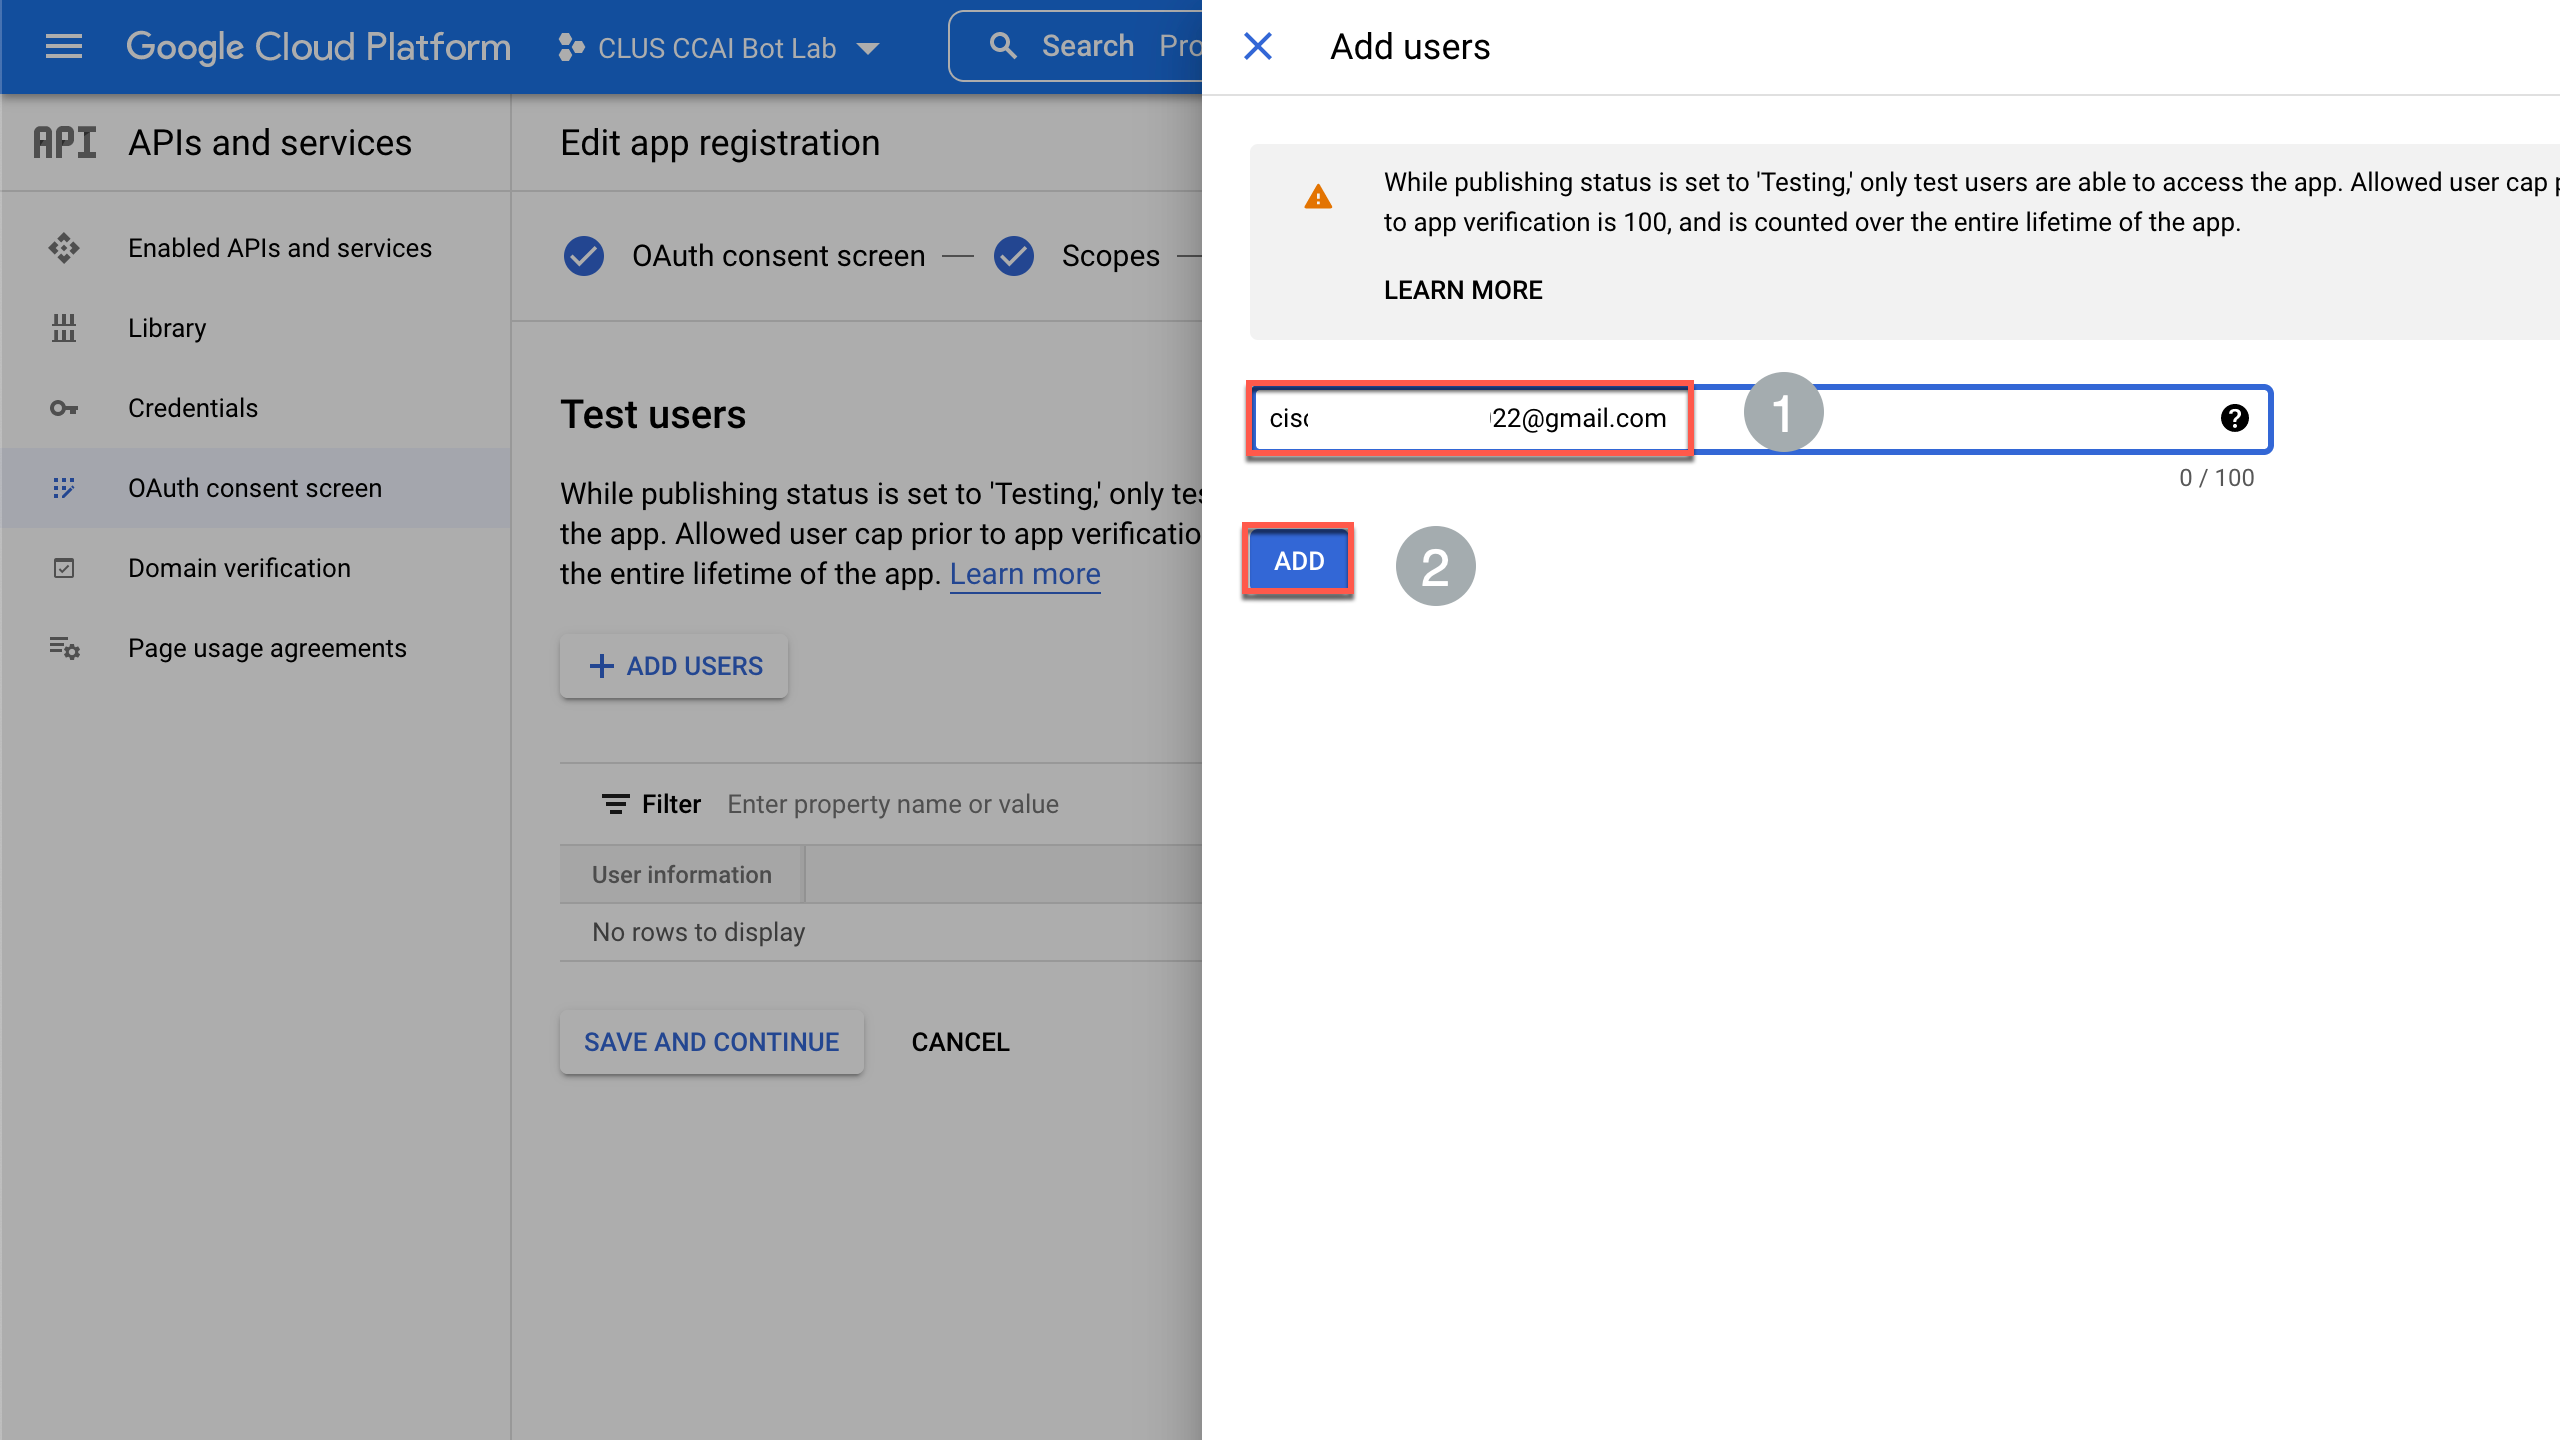
-
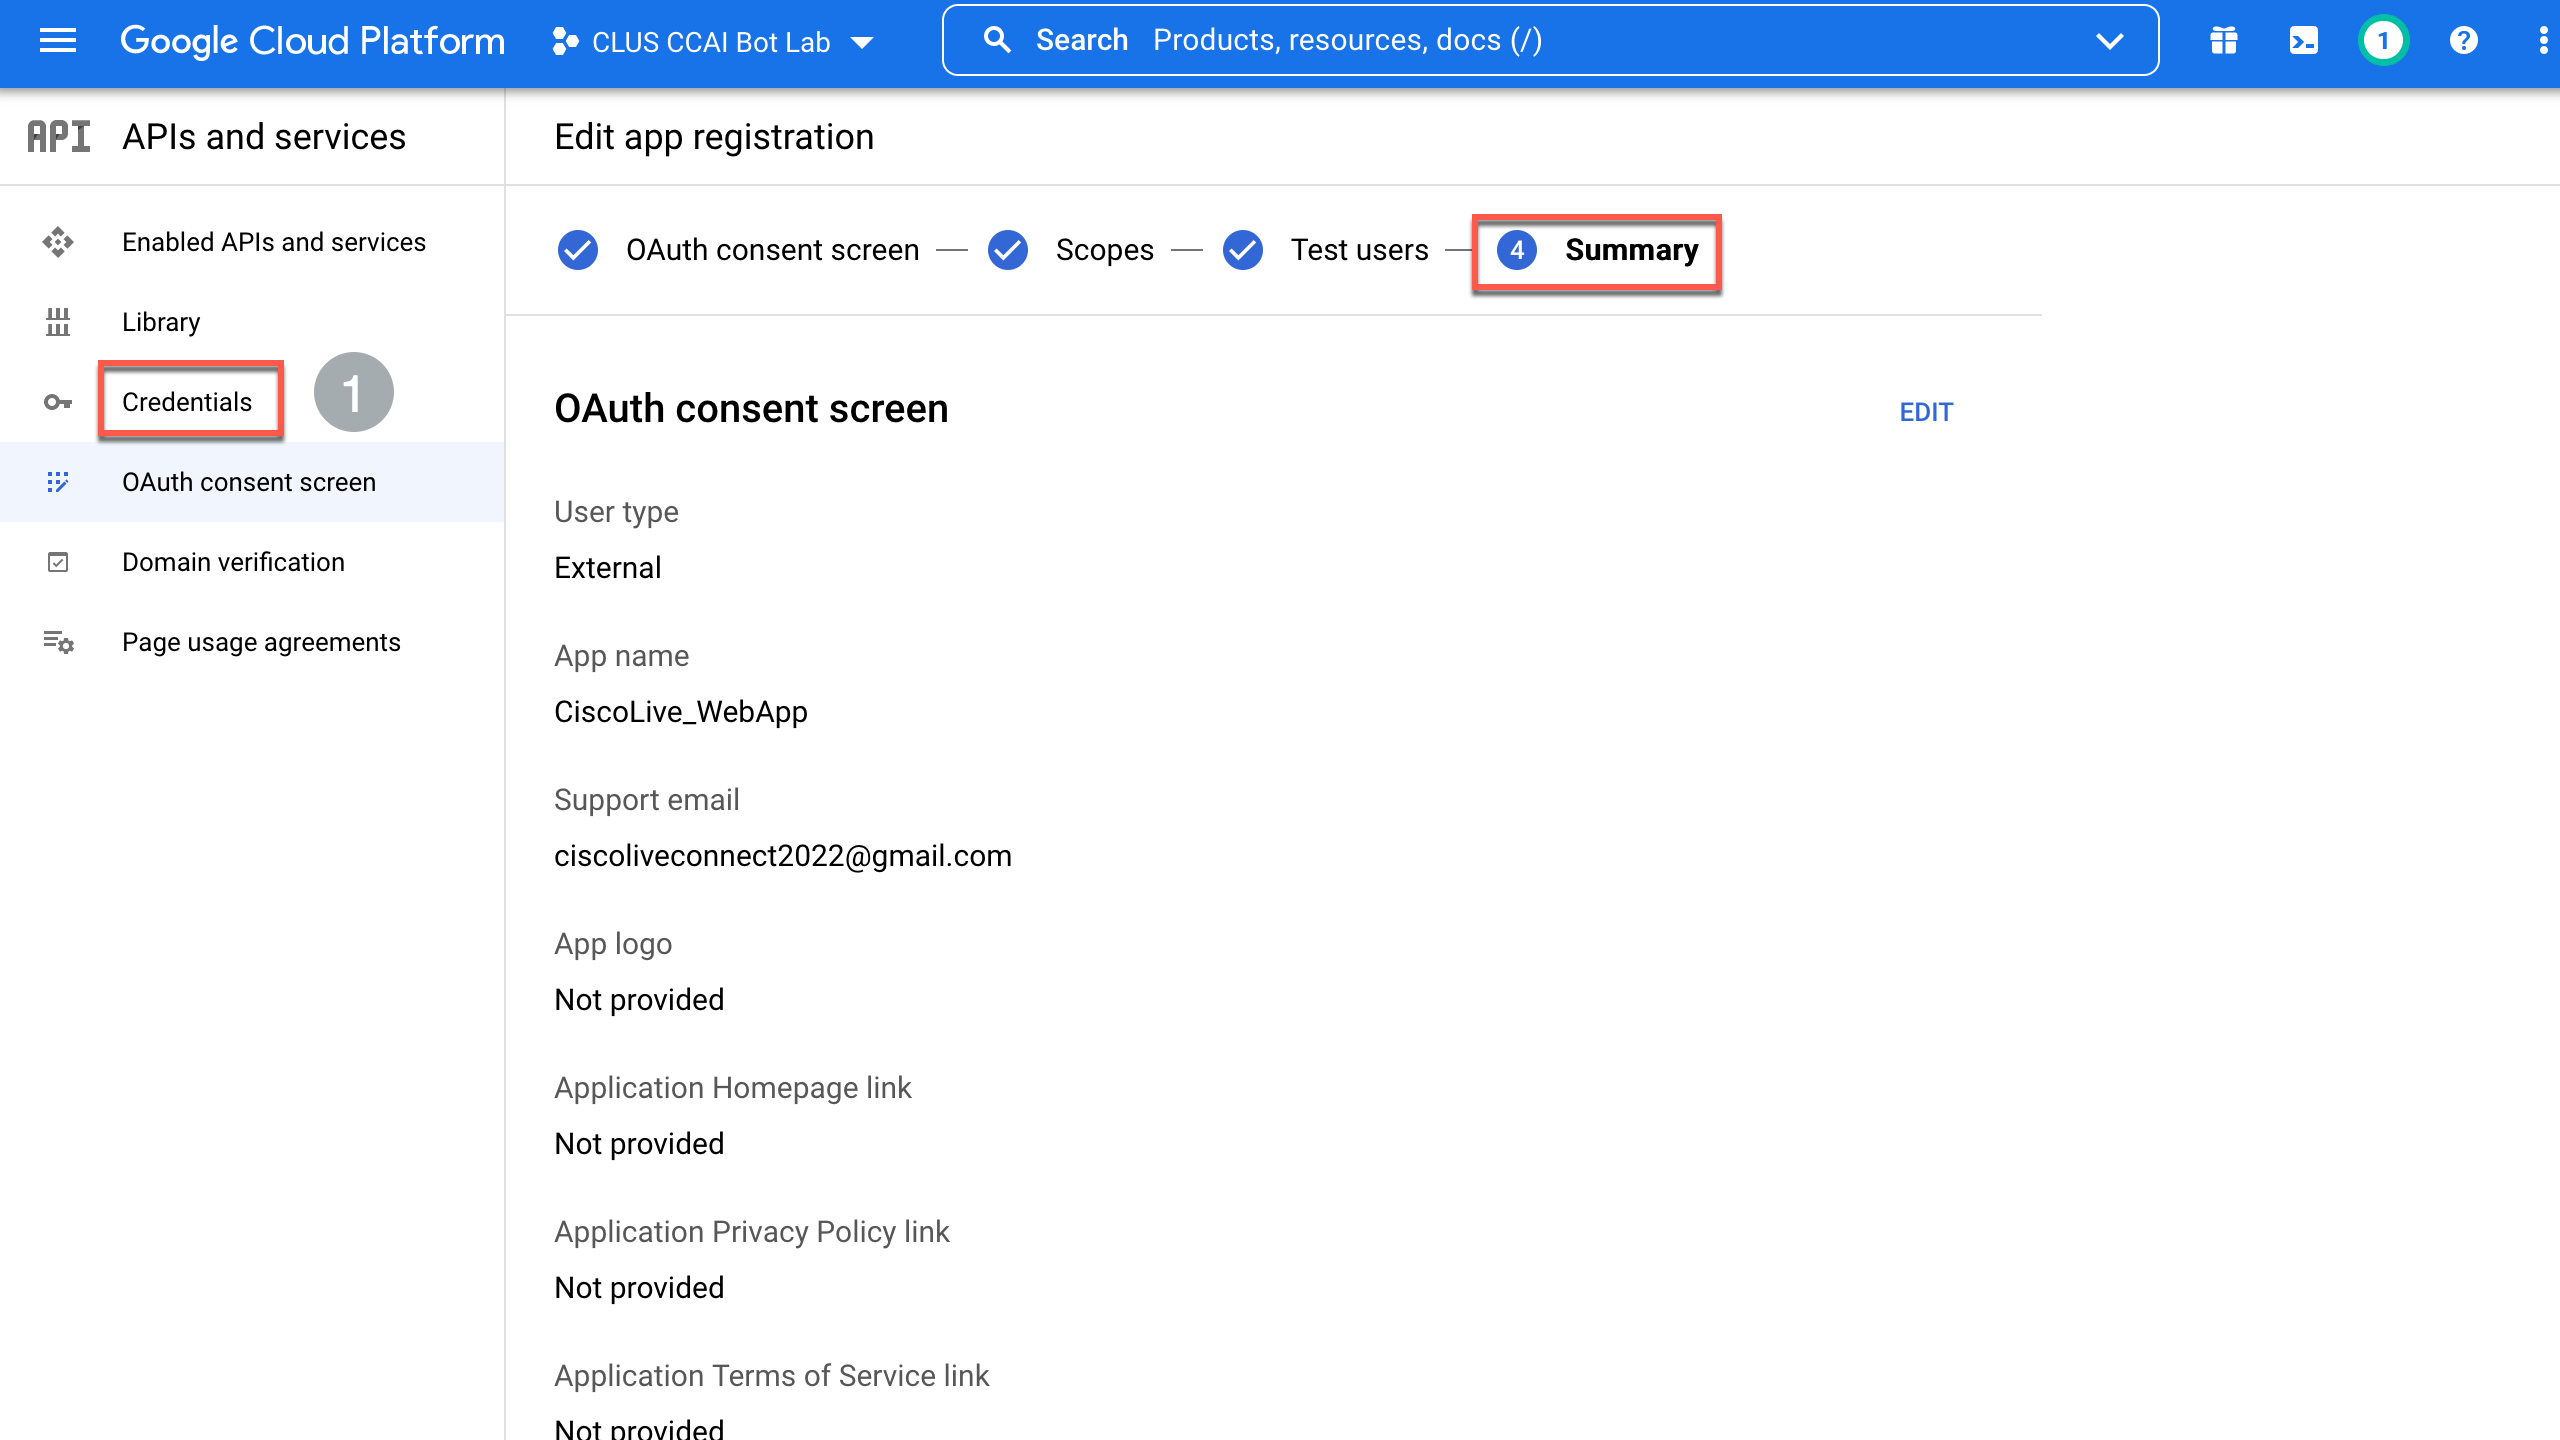
Click Save and Continue

-
Once the OAuth consent screen configurations are complete, click on Credentials
-
Click Create Credentials > OAuth client ID
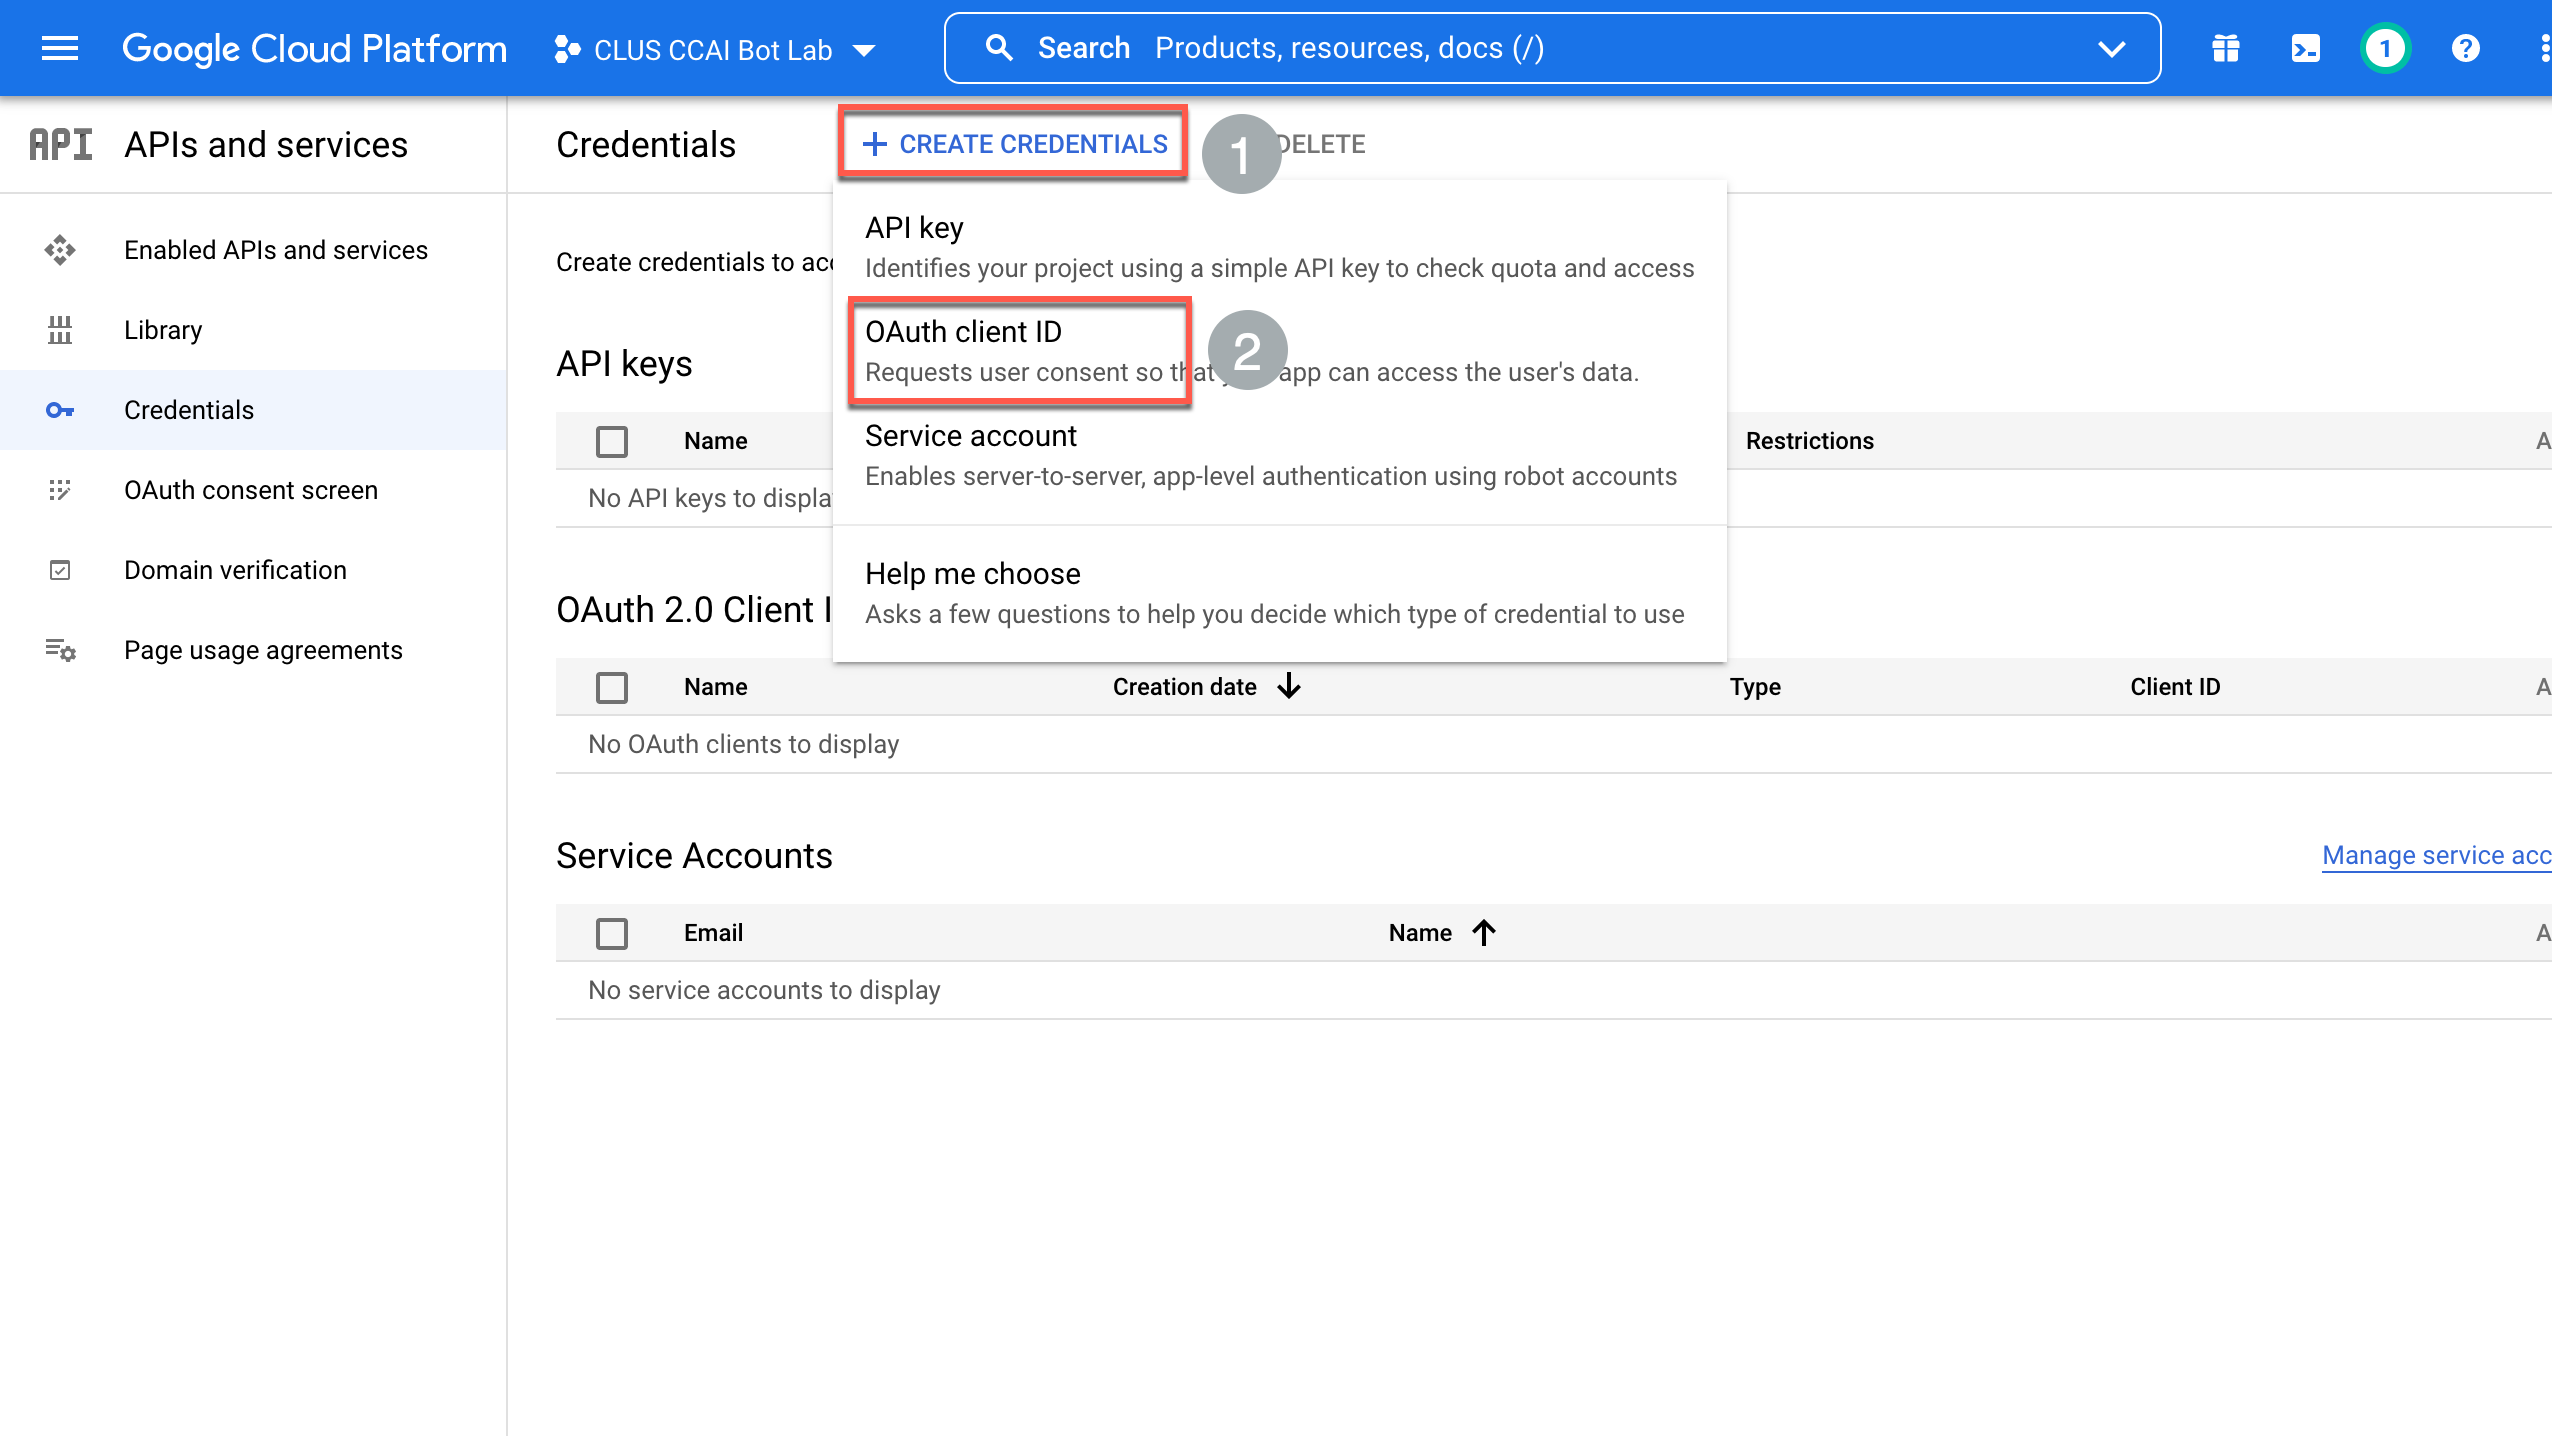
-
Select Application type as Web application and a desired Name
-
Click Add URI and input the value as https://oauth.us.webexconnect.io/callback and click Create
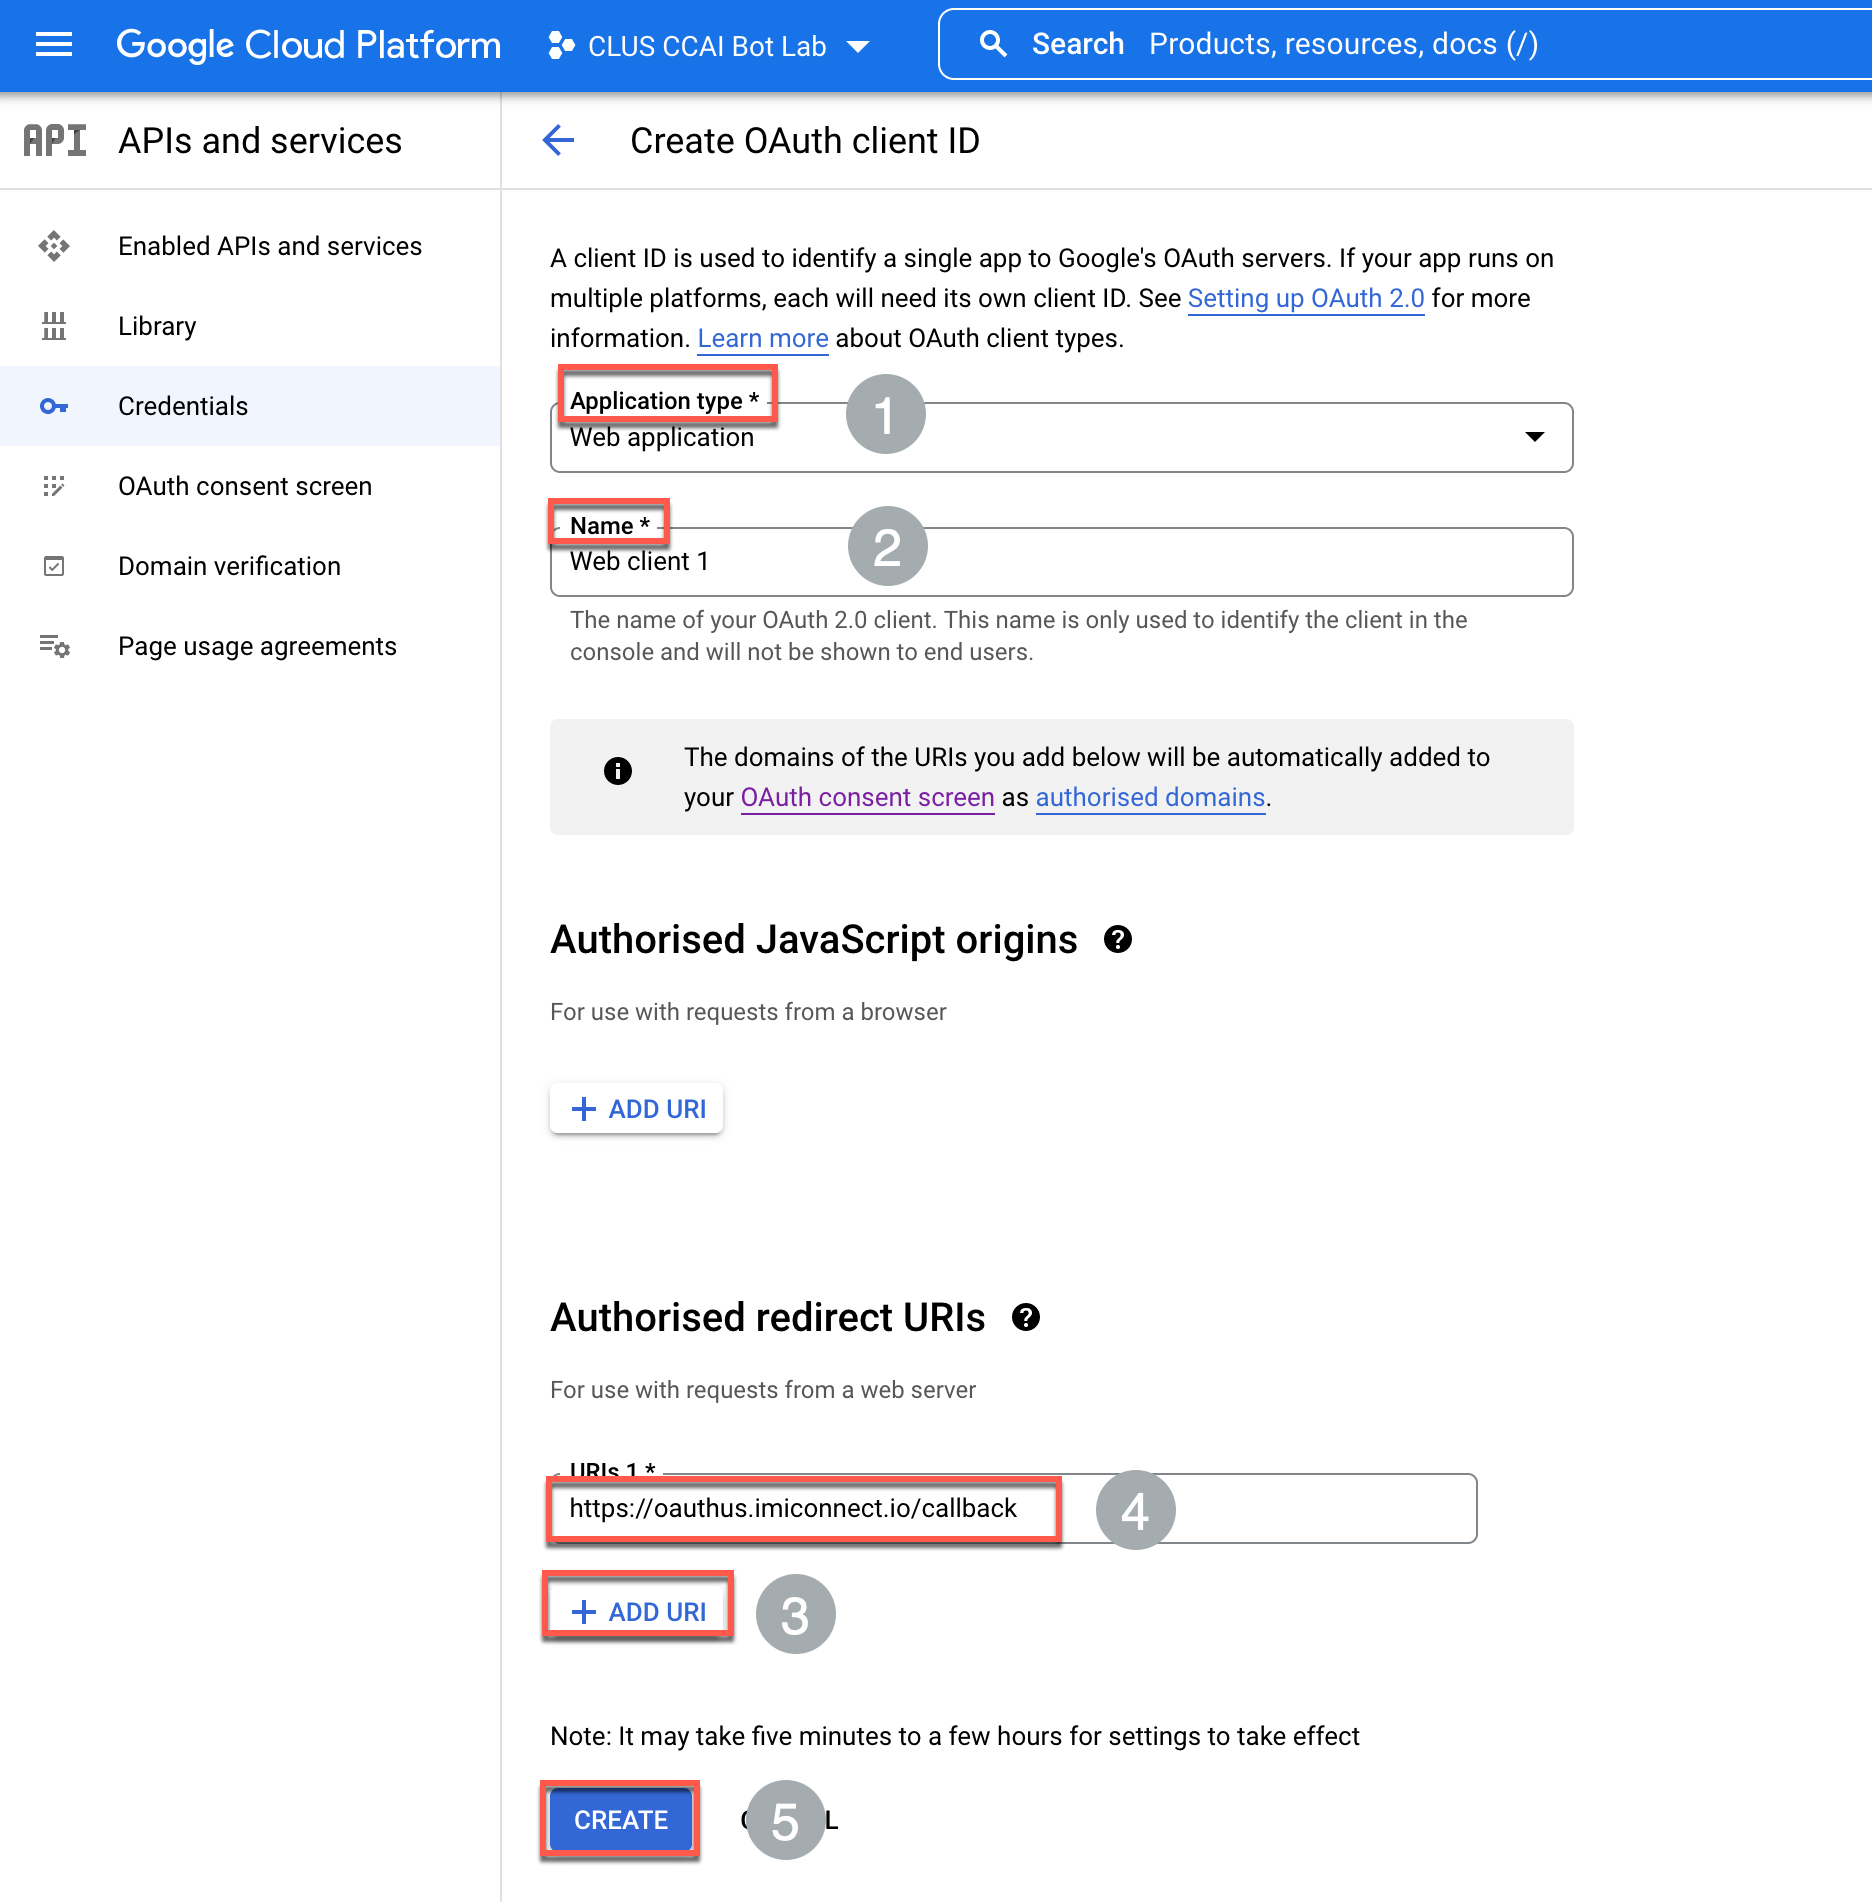
-
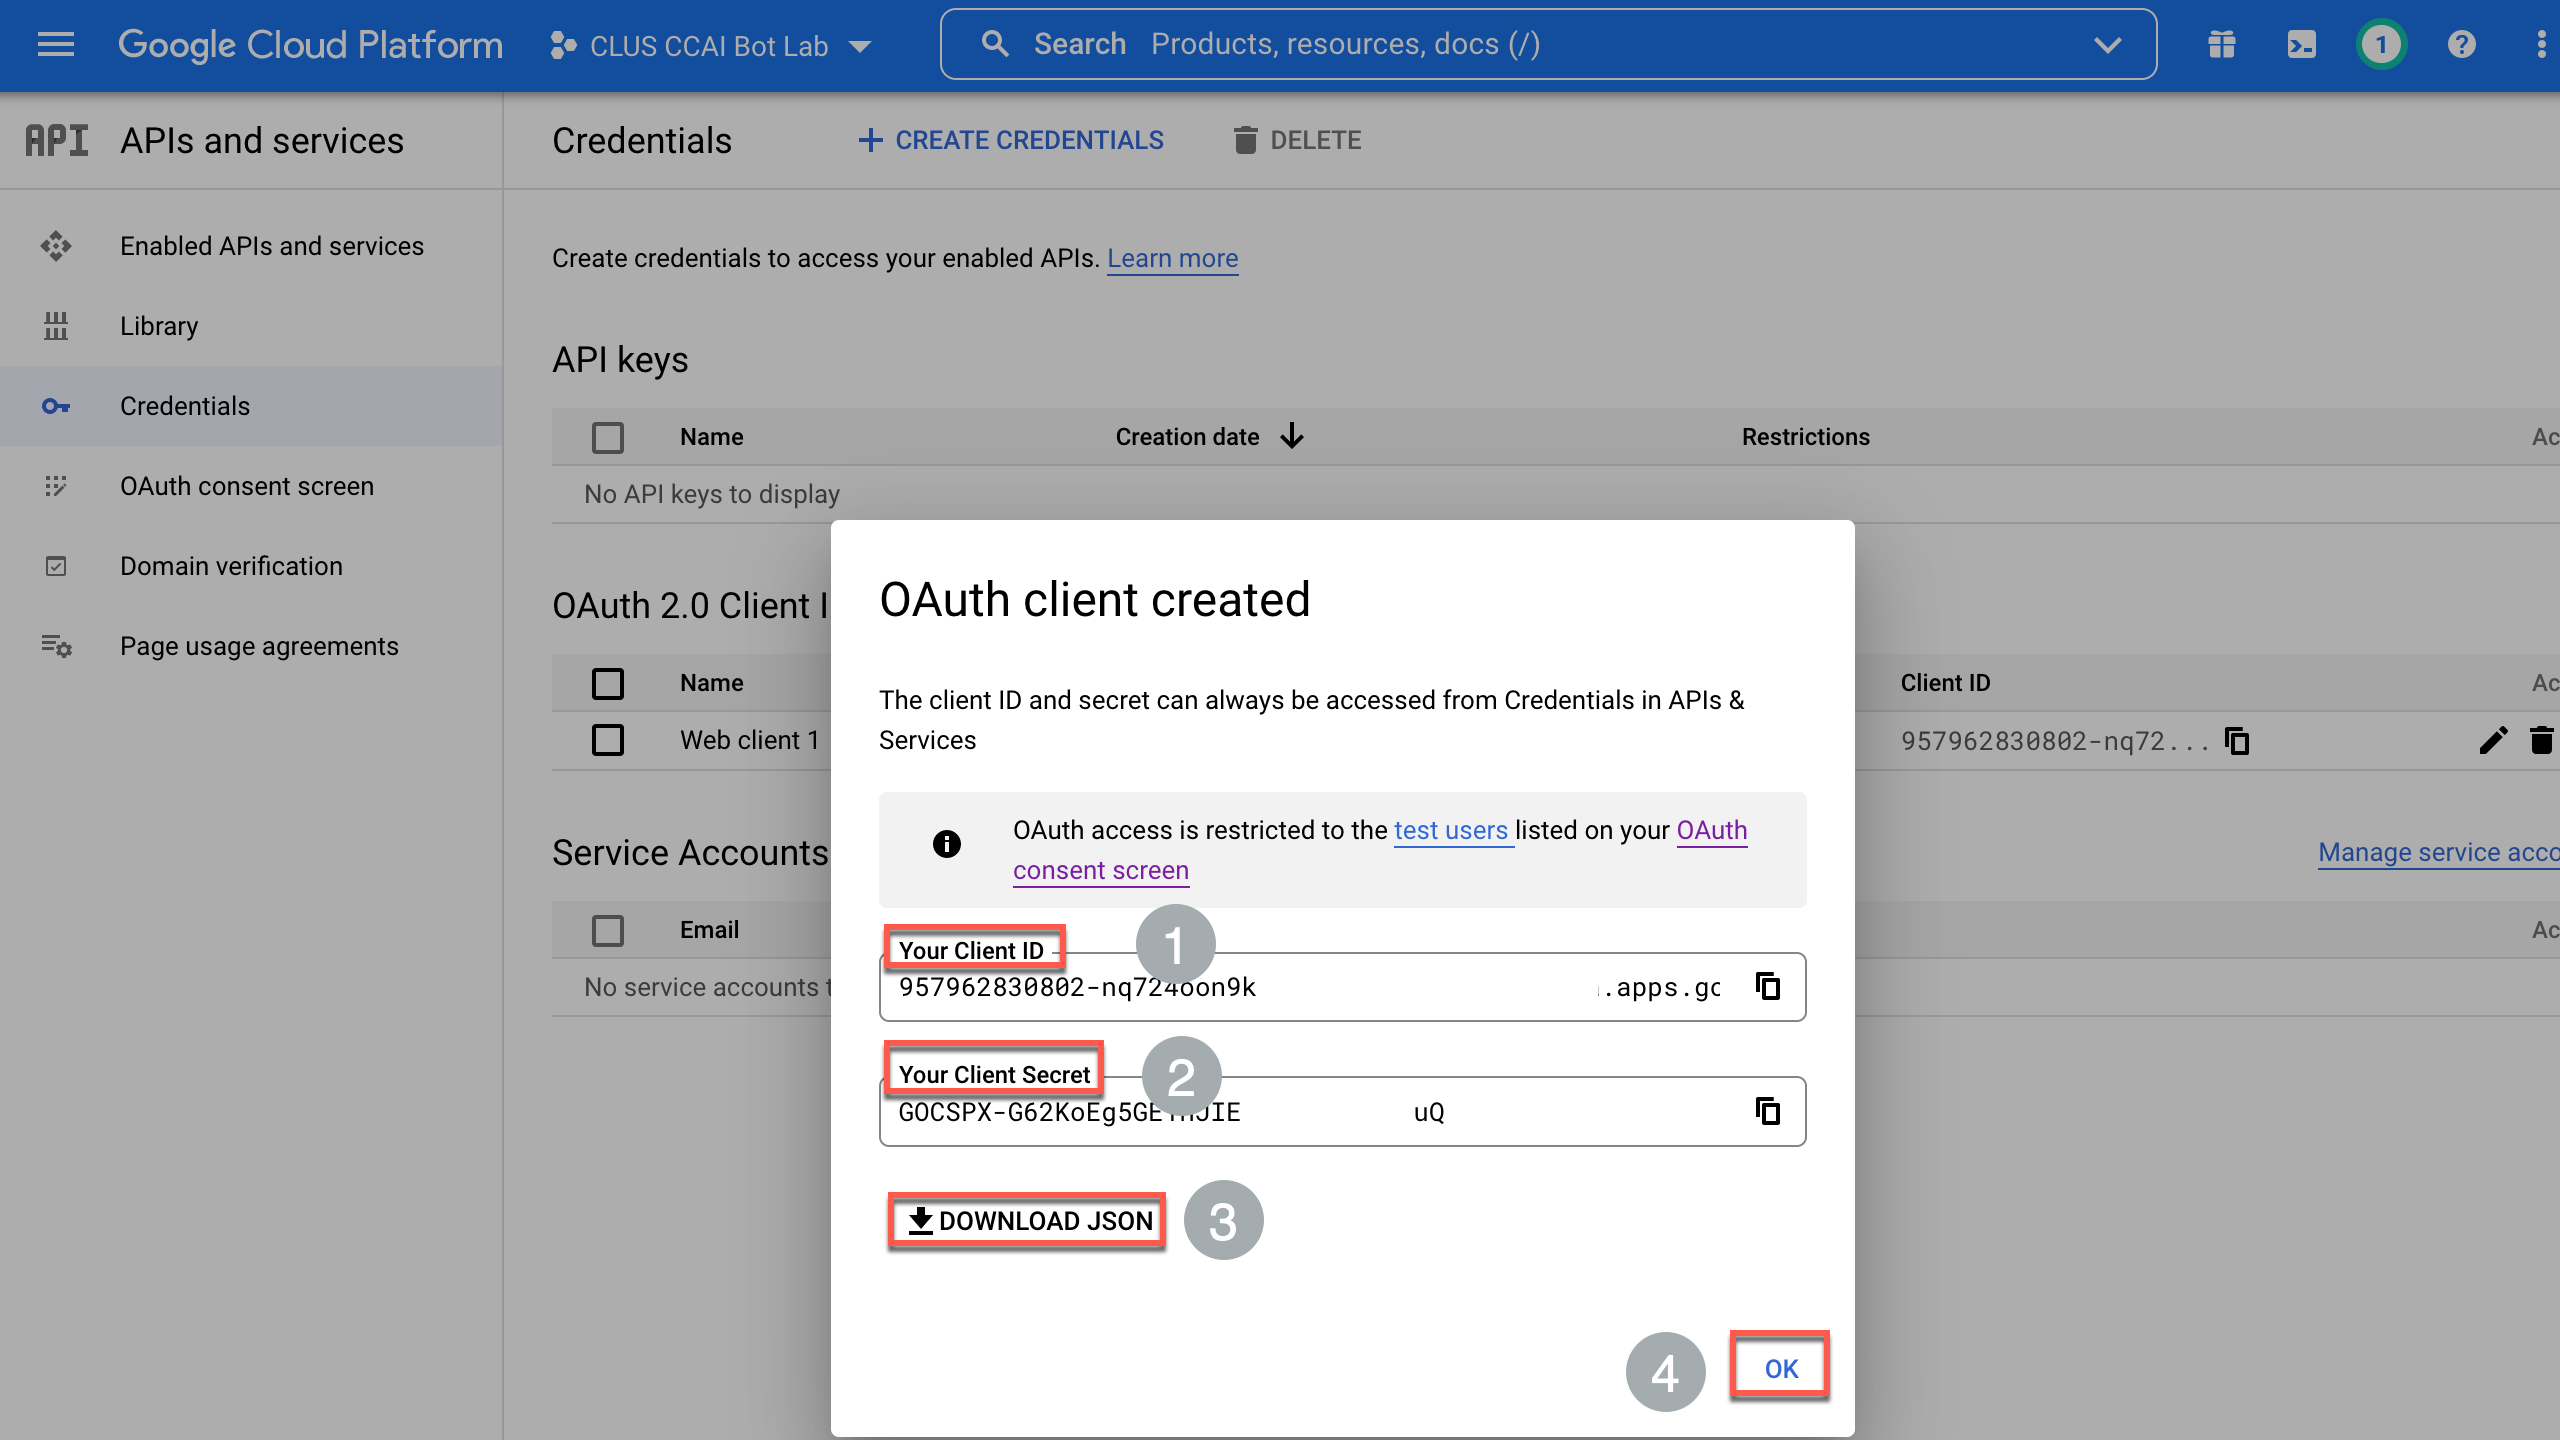
Copy the Client ID , Client Secret to a text editor in the local computer. Also, Download JSON . We will need these values at a later stage to complete the configuration.
-
Click OK
Step 3. Authorize Google Dialog flow node in Webex Connect
-
Login to your respective Webex Connect UI using the provided URL: [https://labtenant.us.webexconnect.io/]
-
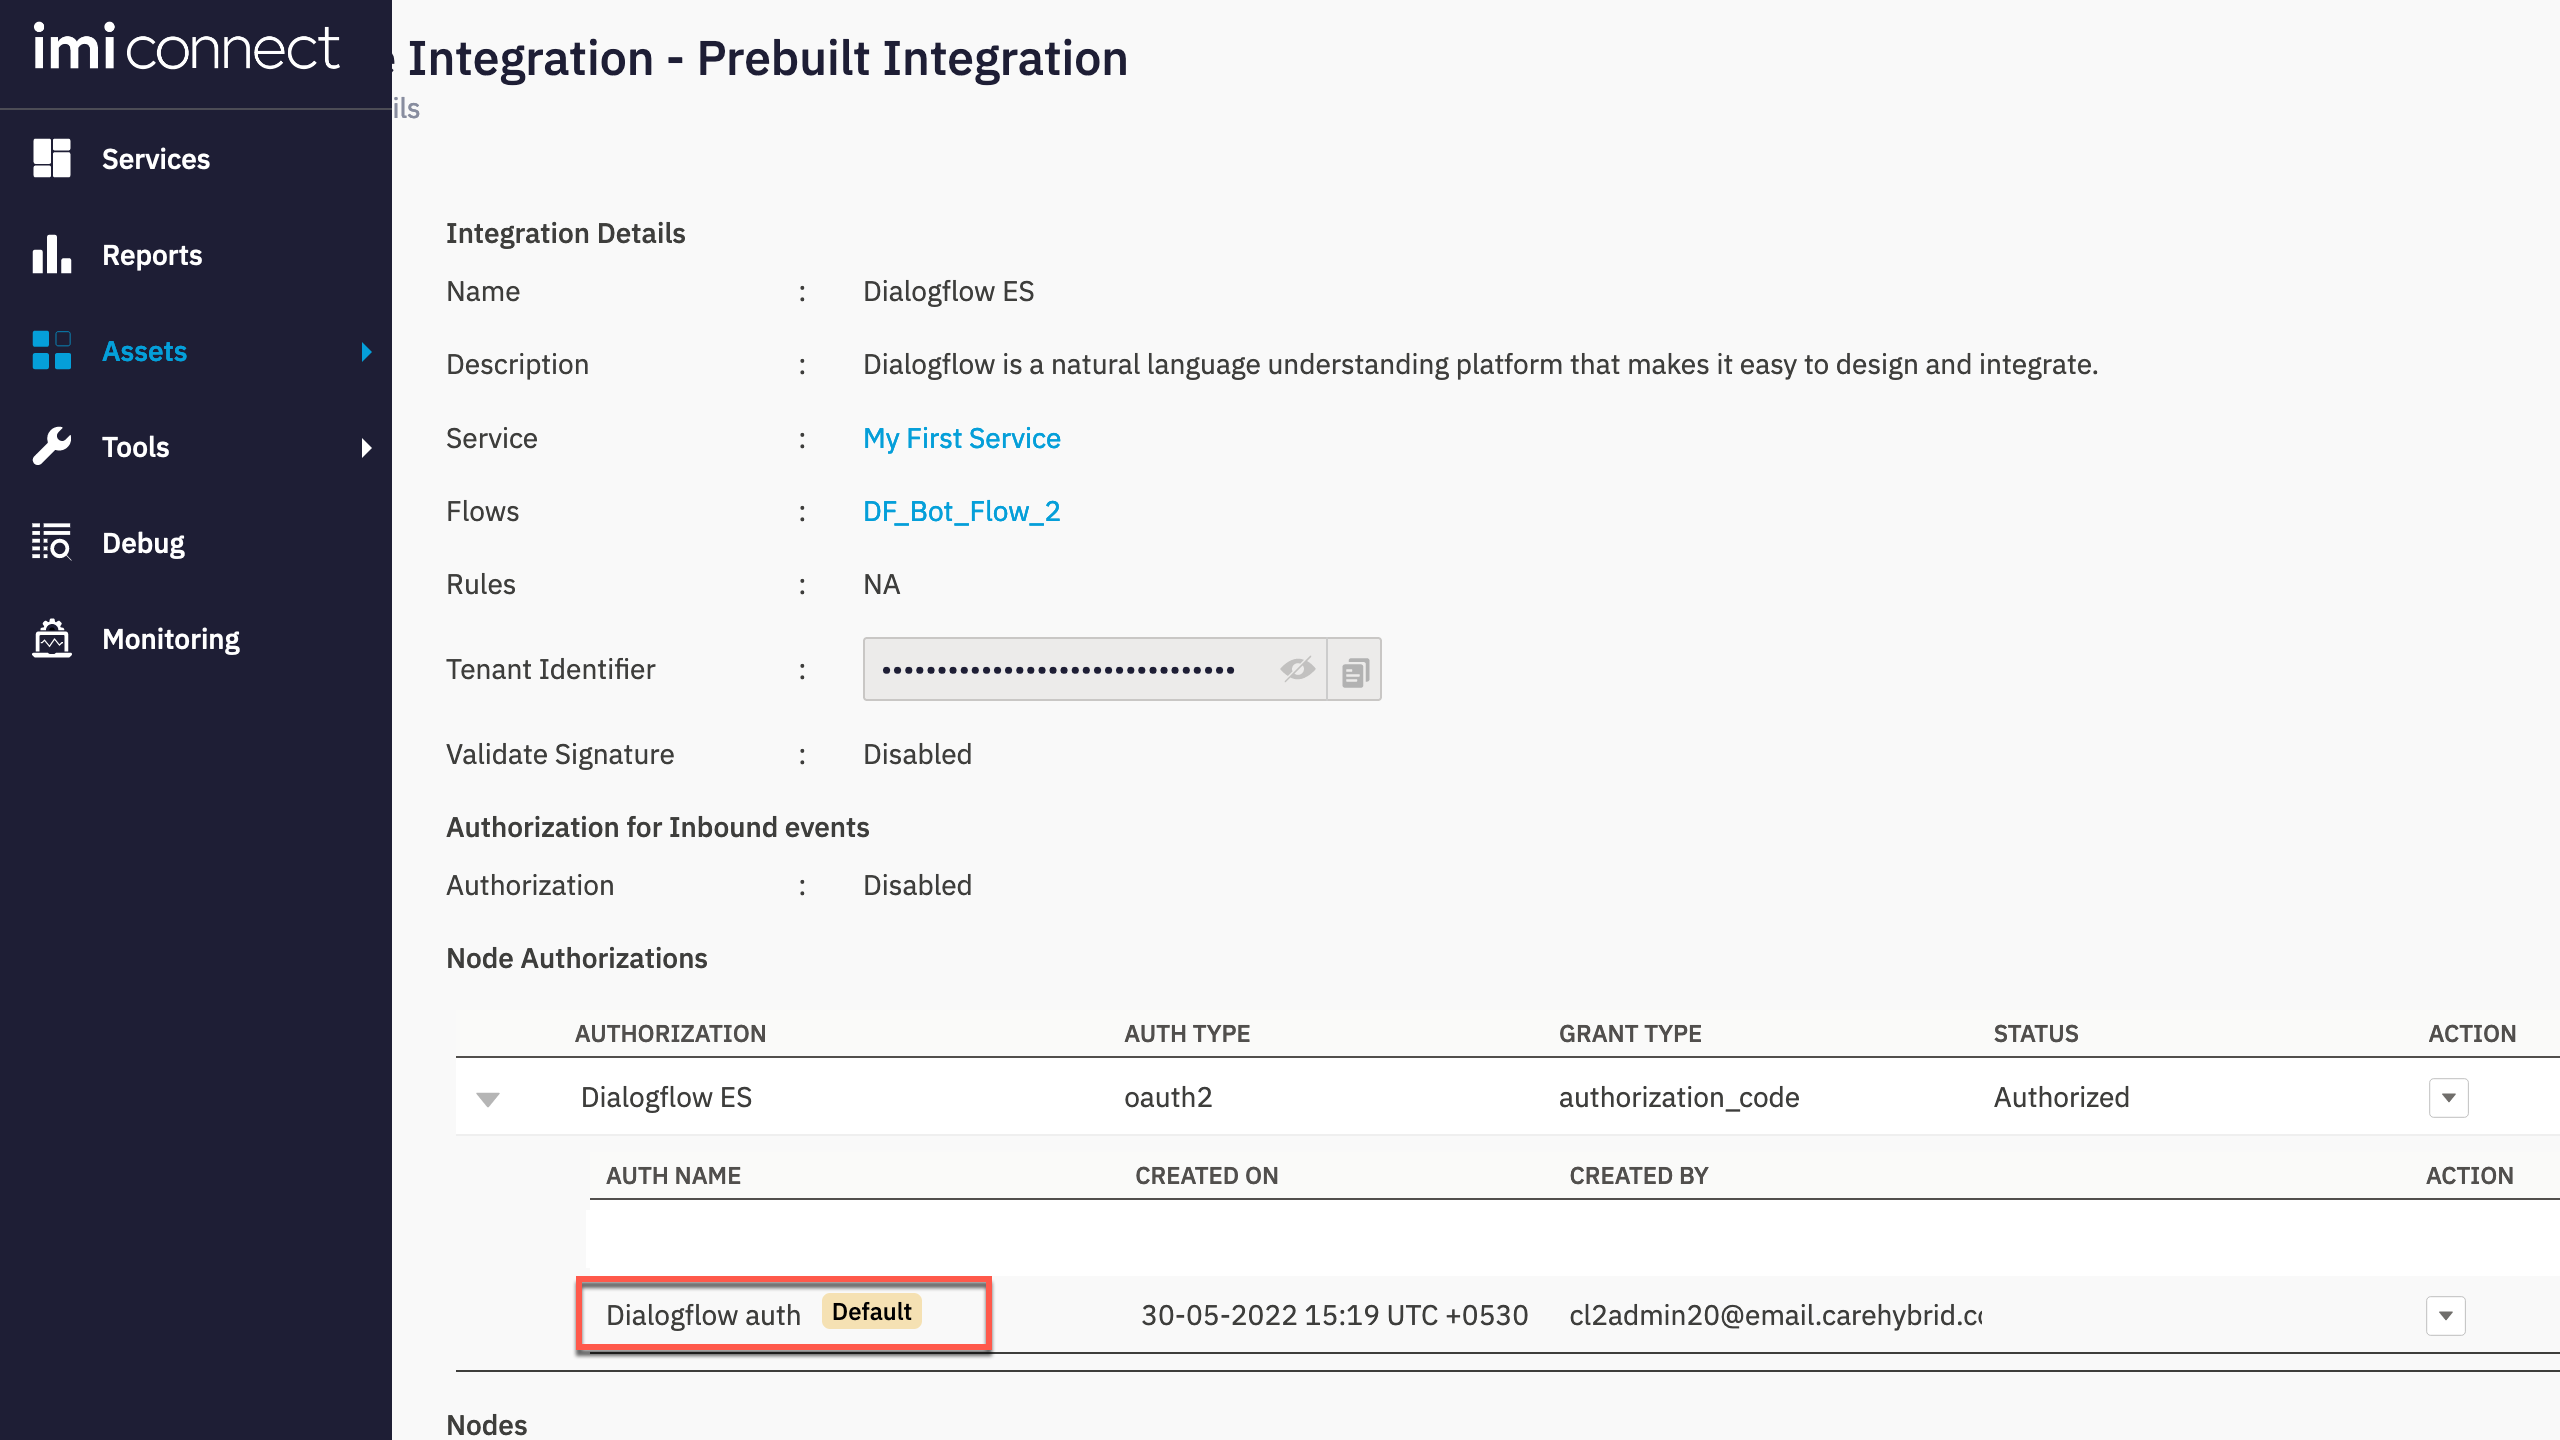
Navigate to Assets > Integrations > Dialogflow ES > Manage
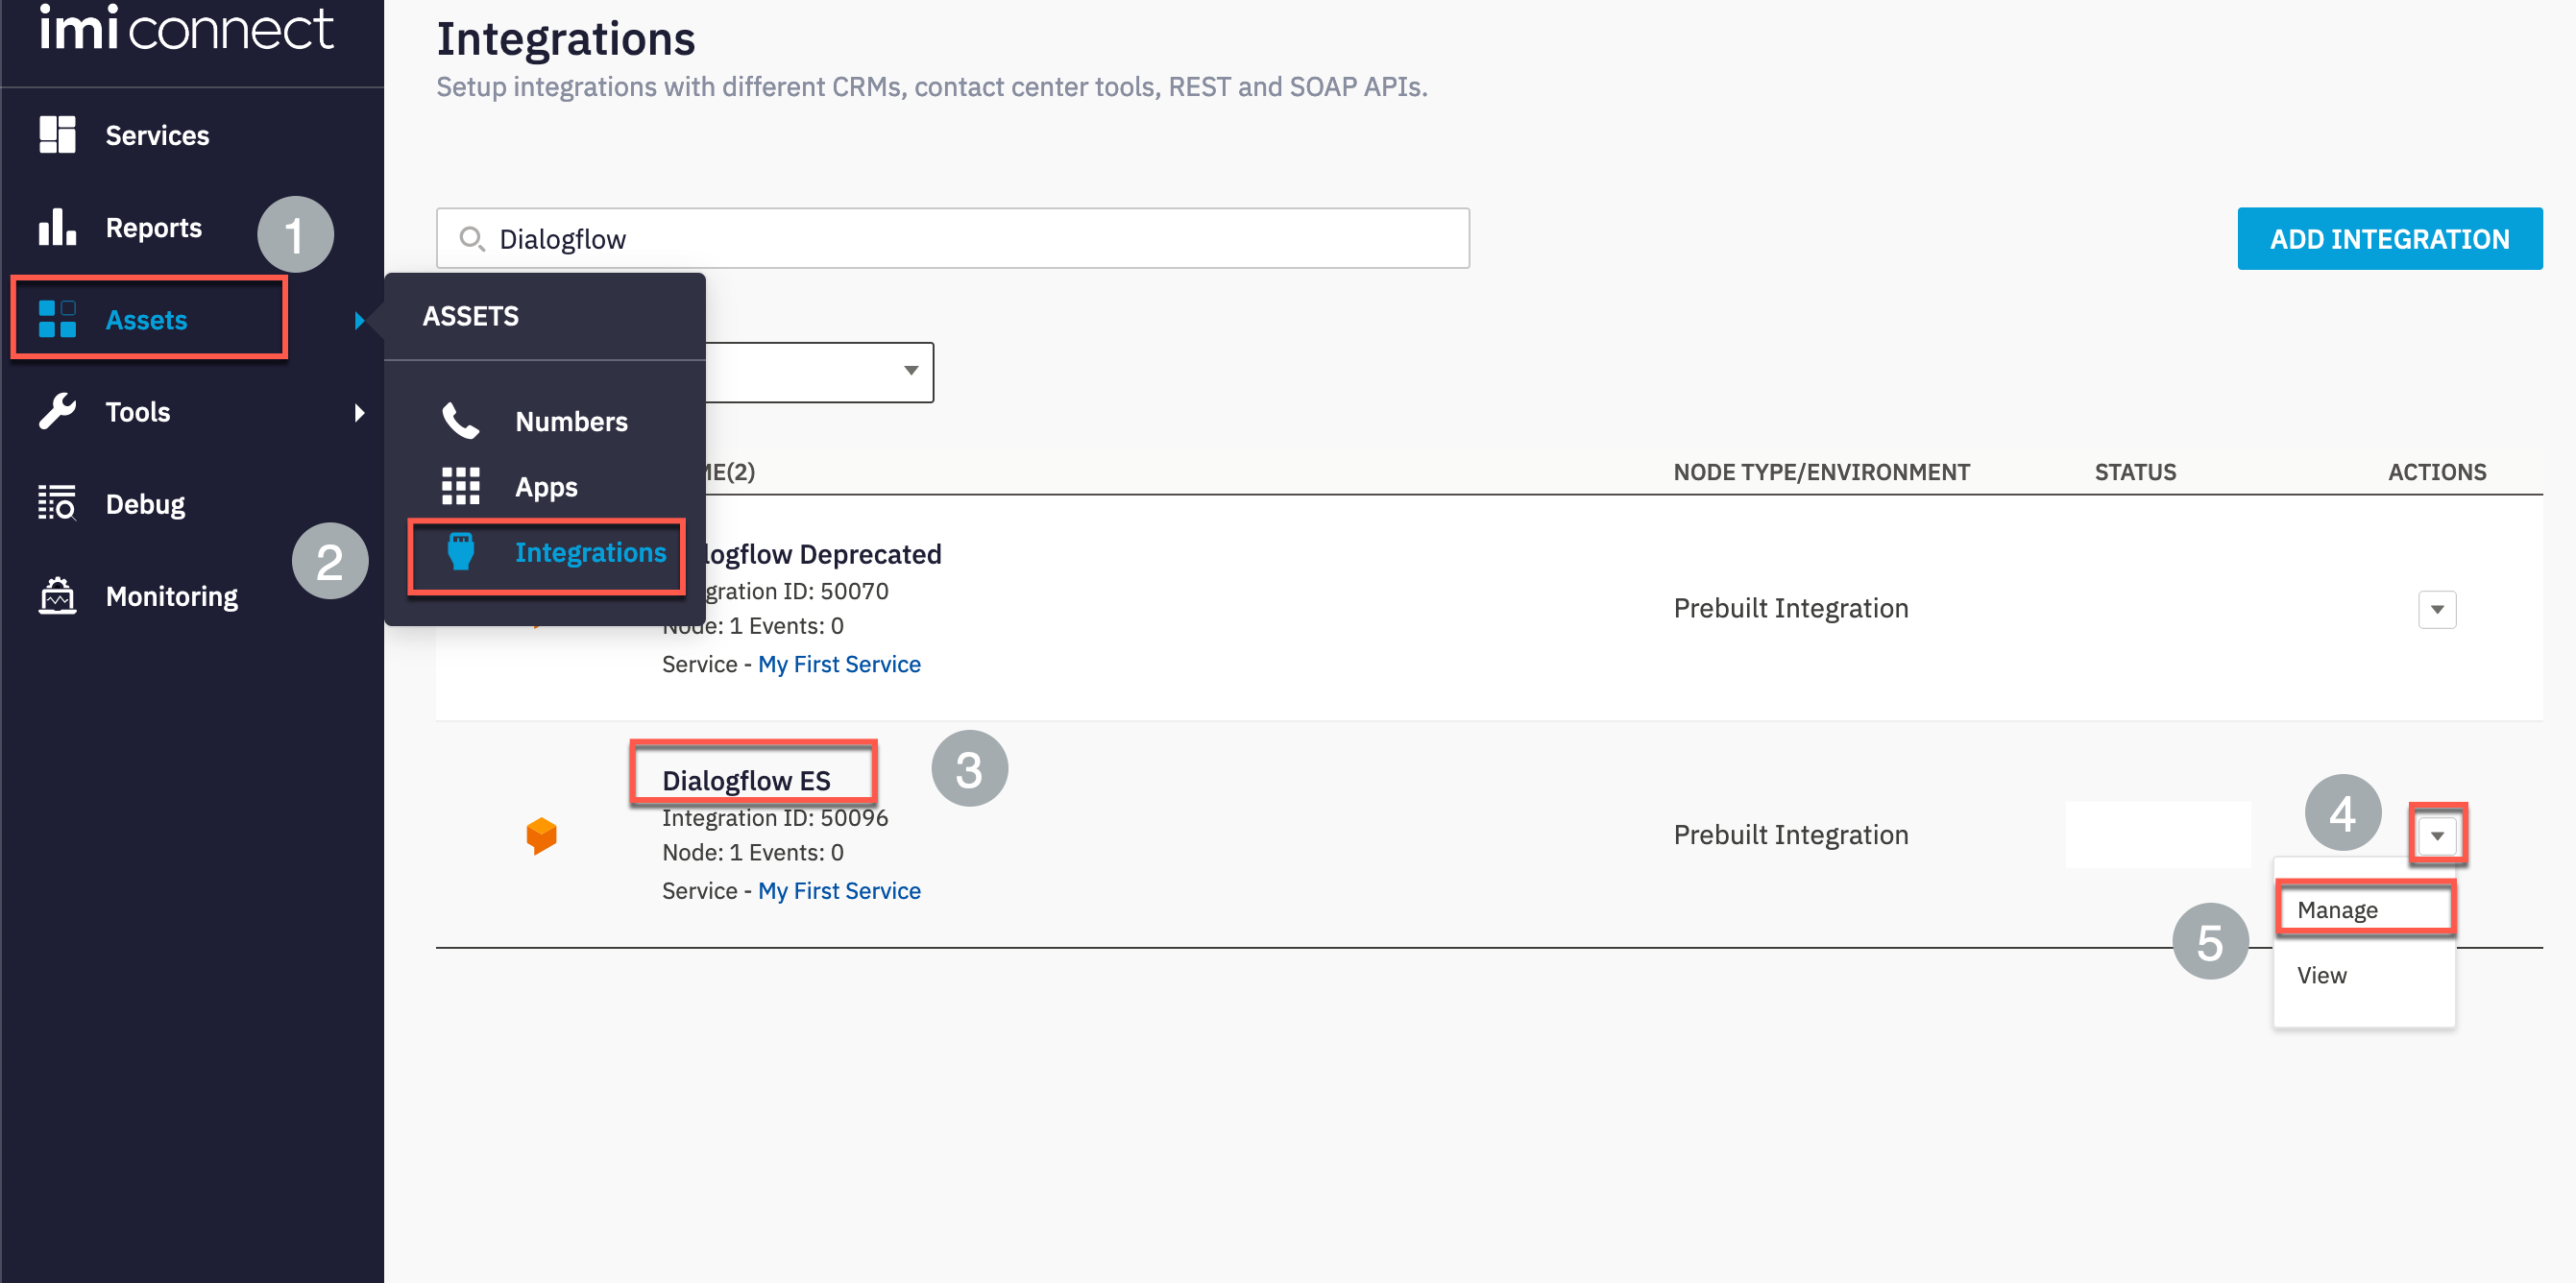
-
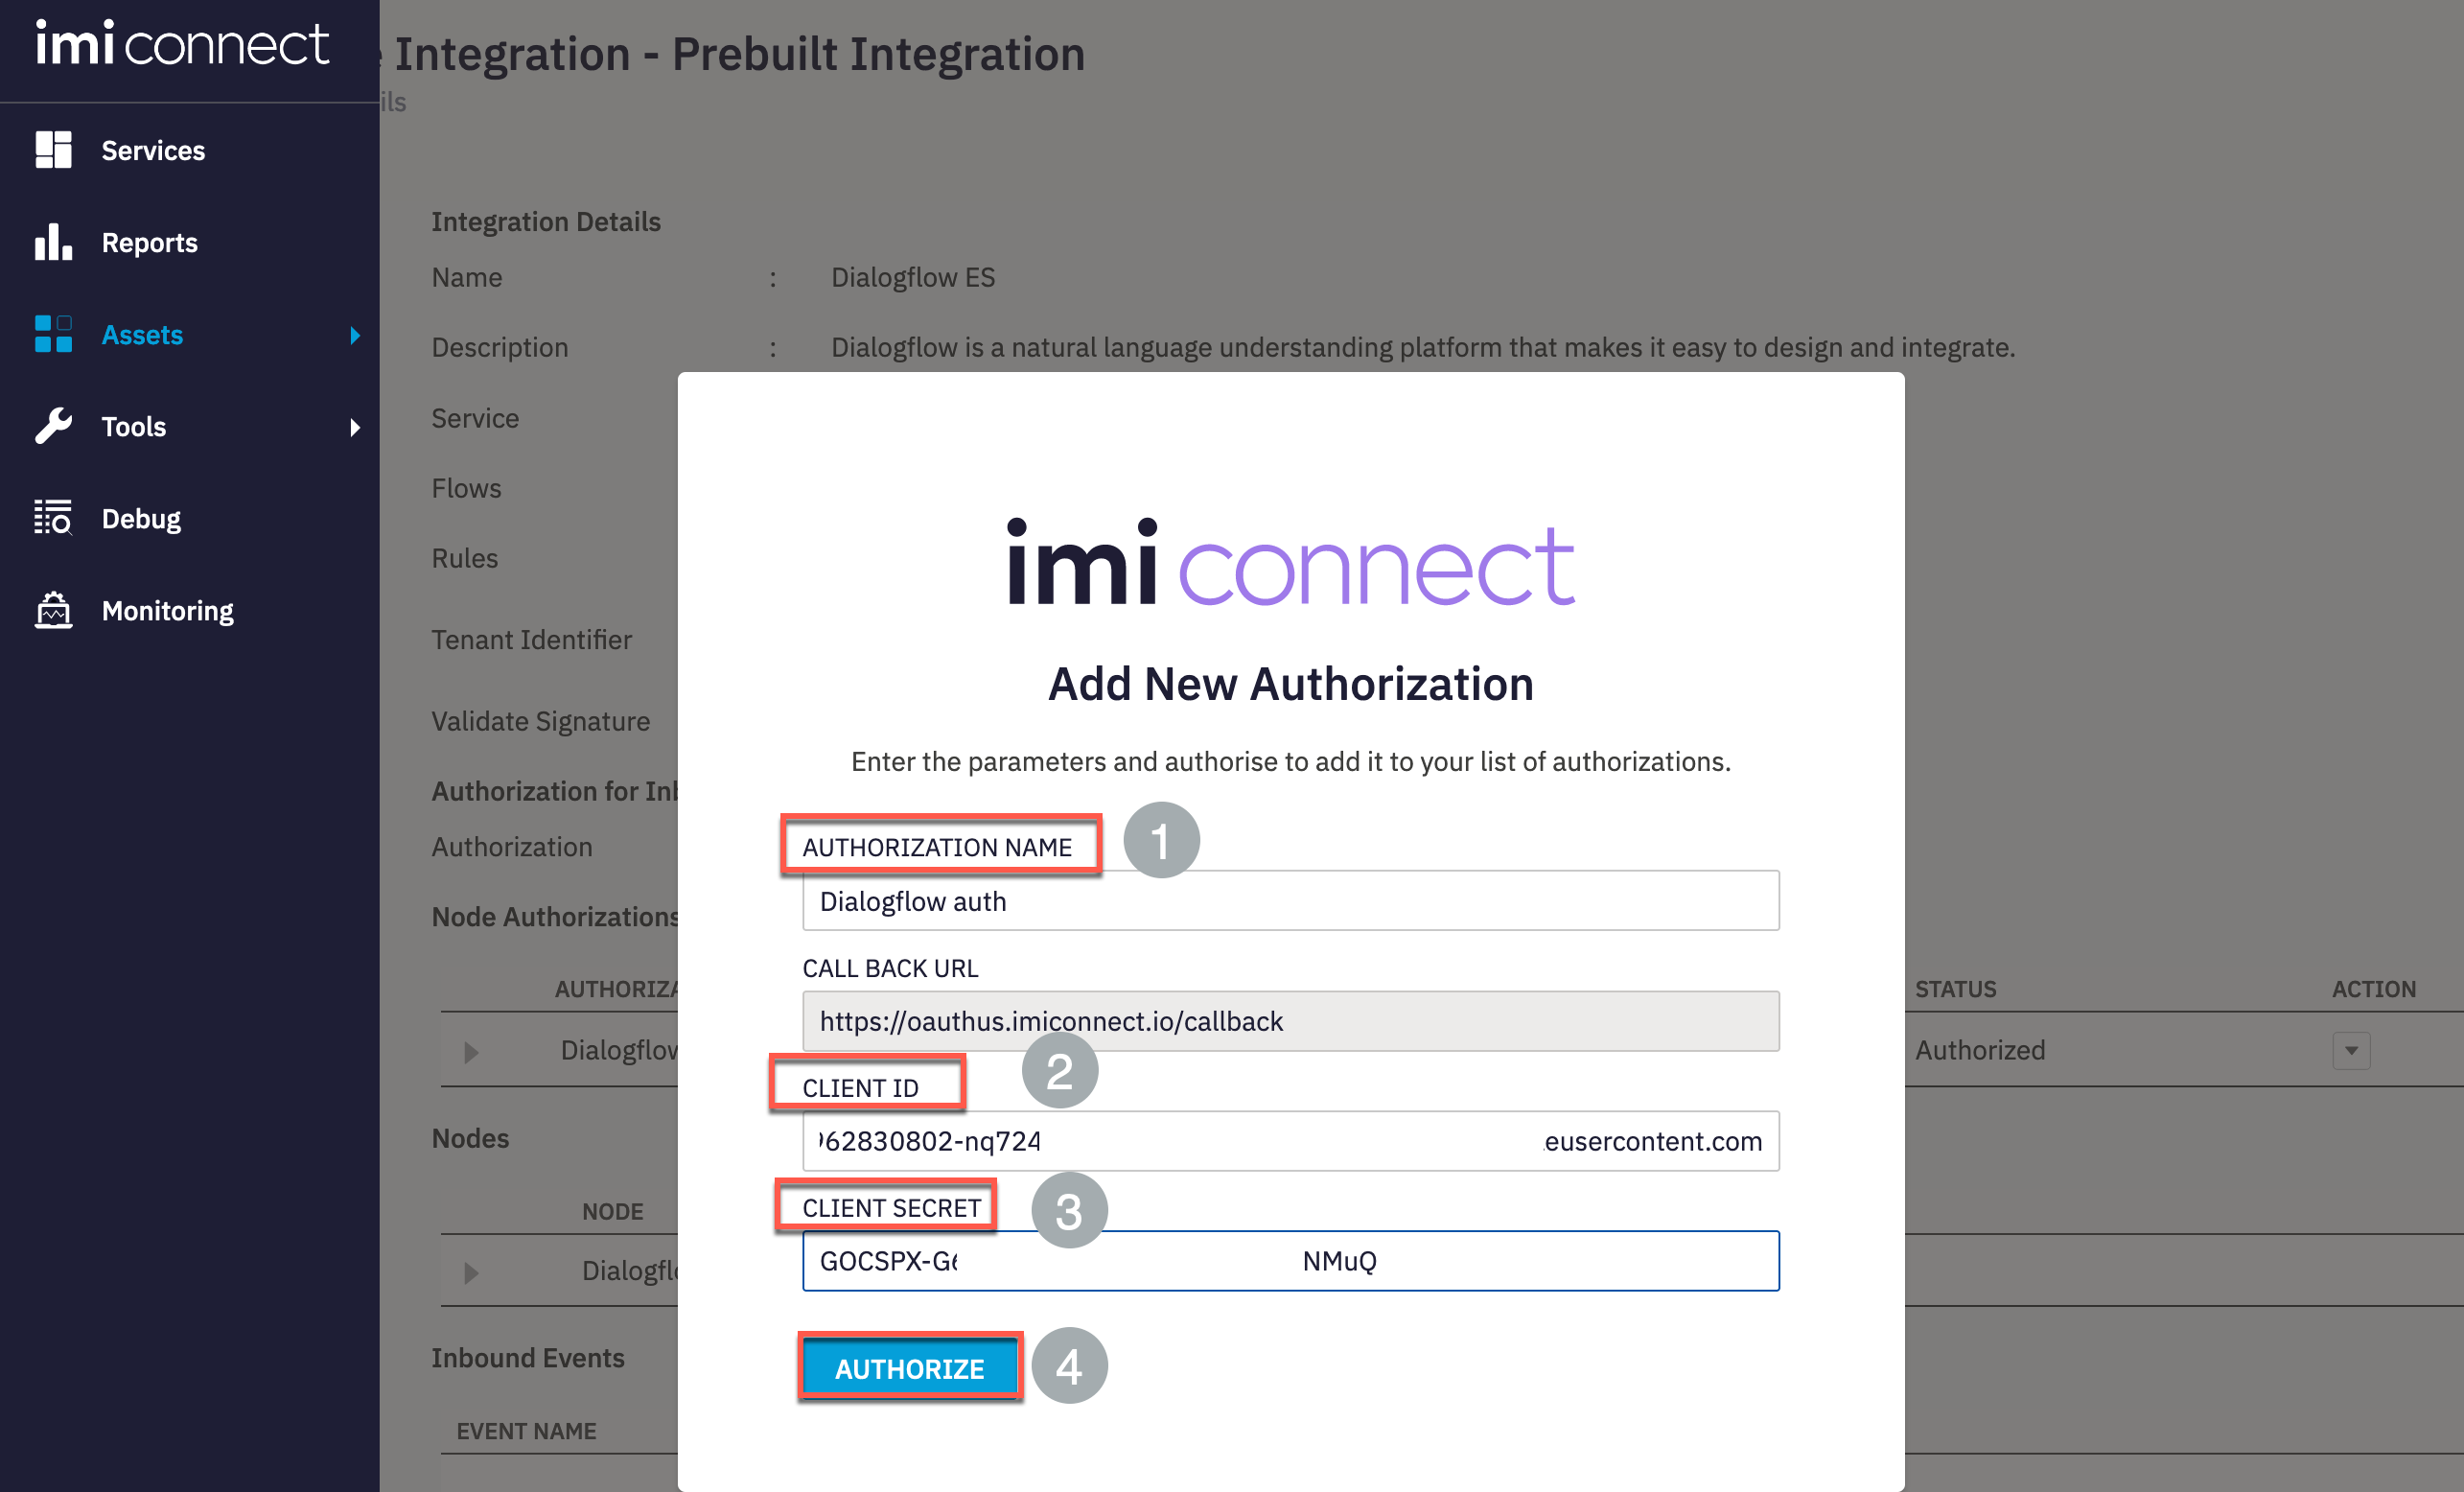
Click Add Authorization
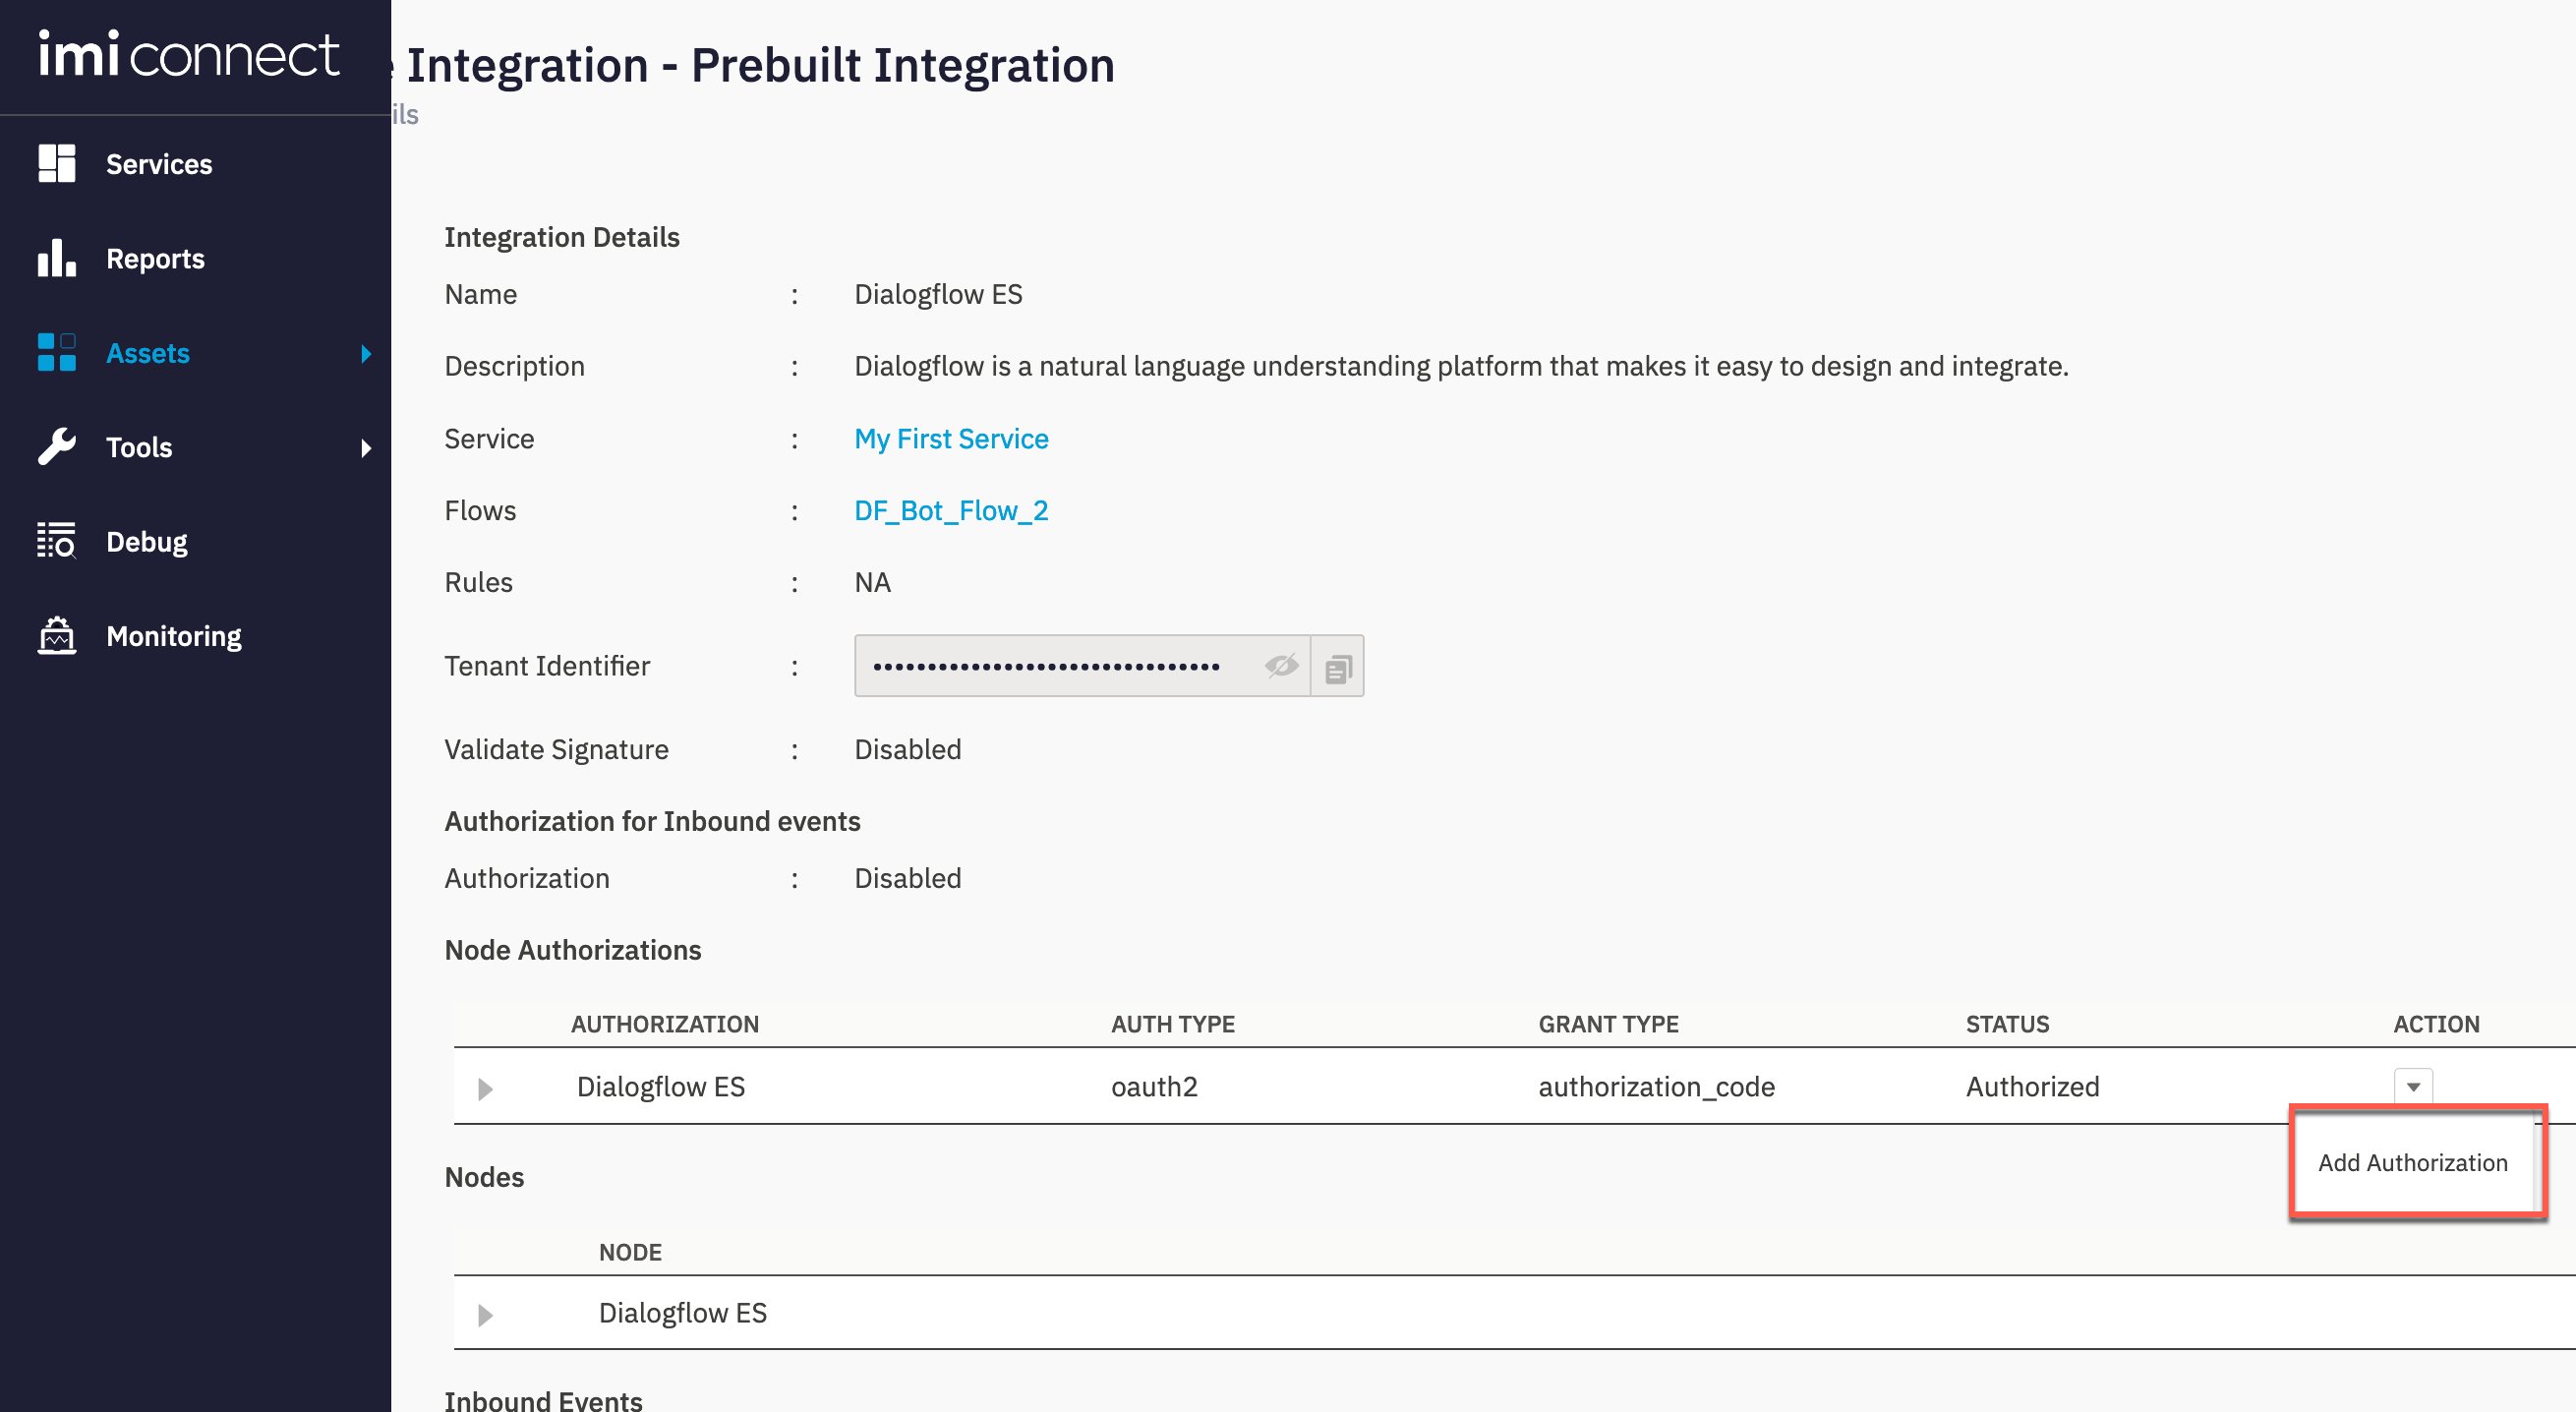
-
Input a desired Authorization Name . Input the Client ID, Client Secret value that was obtained in Step-2. Click Authorize
-
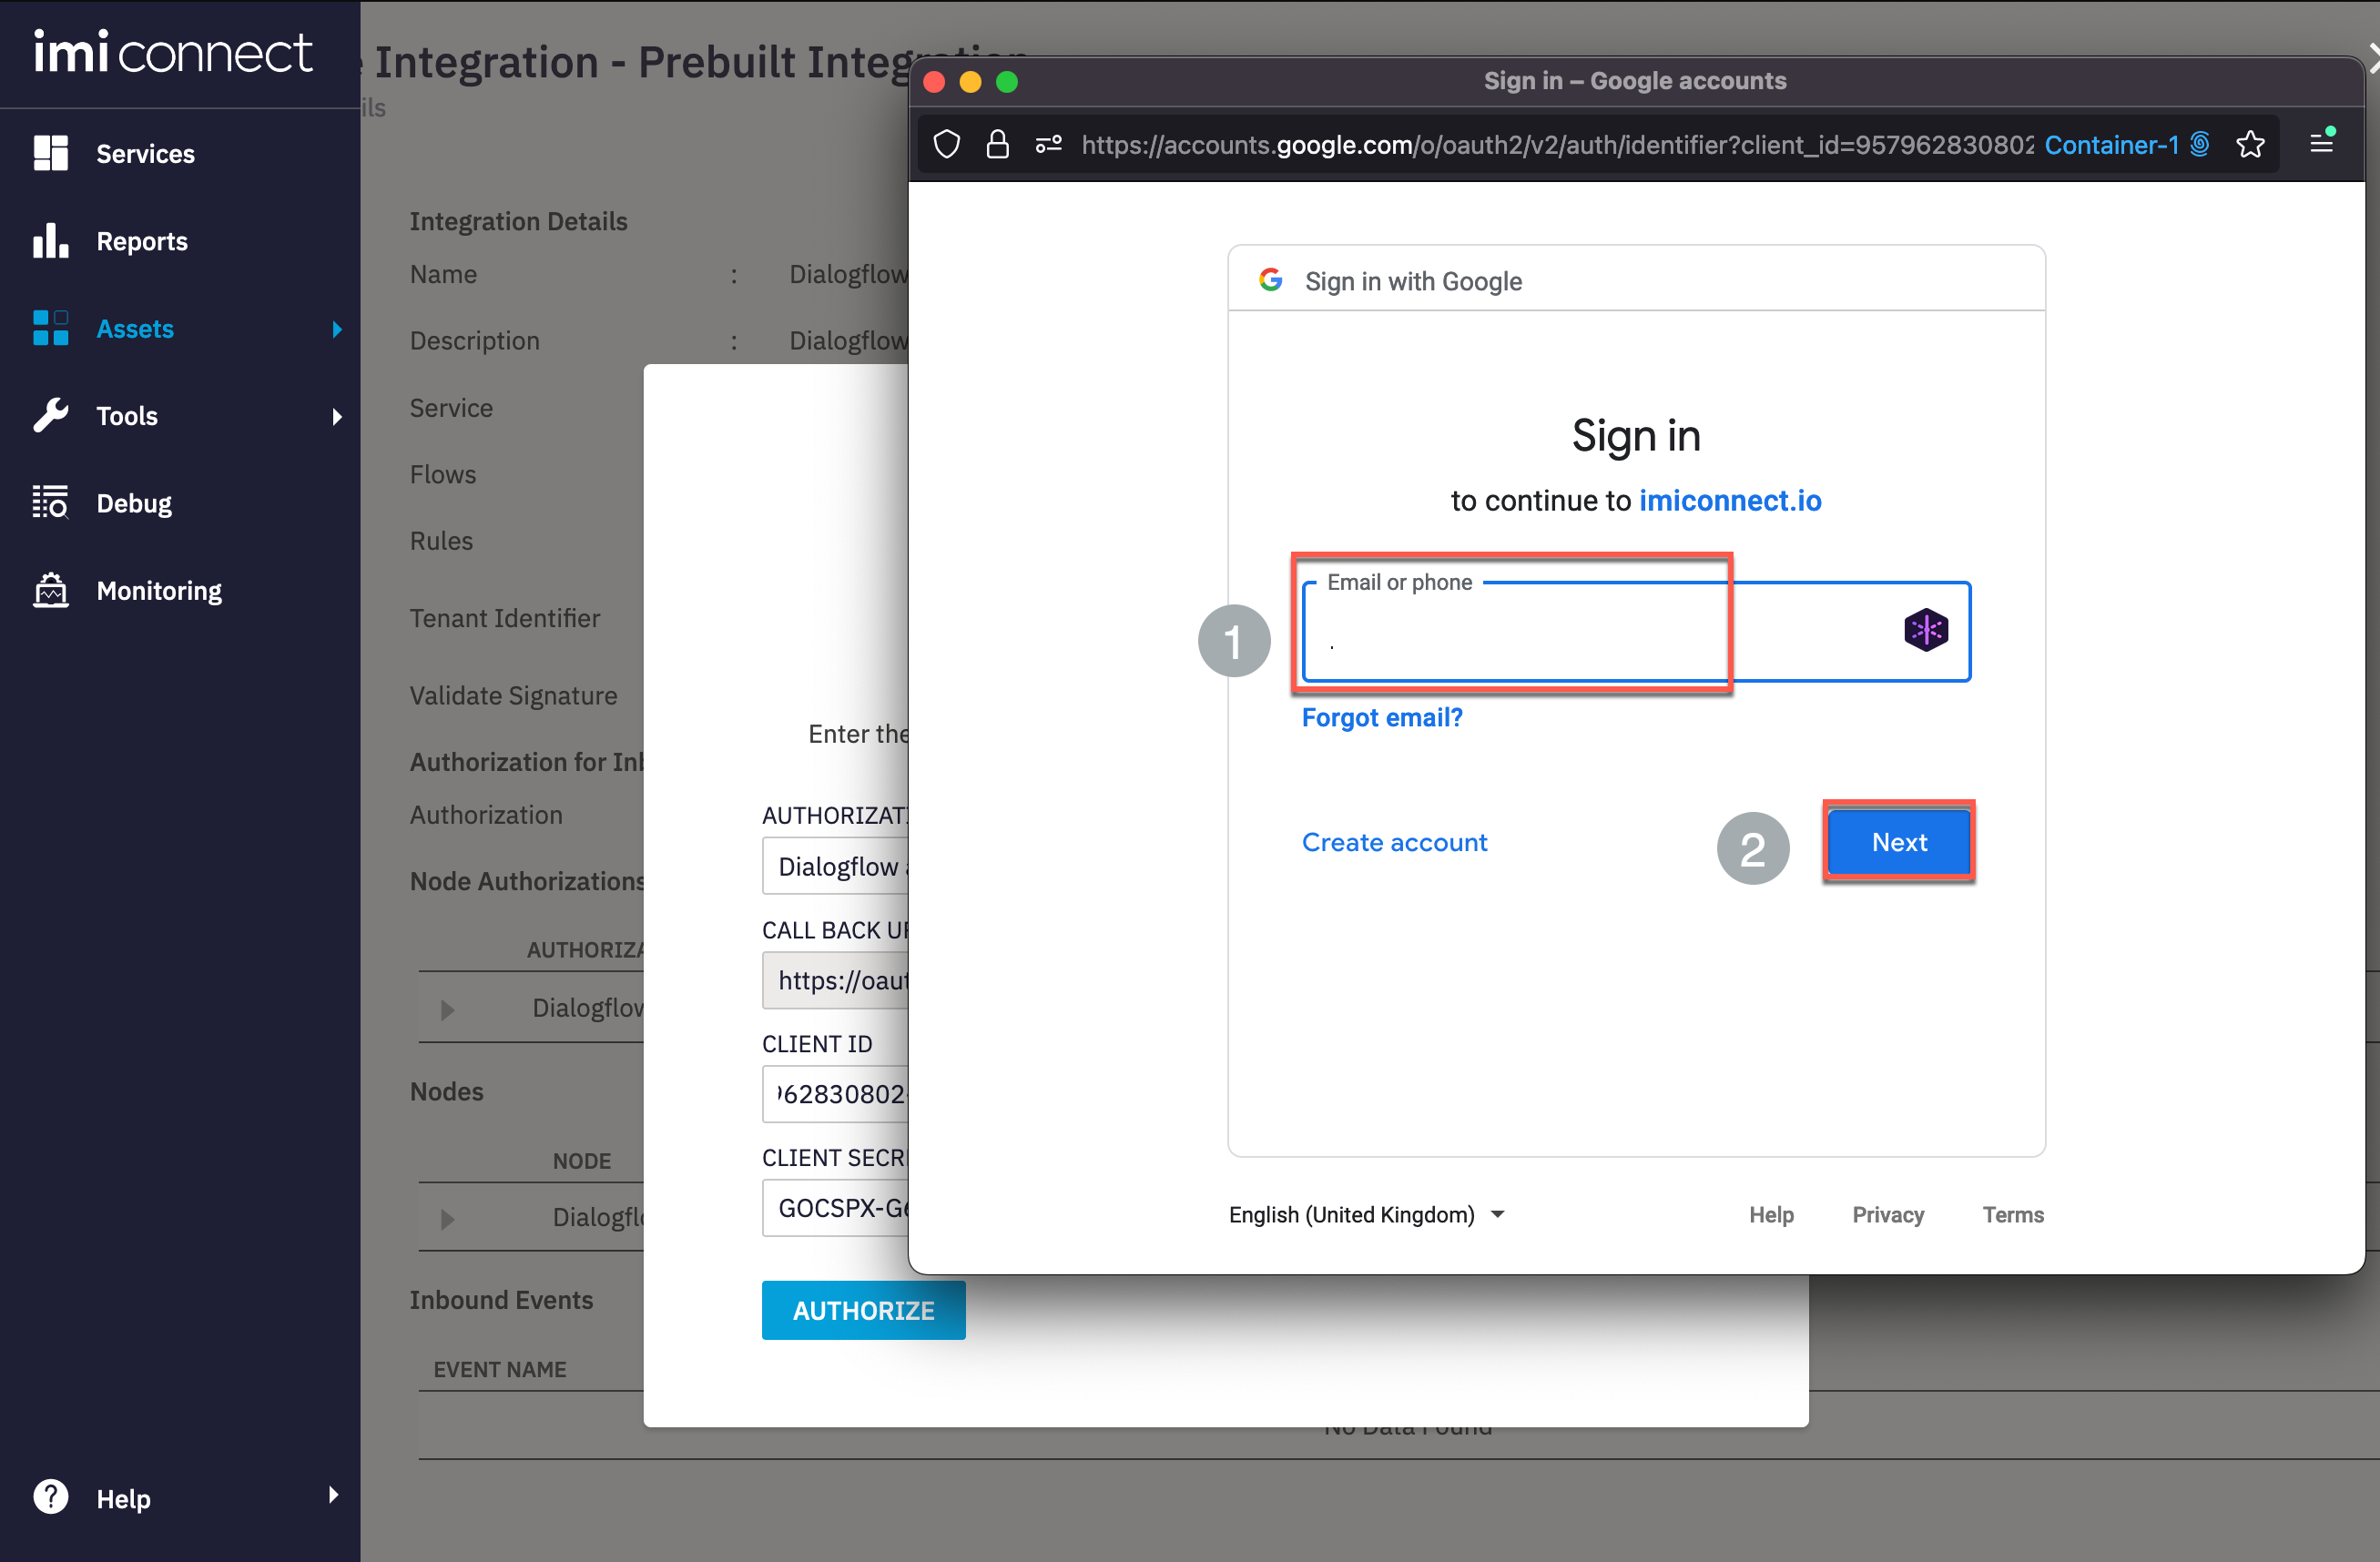
When redirected to google login, use the same credentials mentioned in Step-1.
-
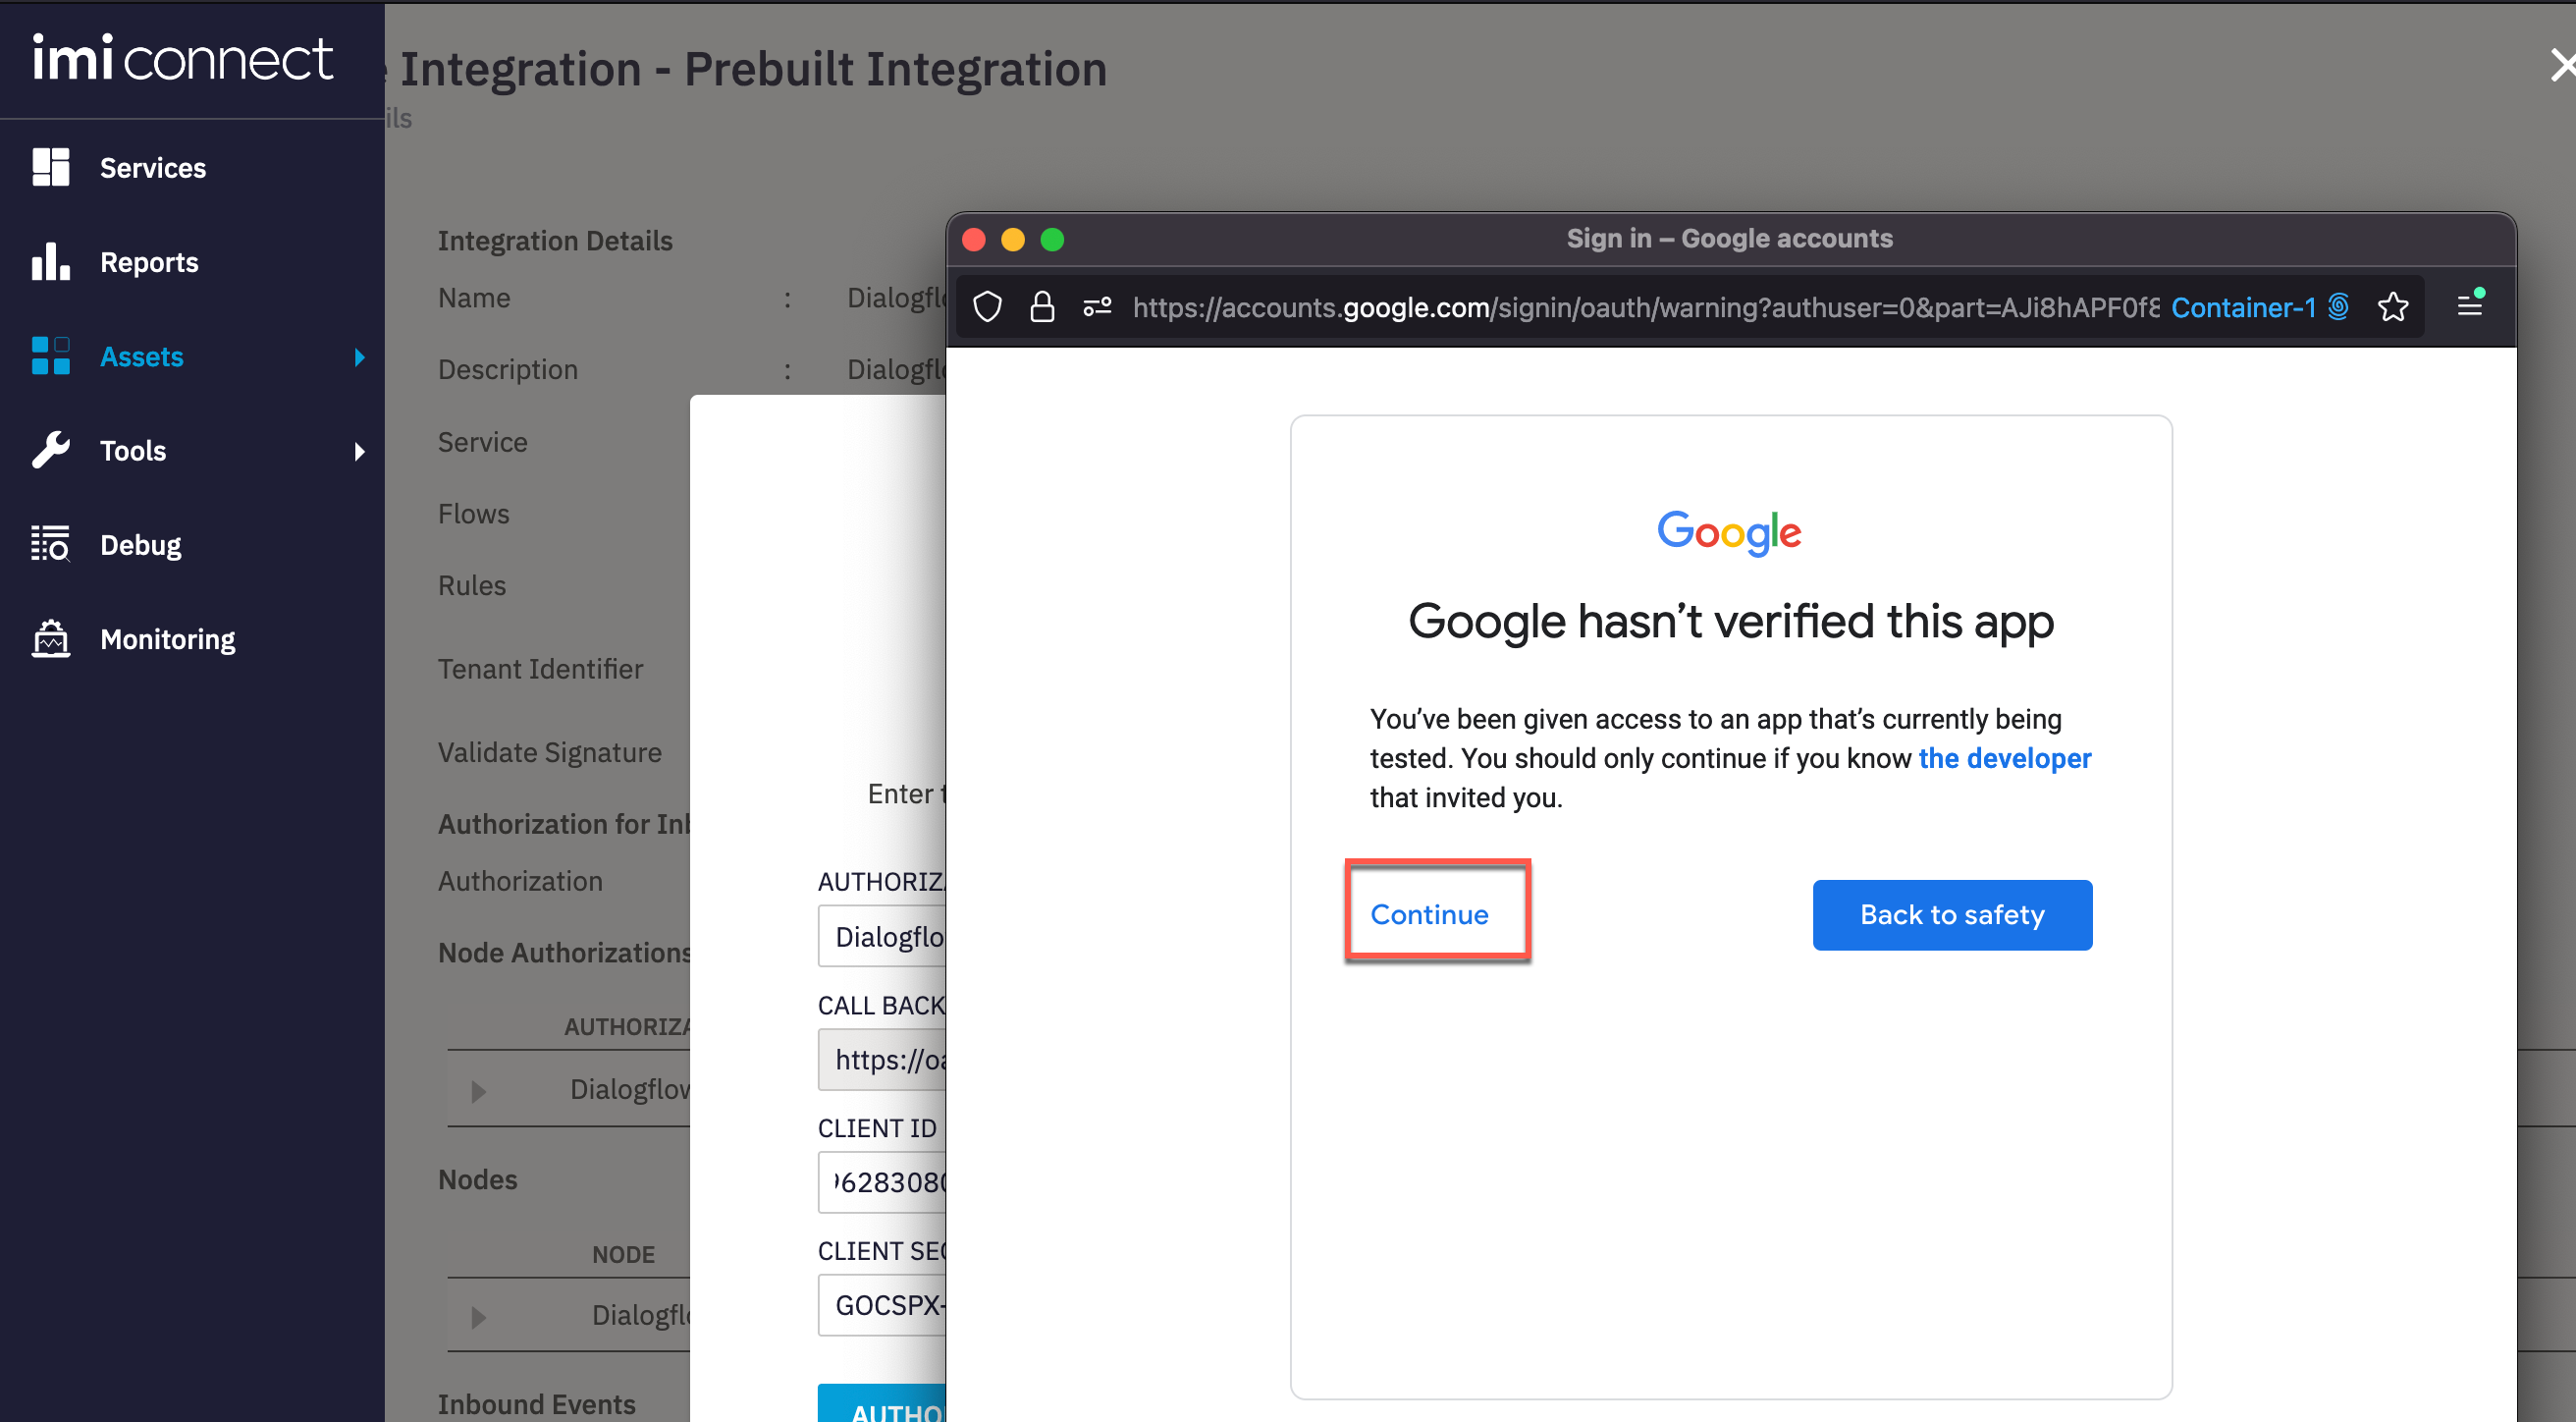
After login, click Continue
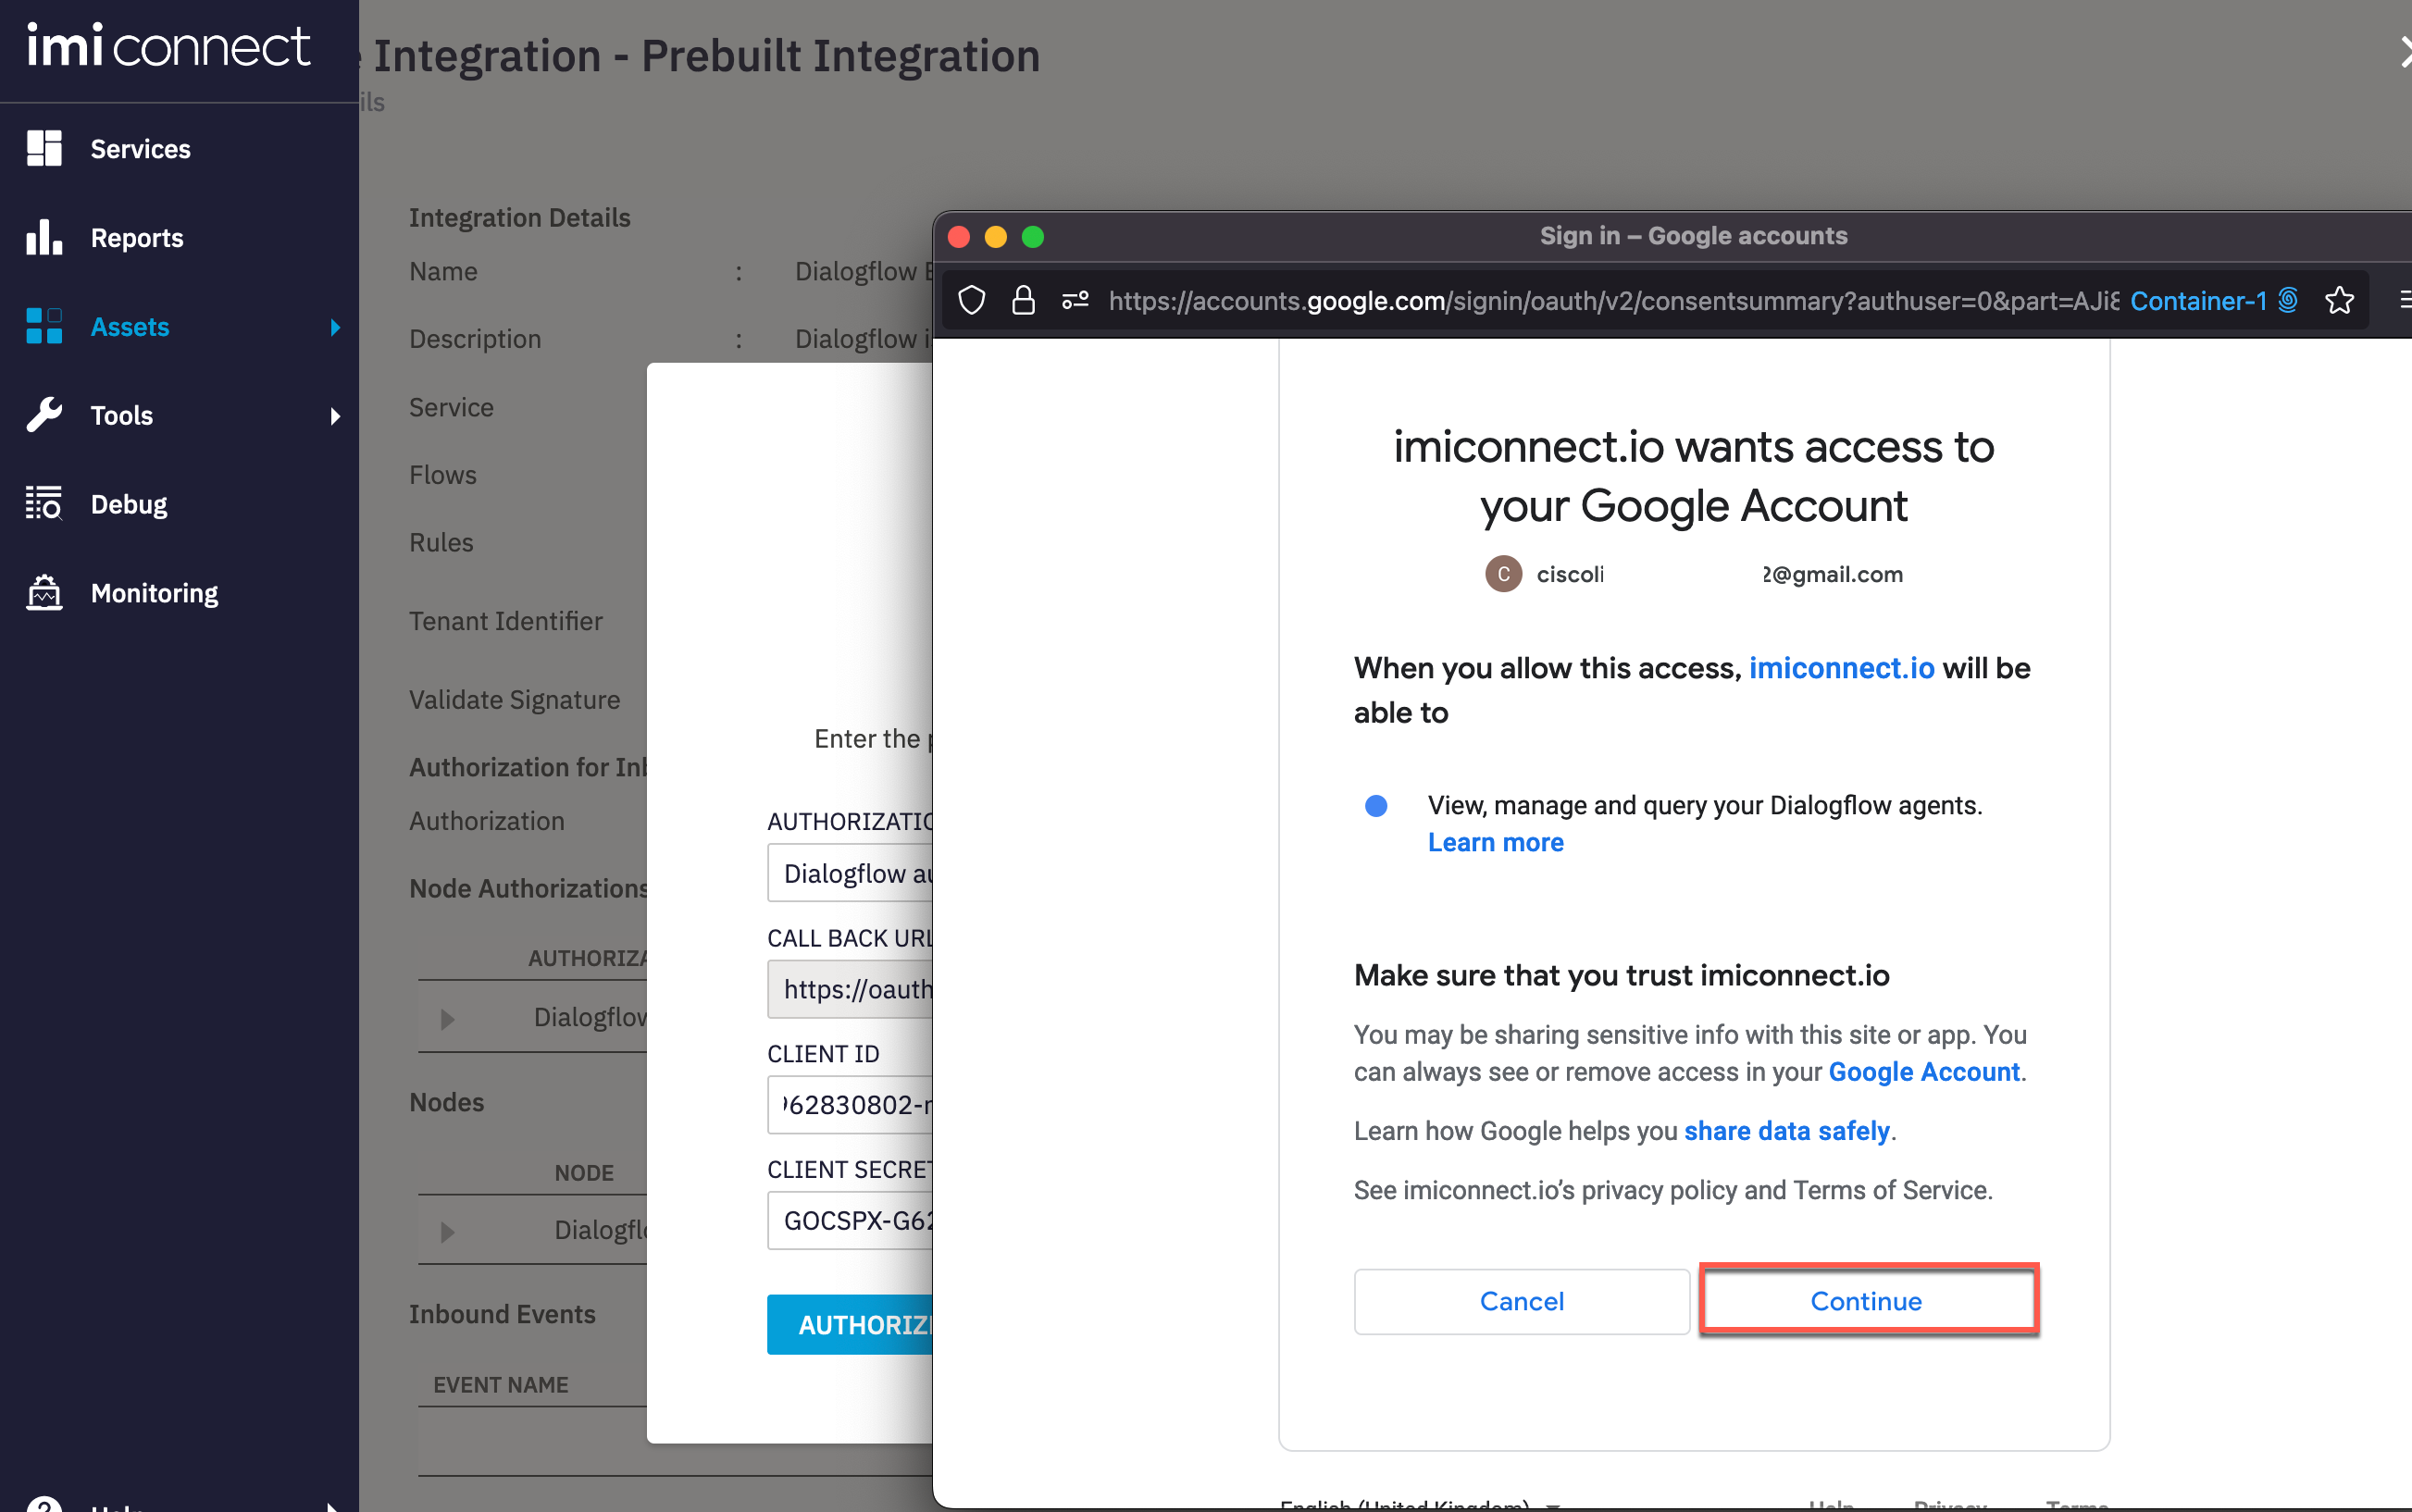
-
Click Continue
-
Verify that the authorization is added successfully and marked as Default.
Step 4. Enable Dialogflow and create agent
-
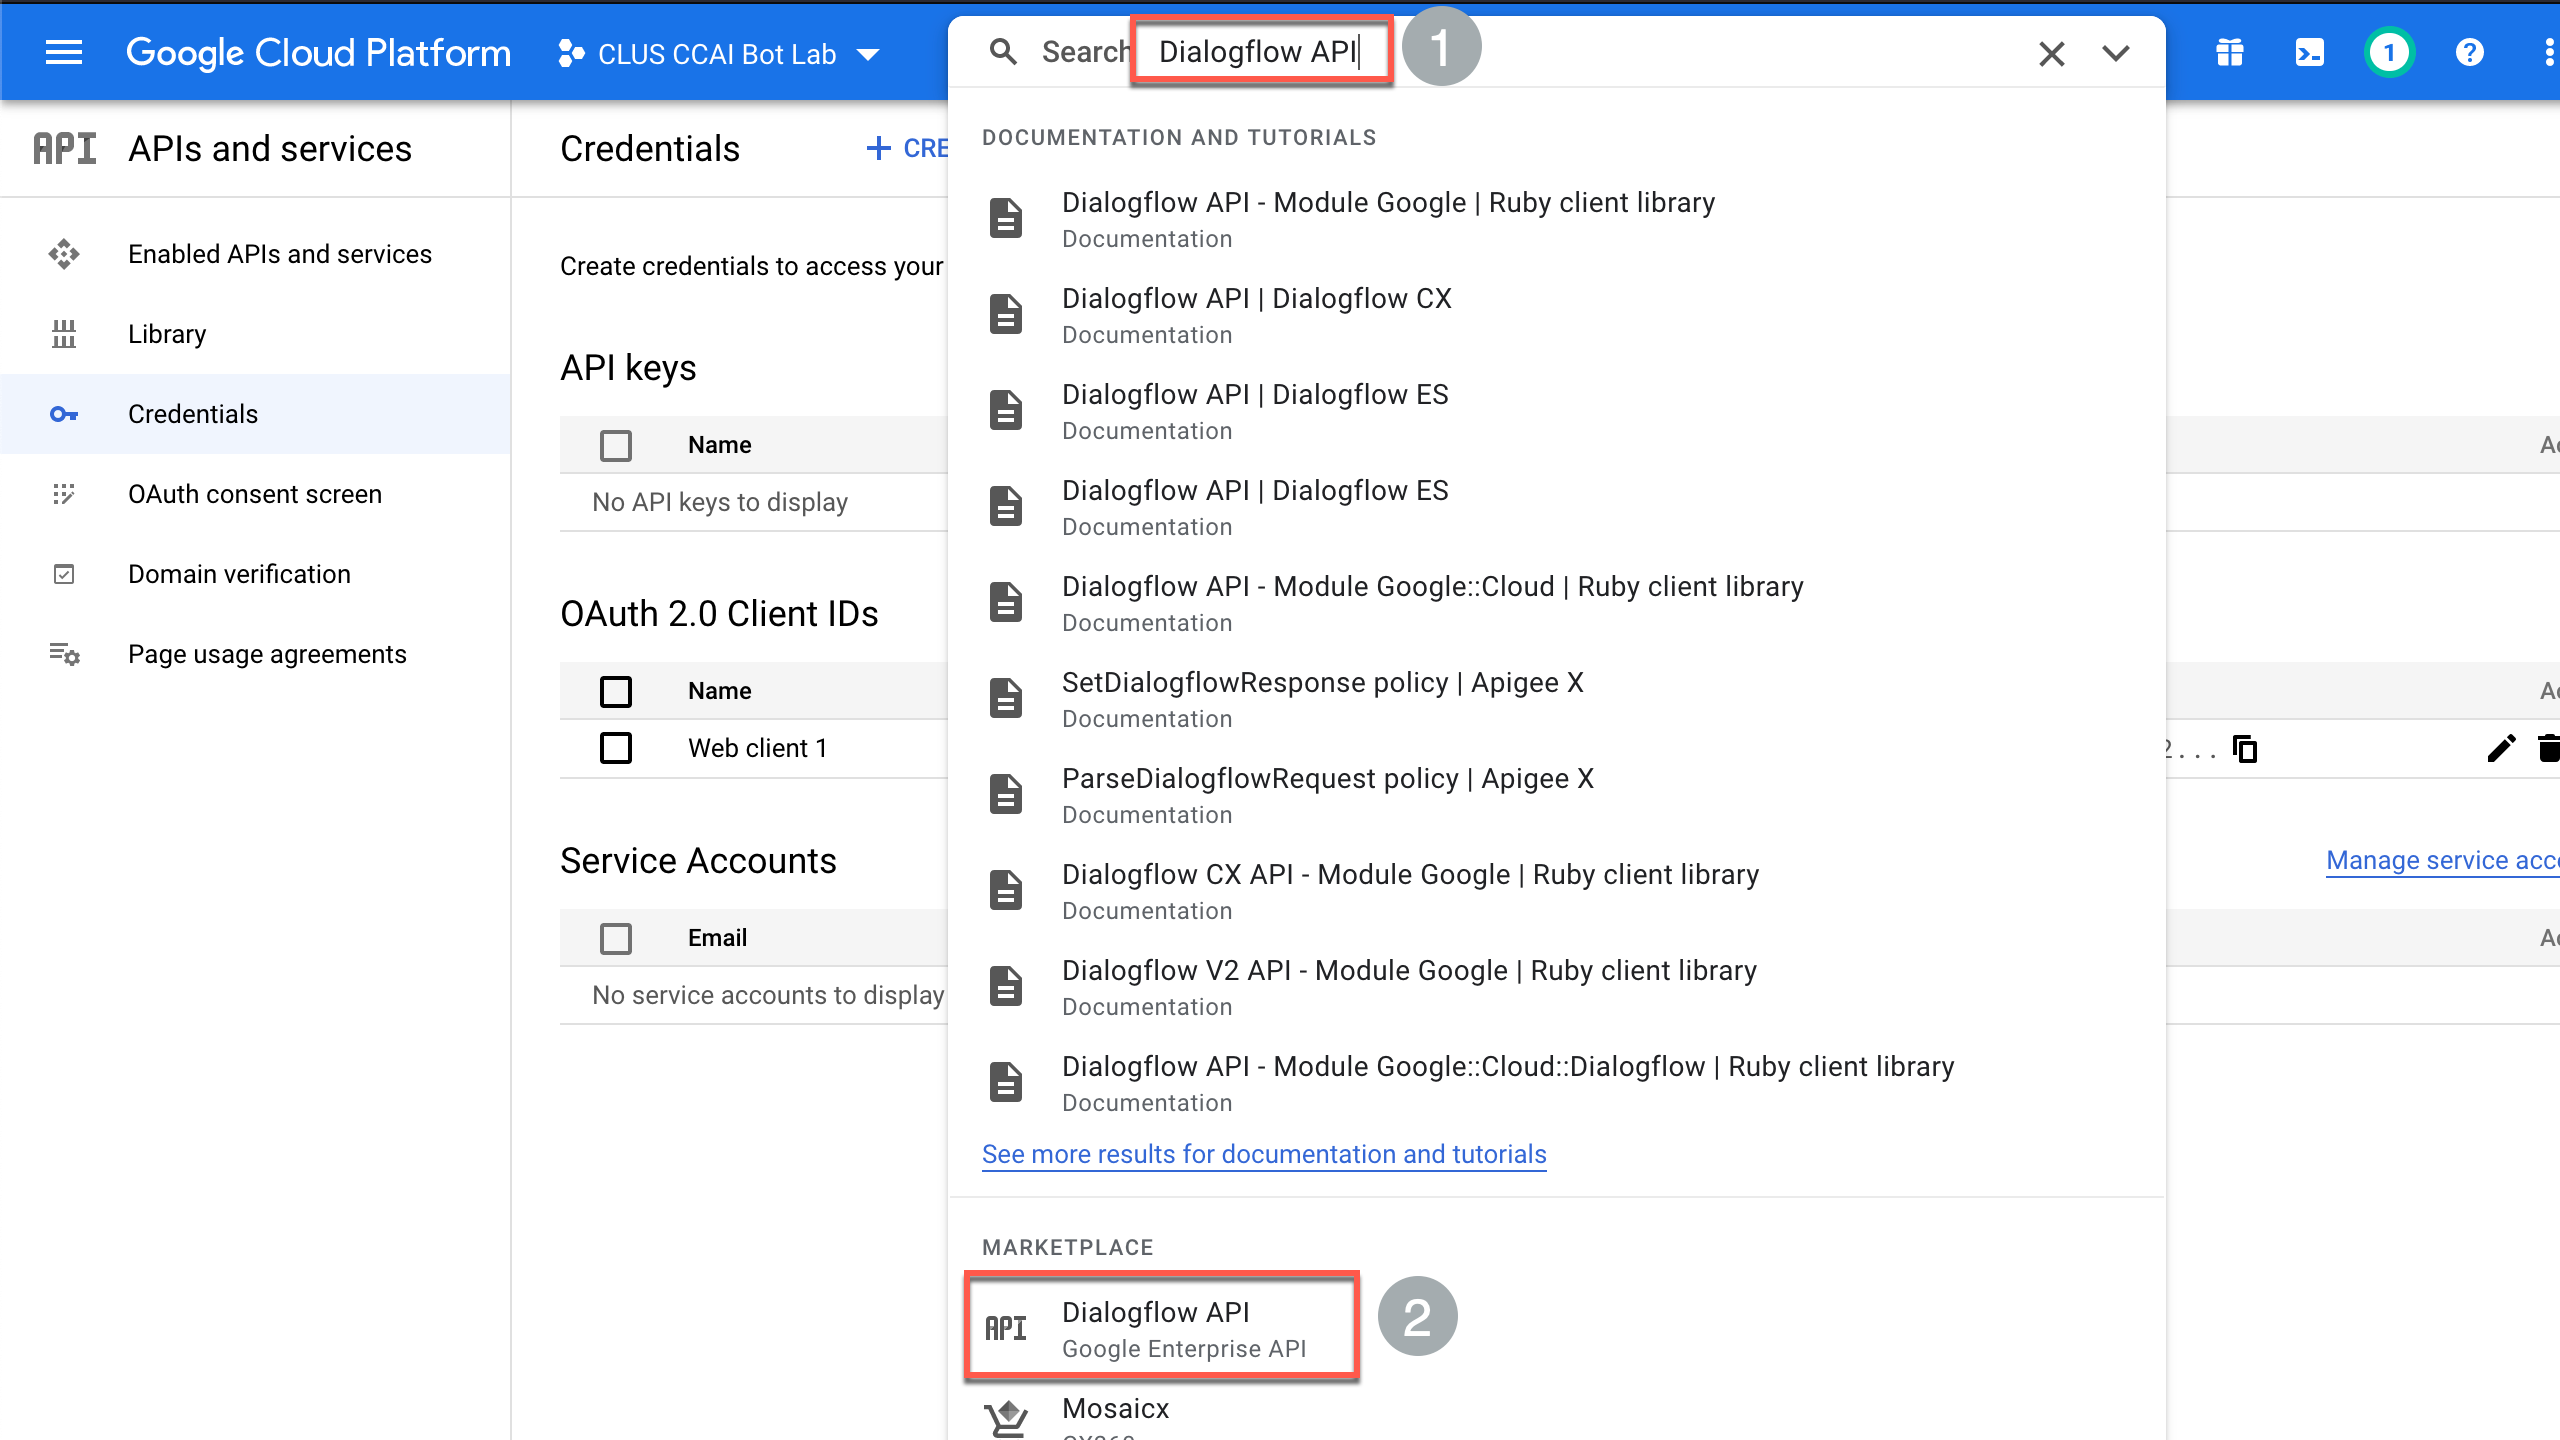
Login to https://console.cloud.google.com/ using the Gmail account mentioned in Step-1.
-
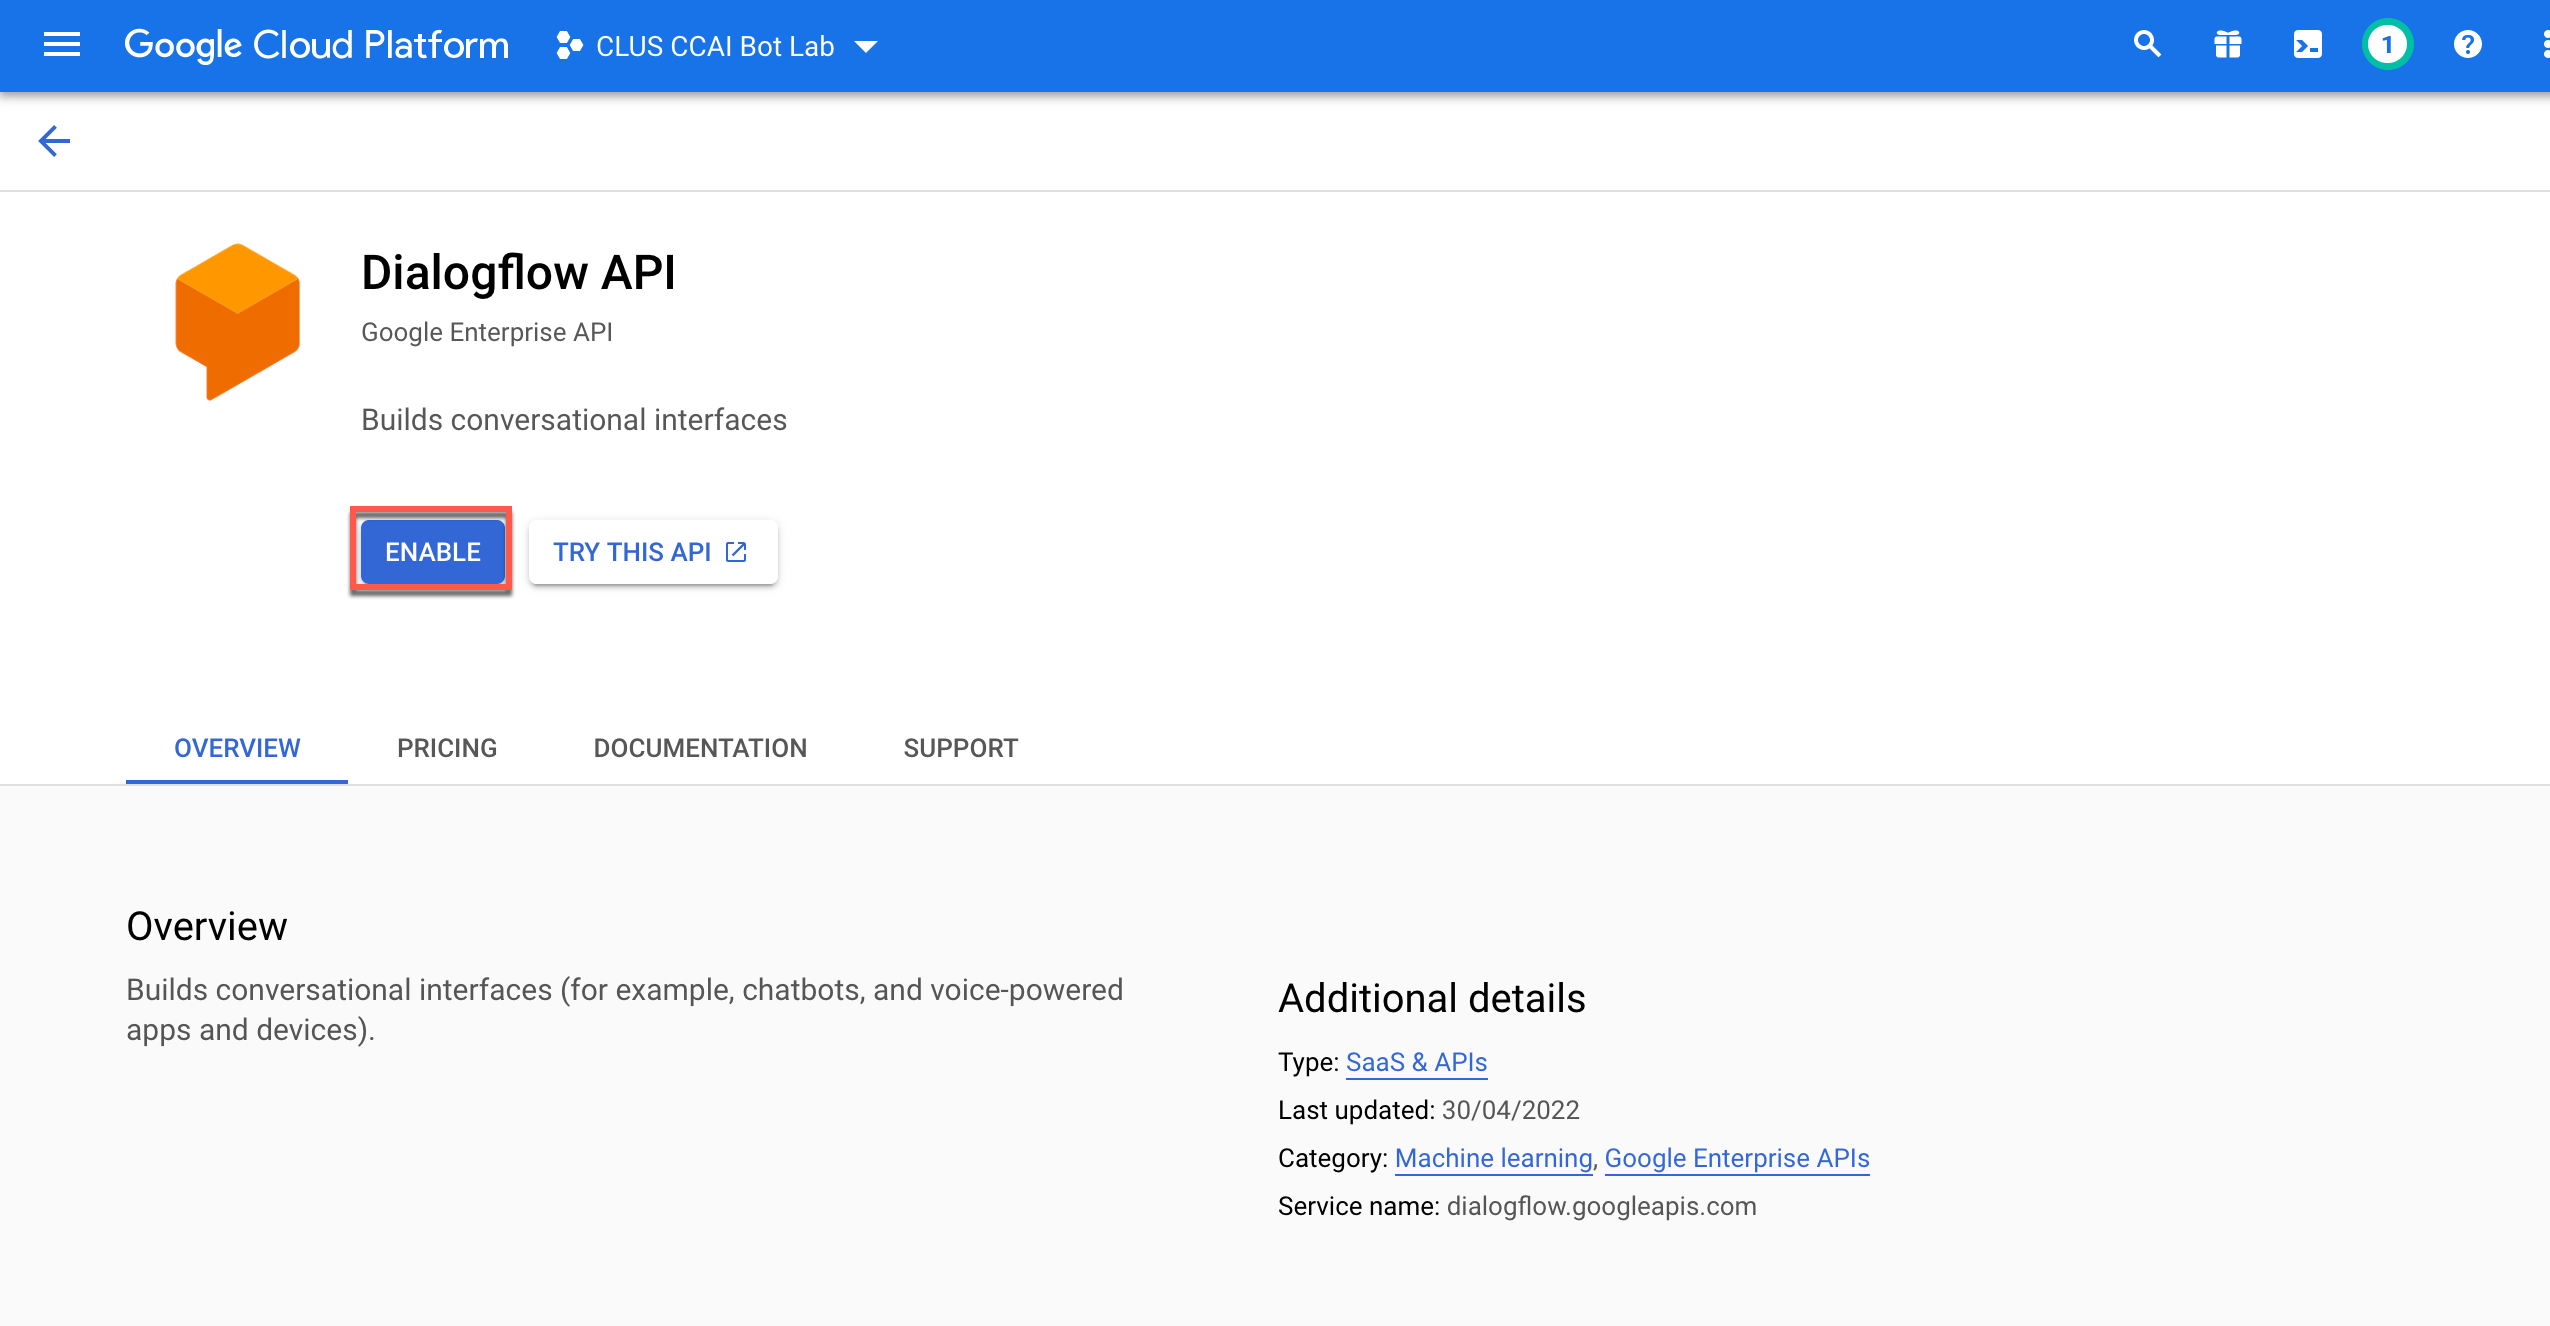
In the search window, input Dialogflow API and click the Dialogflow API option under marketplace.
-
Click Enable
-
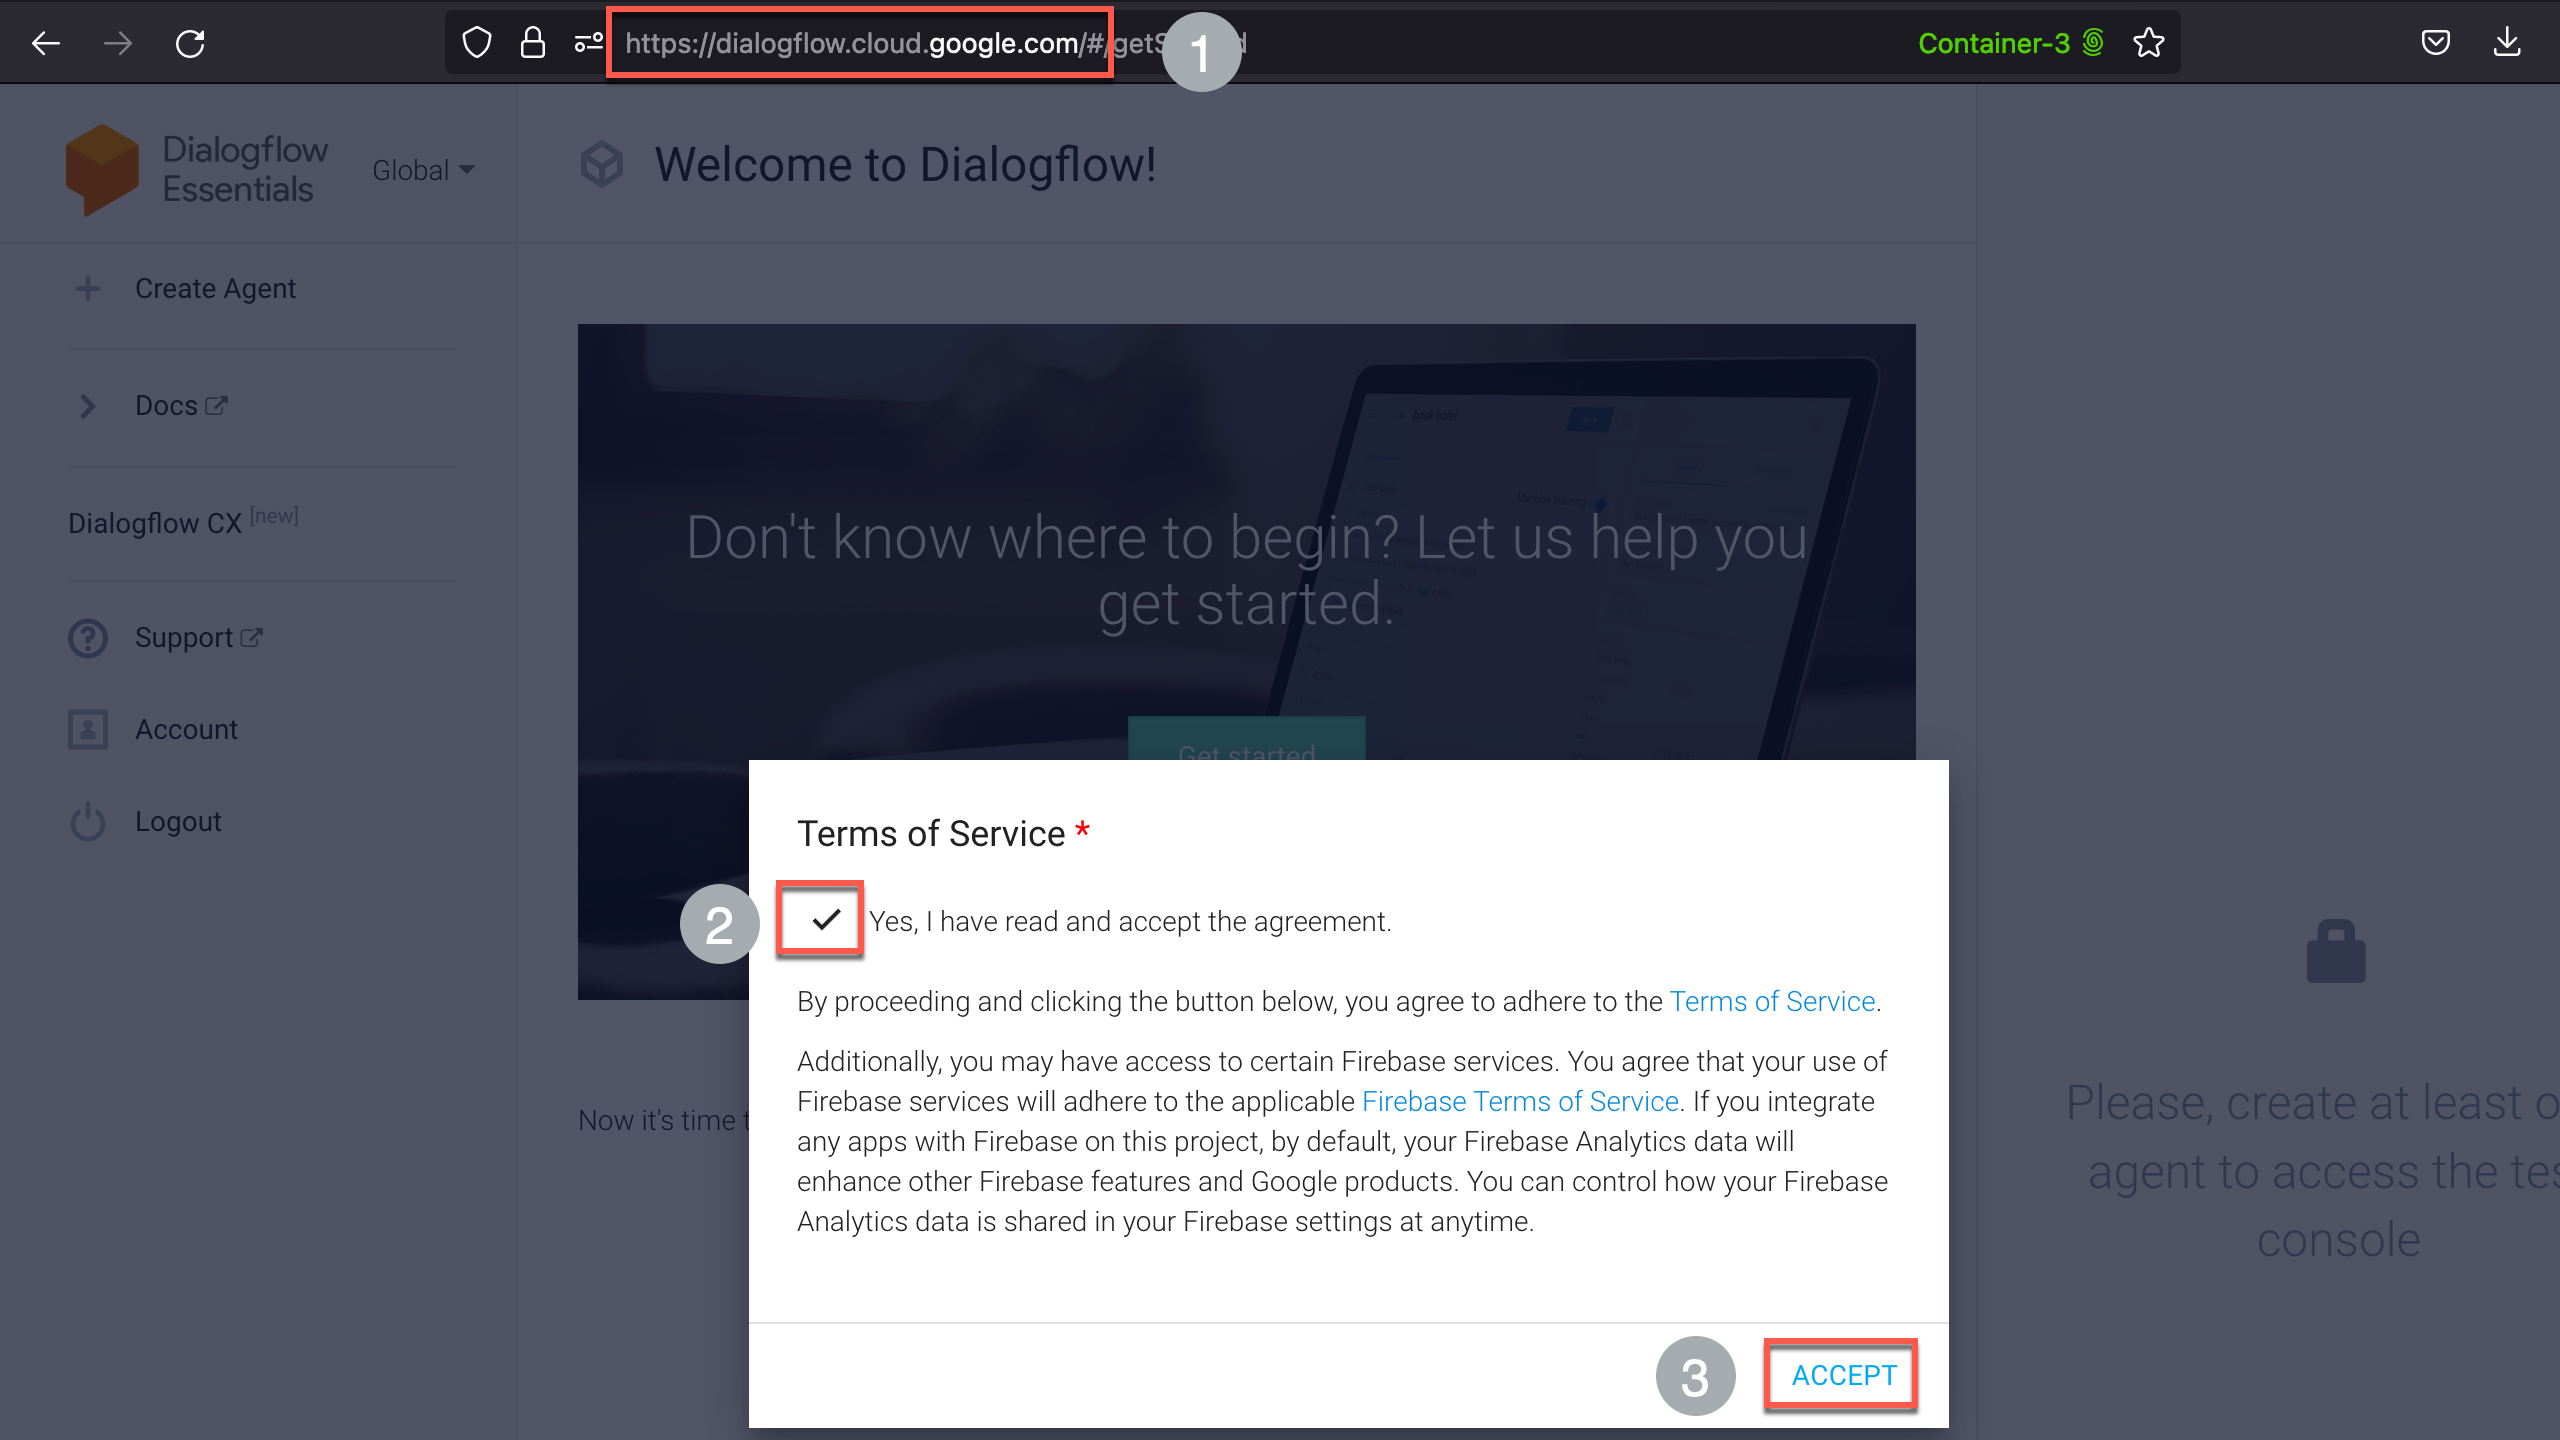
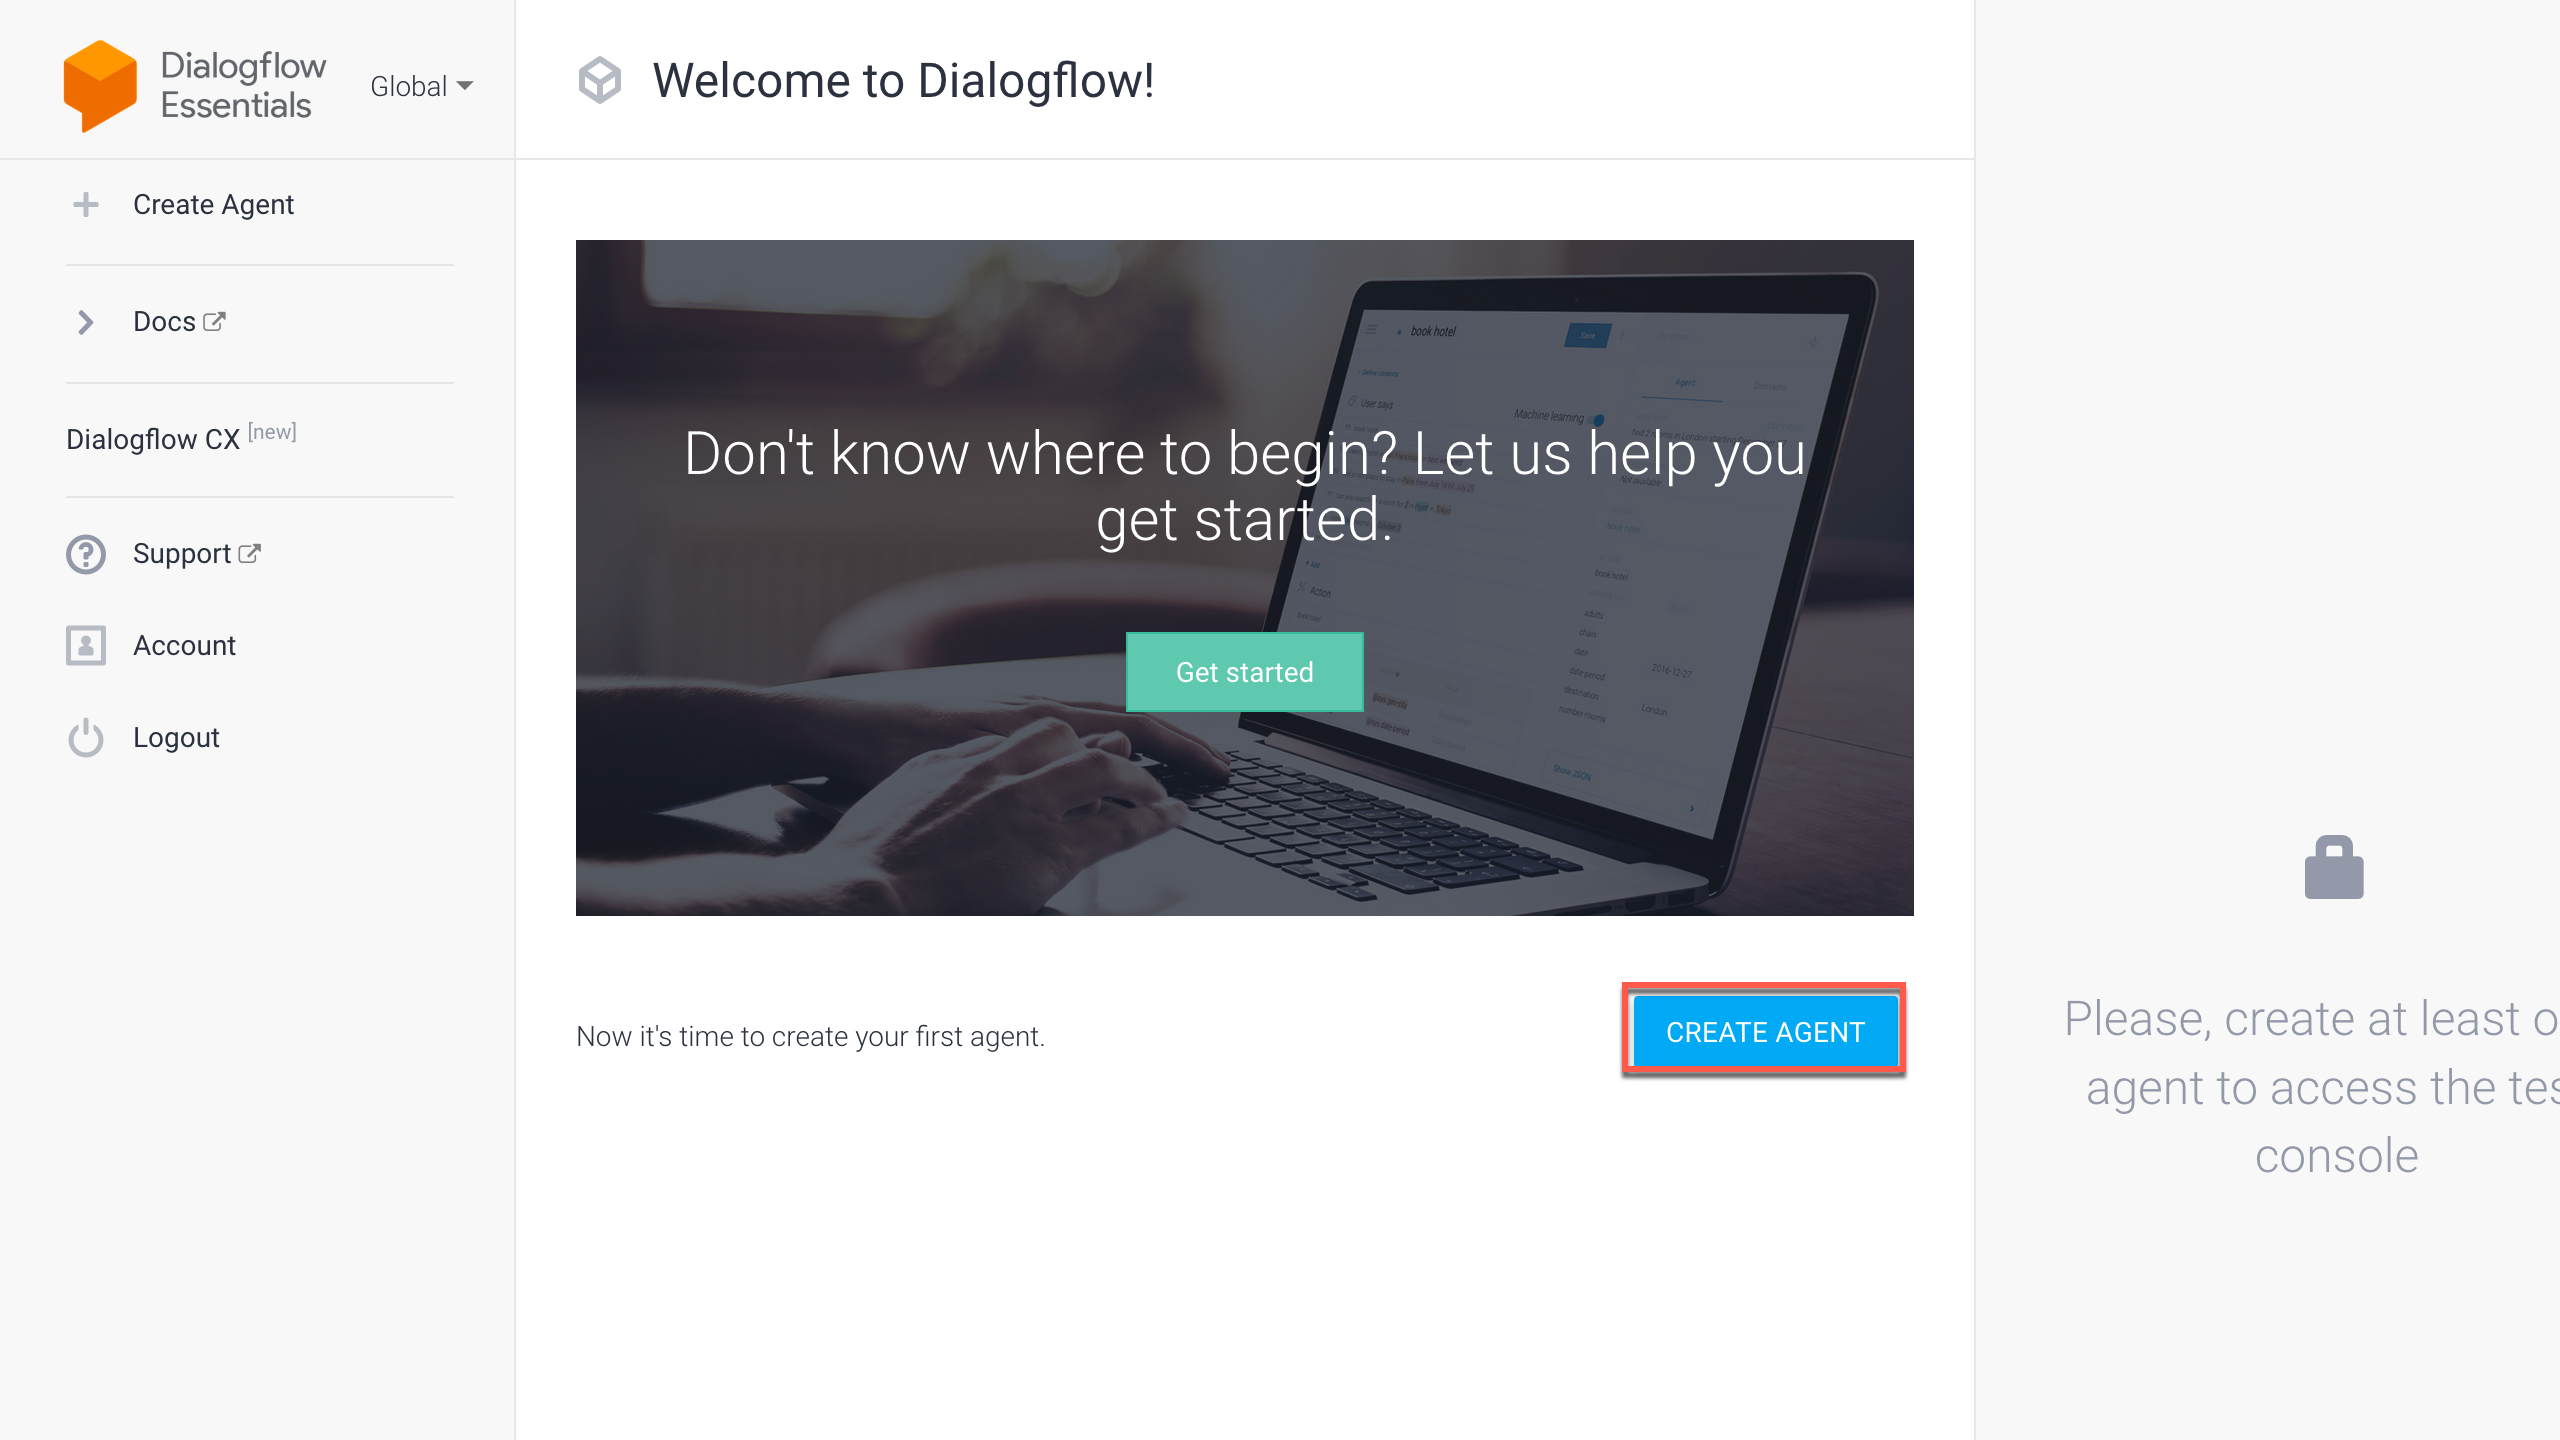
Go to https://dialogflow.cloud.google.com and accept the Terms of service and click Accept
-
Click Create Agent
-
Input a desired Agent name , select the Google project that was created in Step-2. Click Create

-
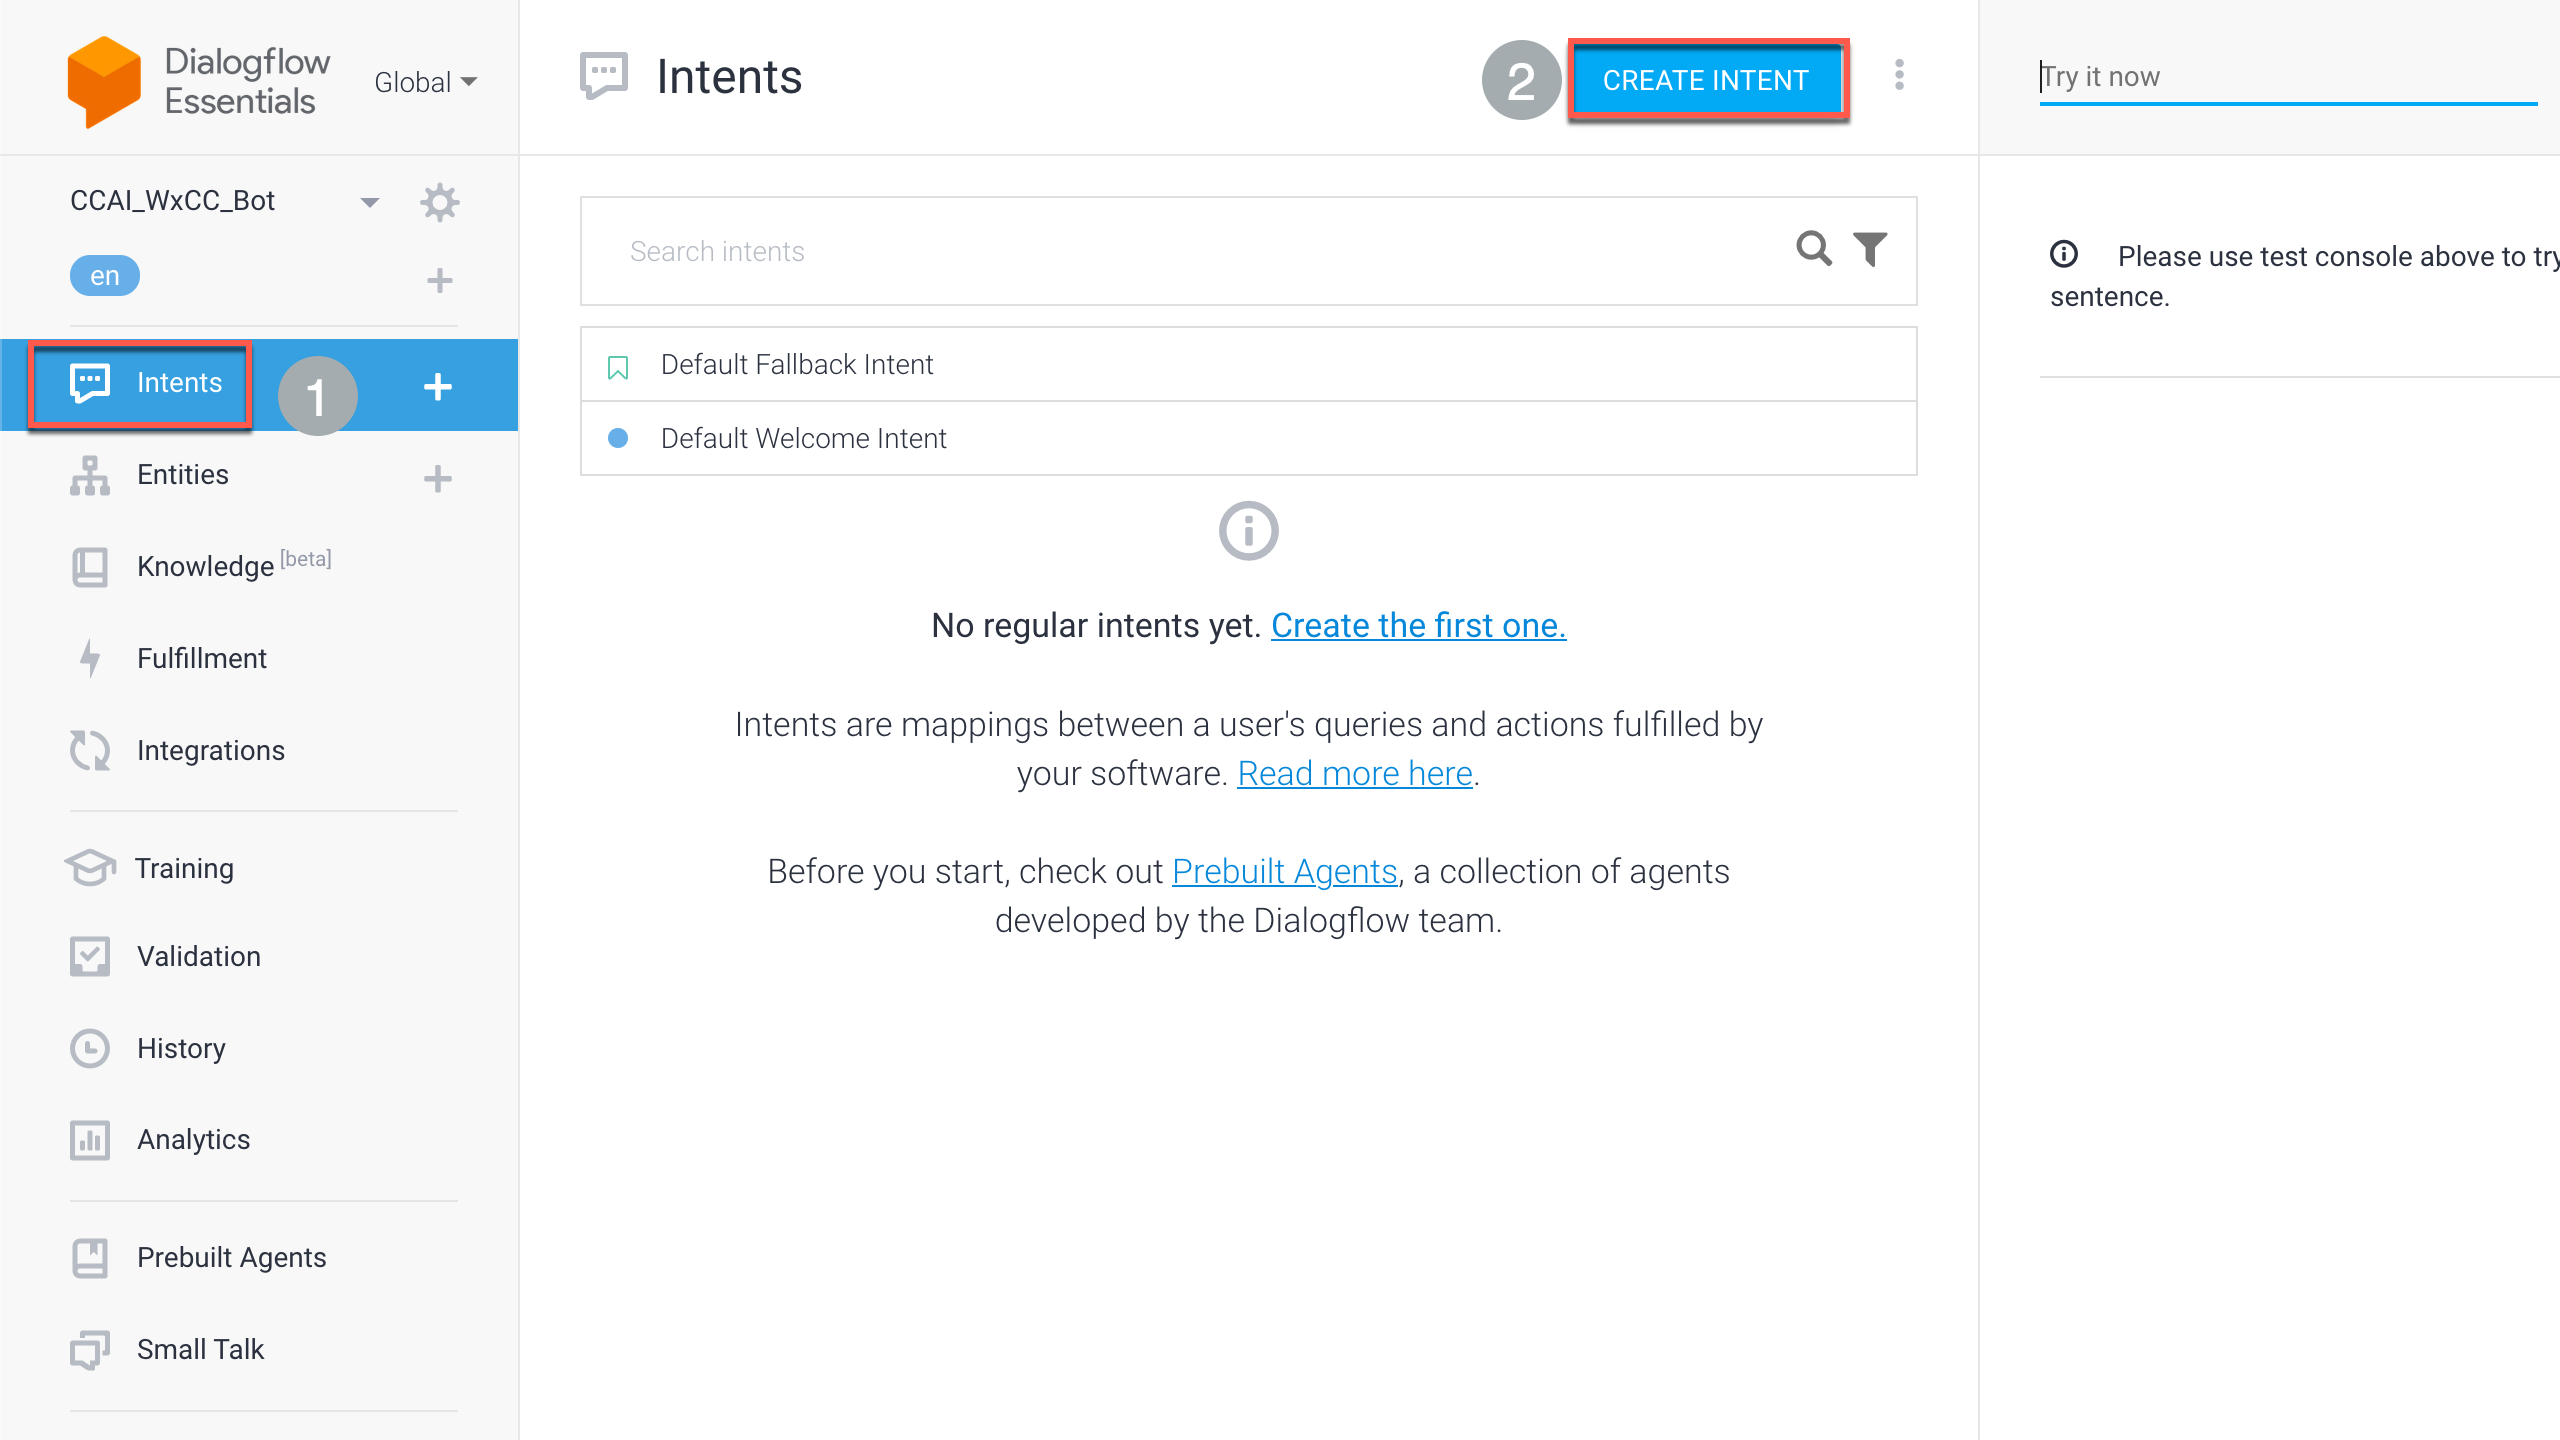
Click Intents and click Create Intent
-
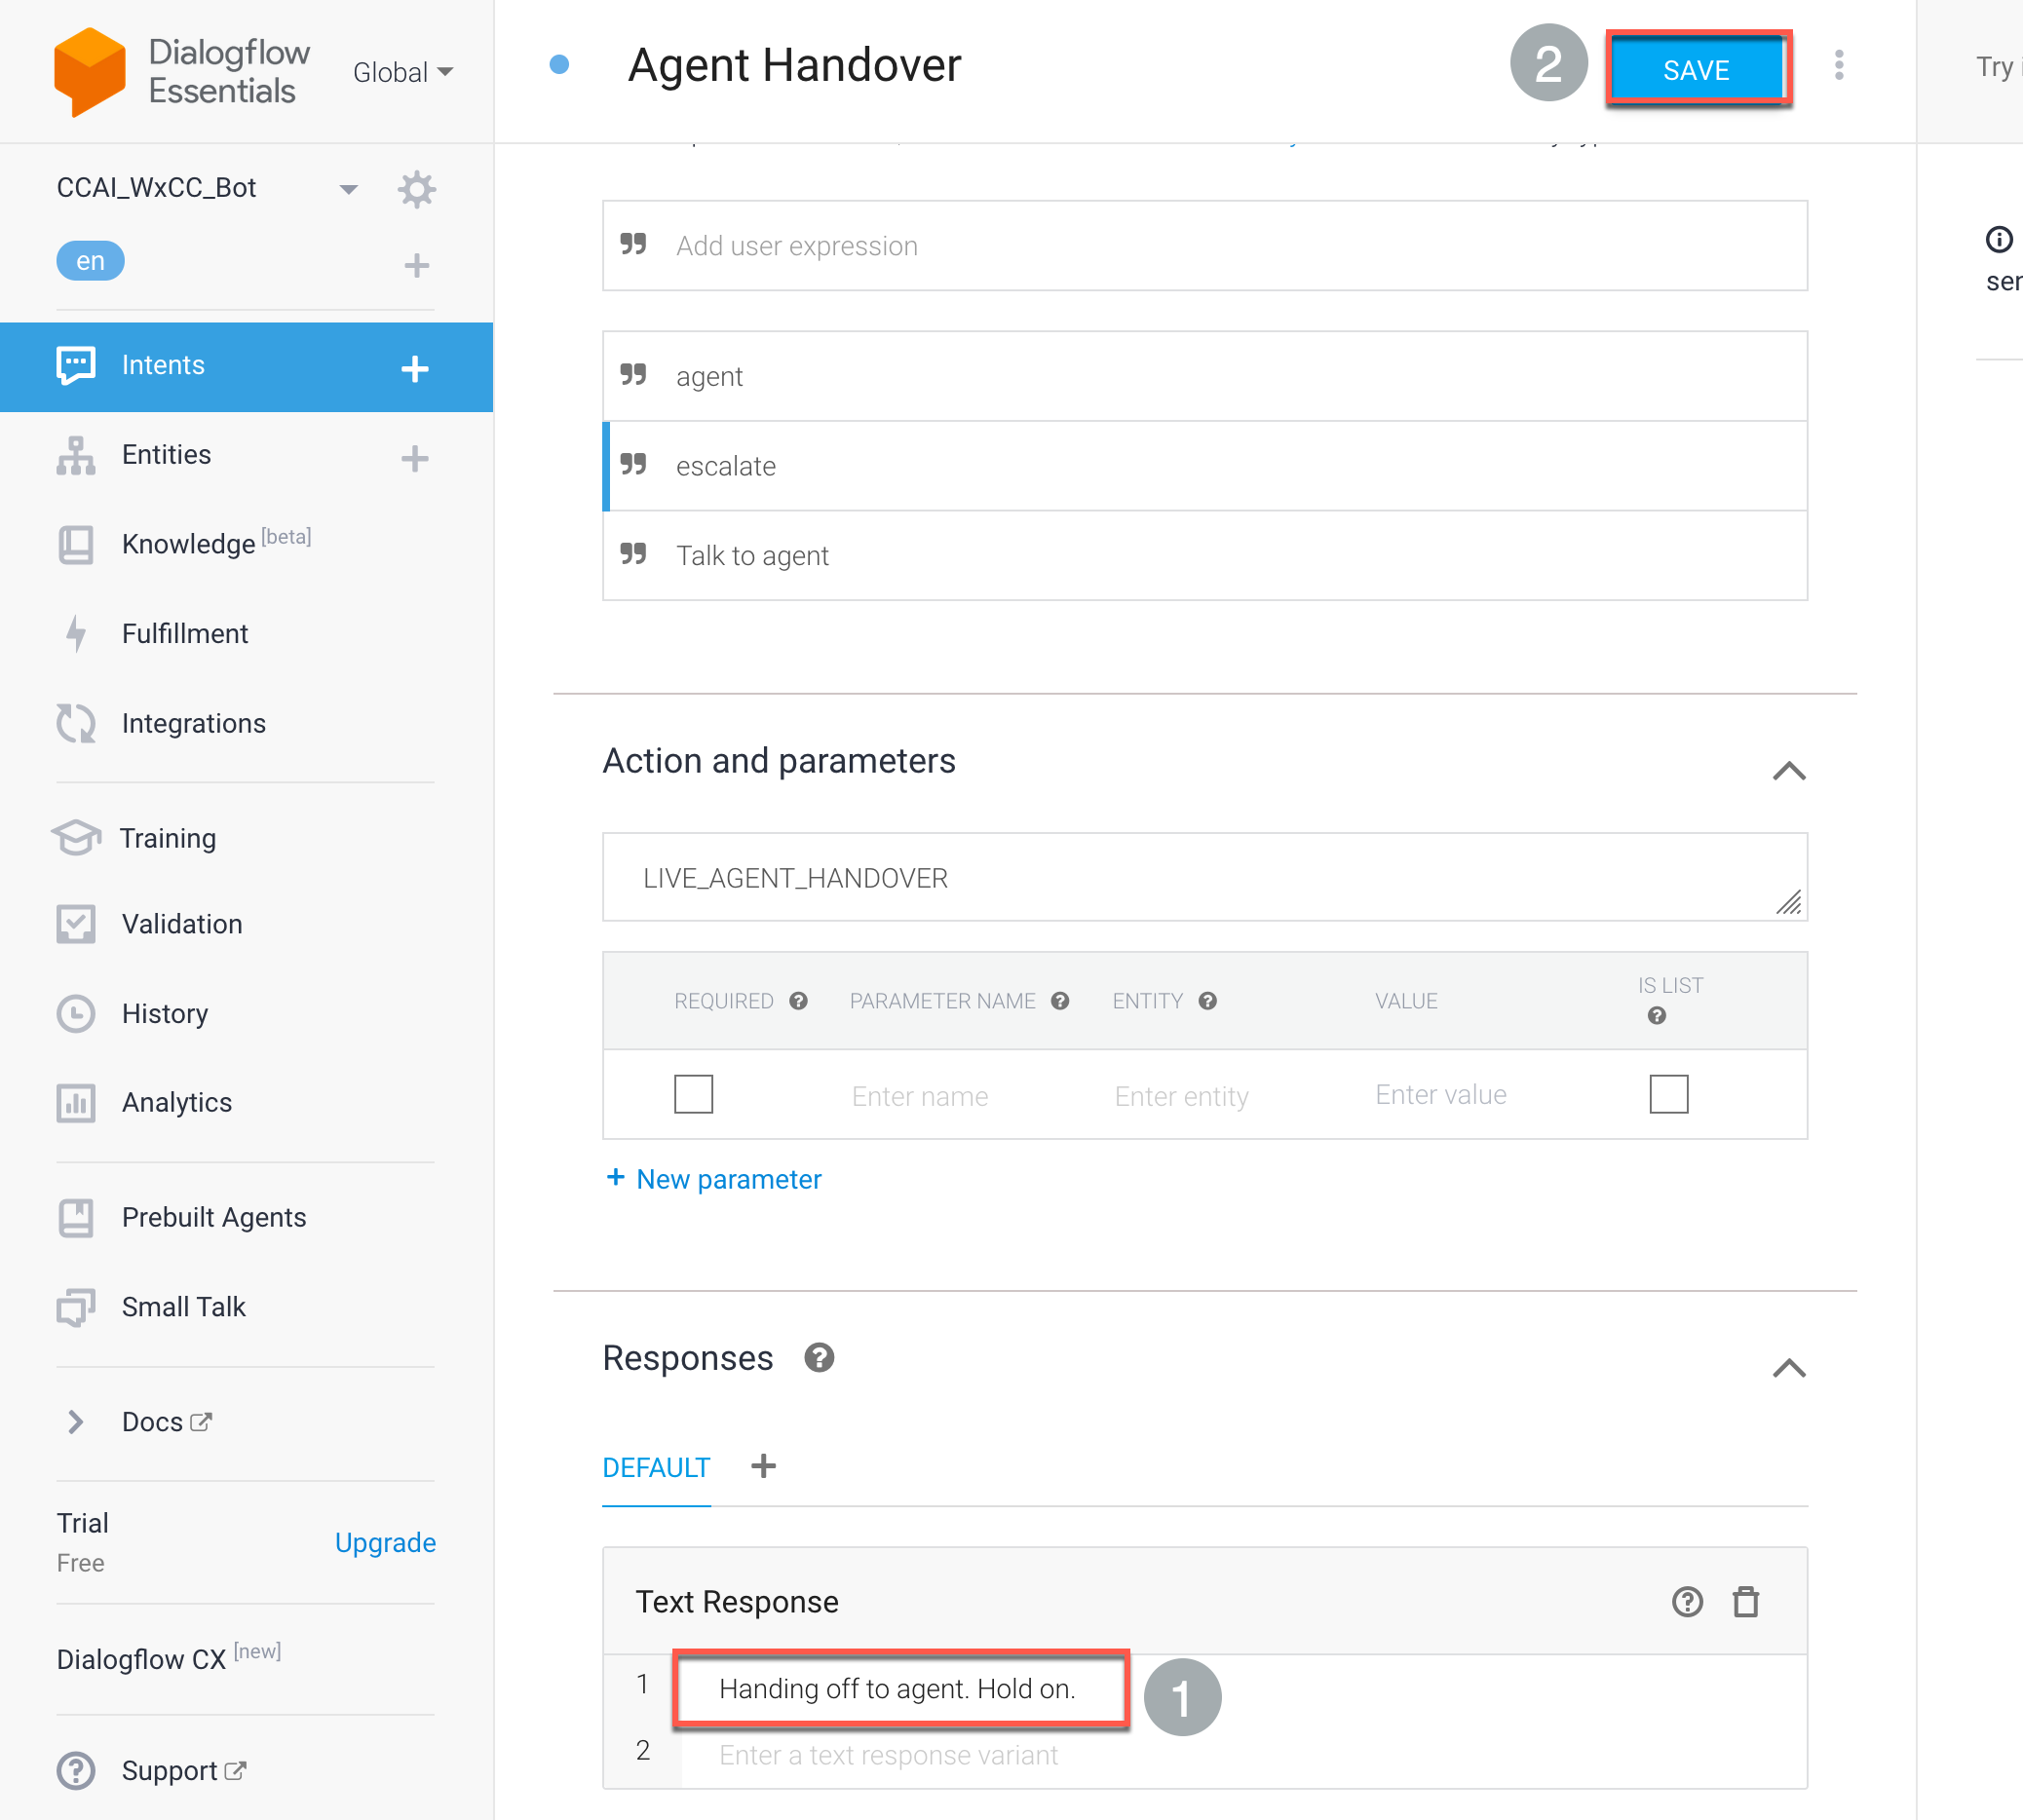
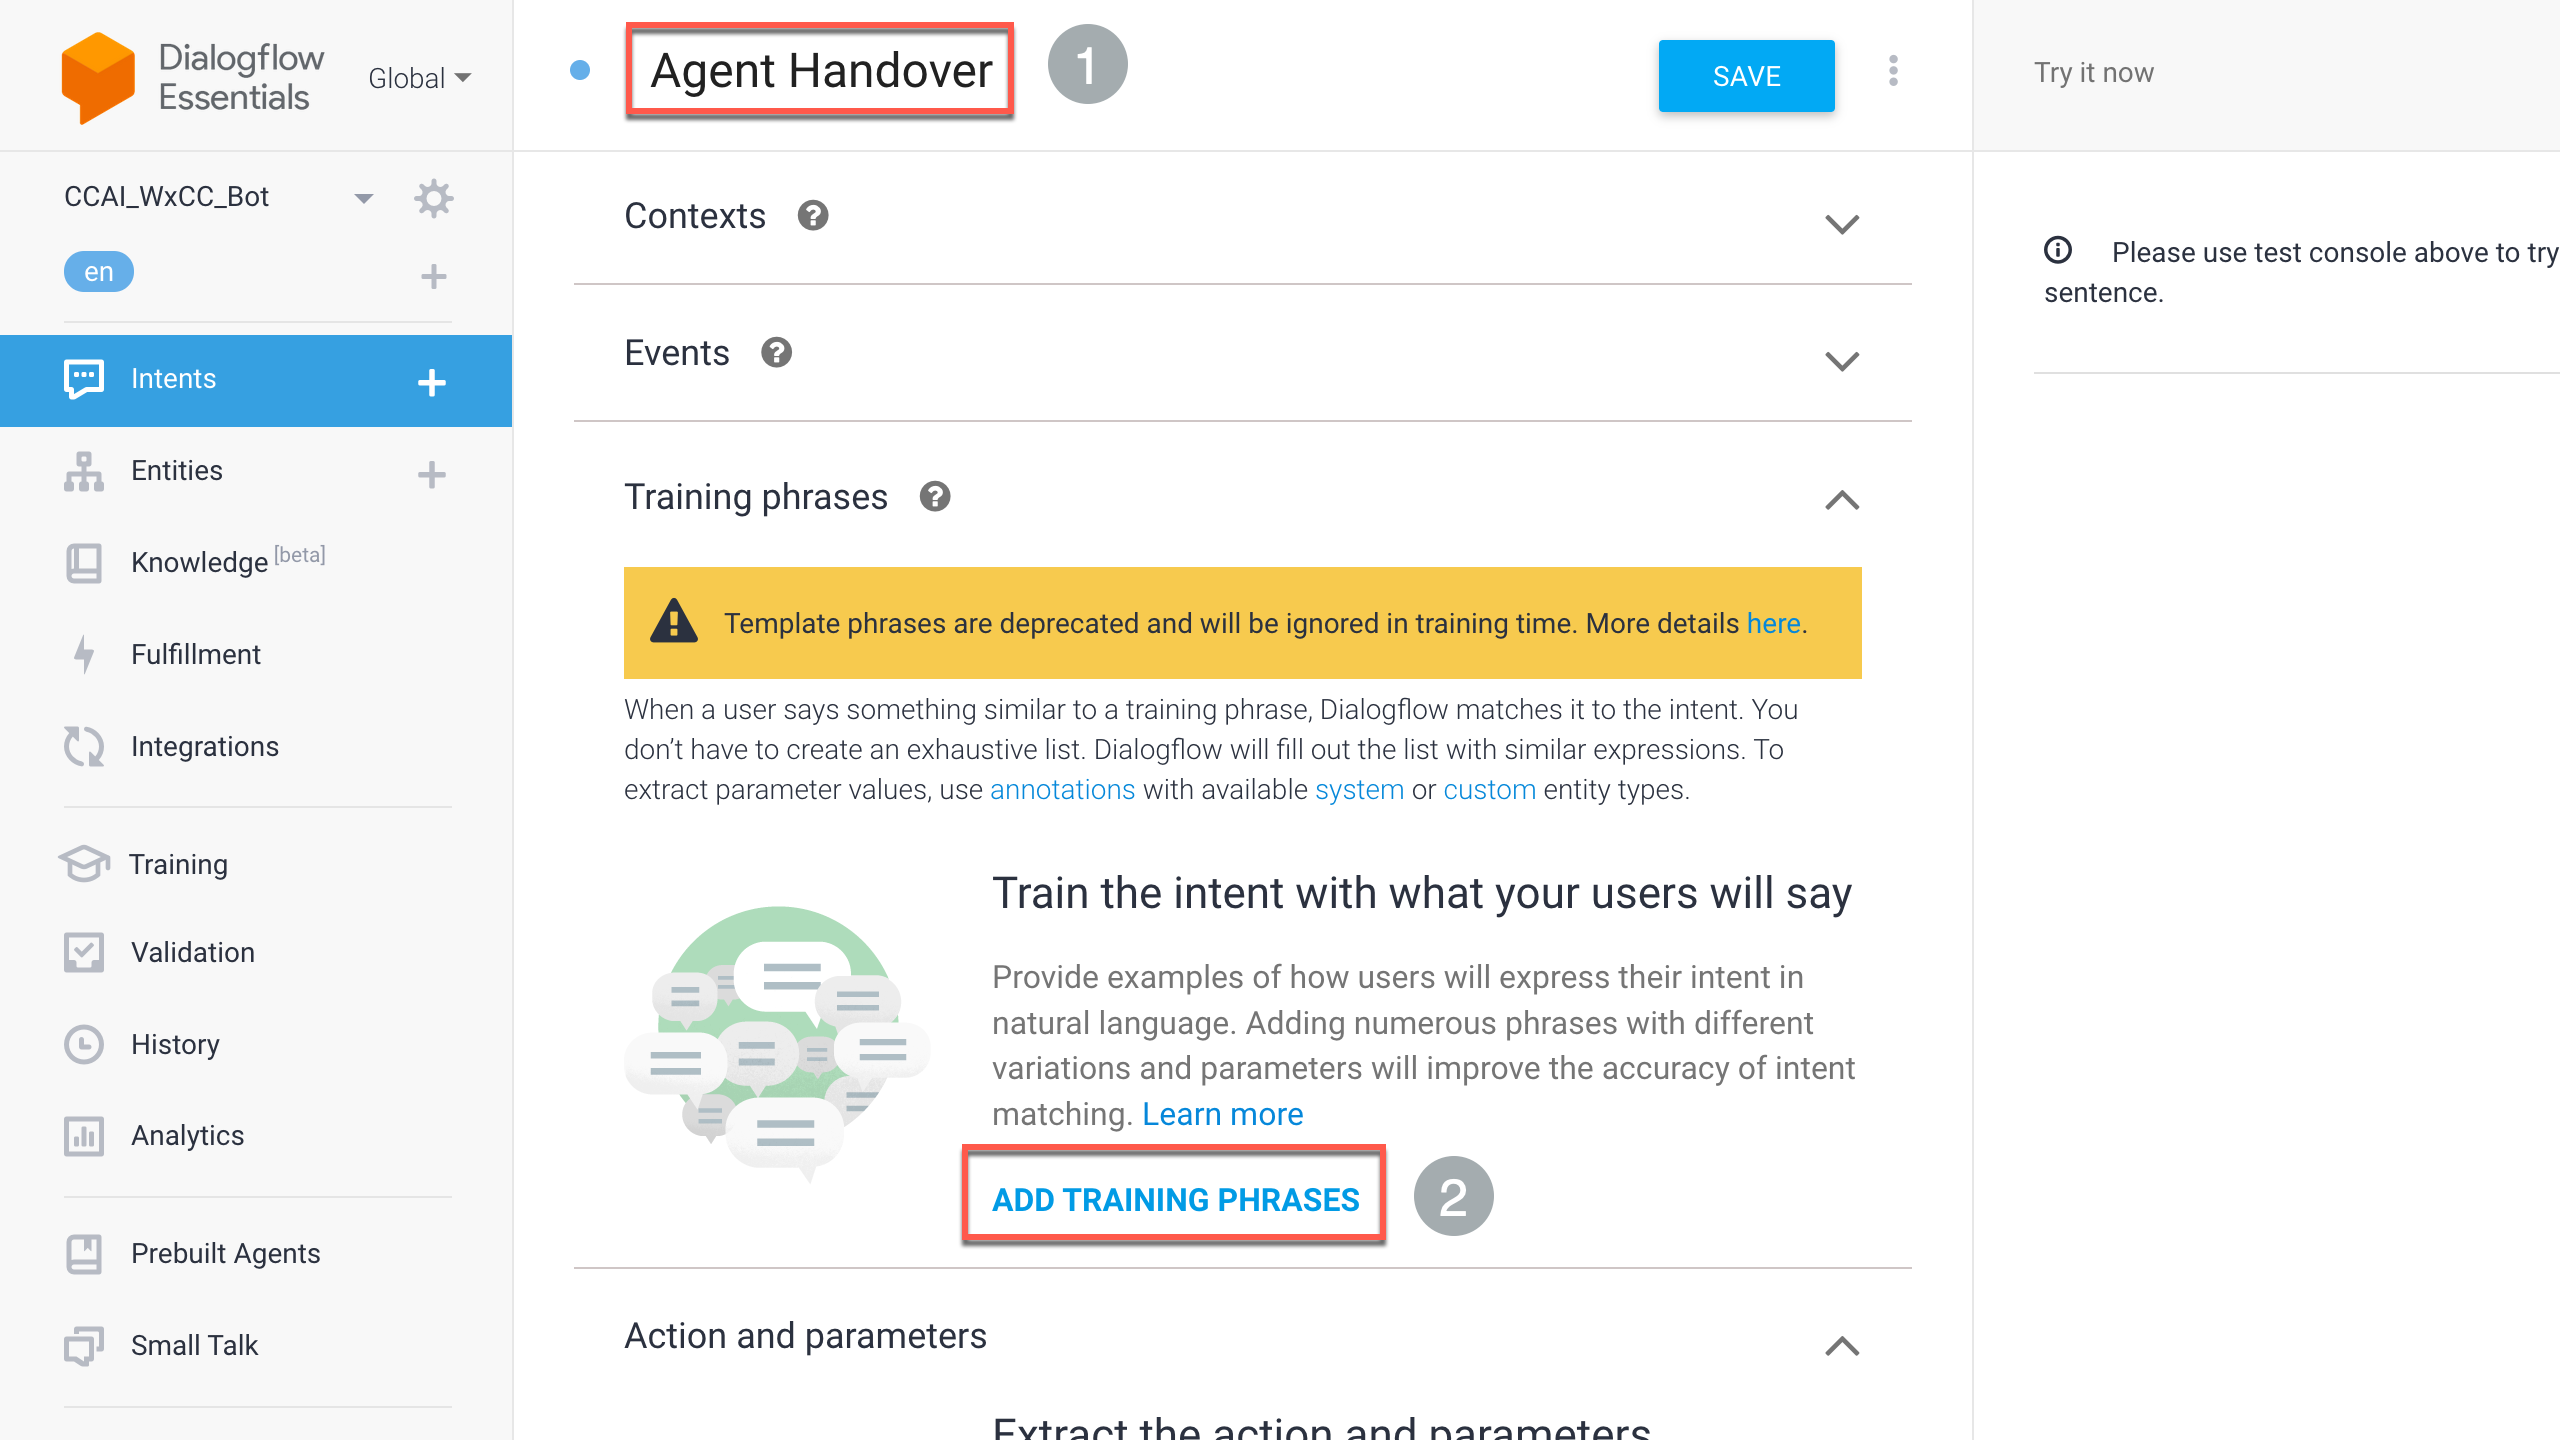
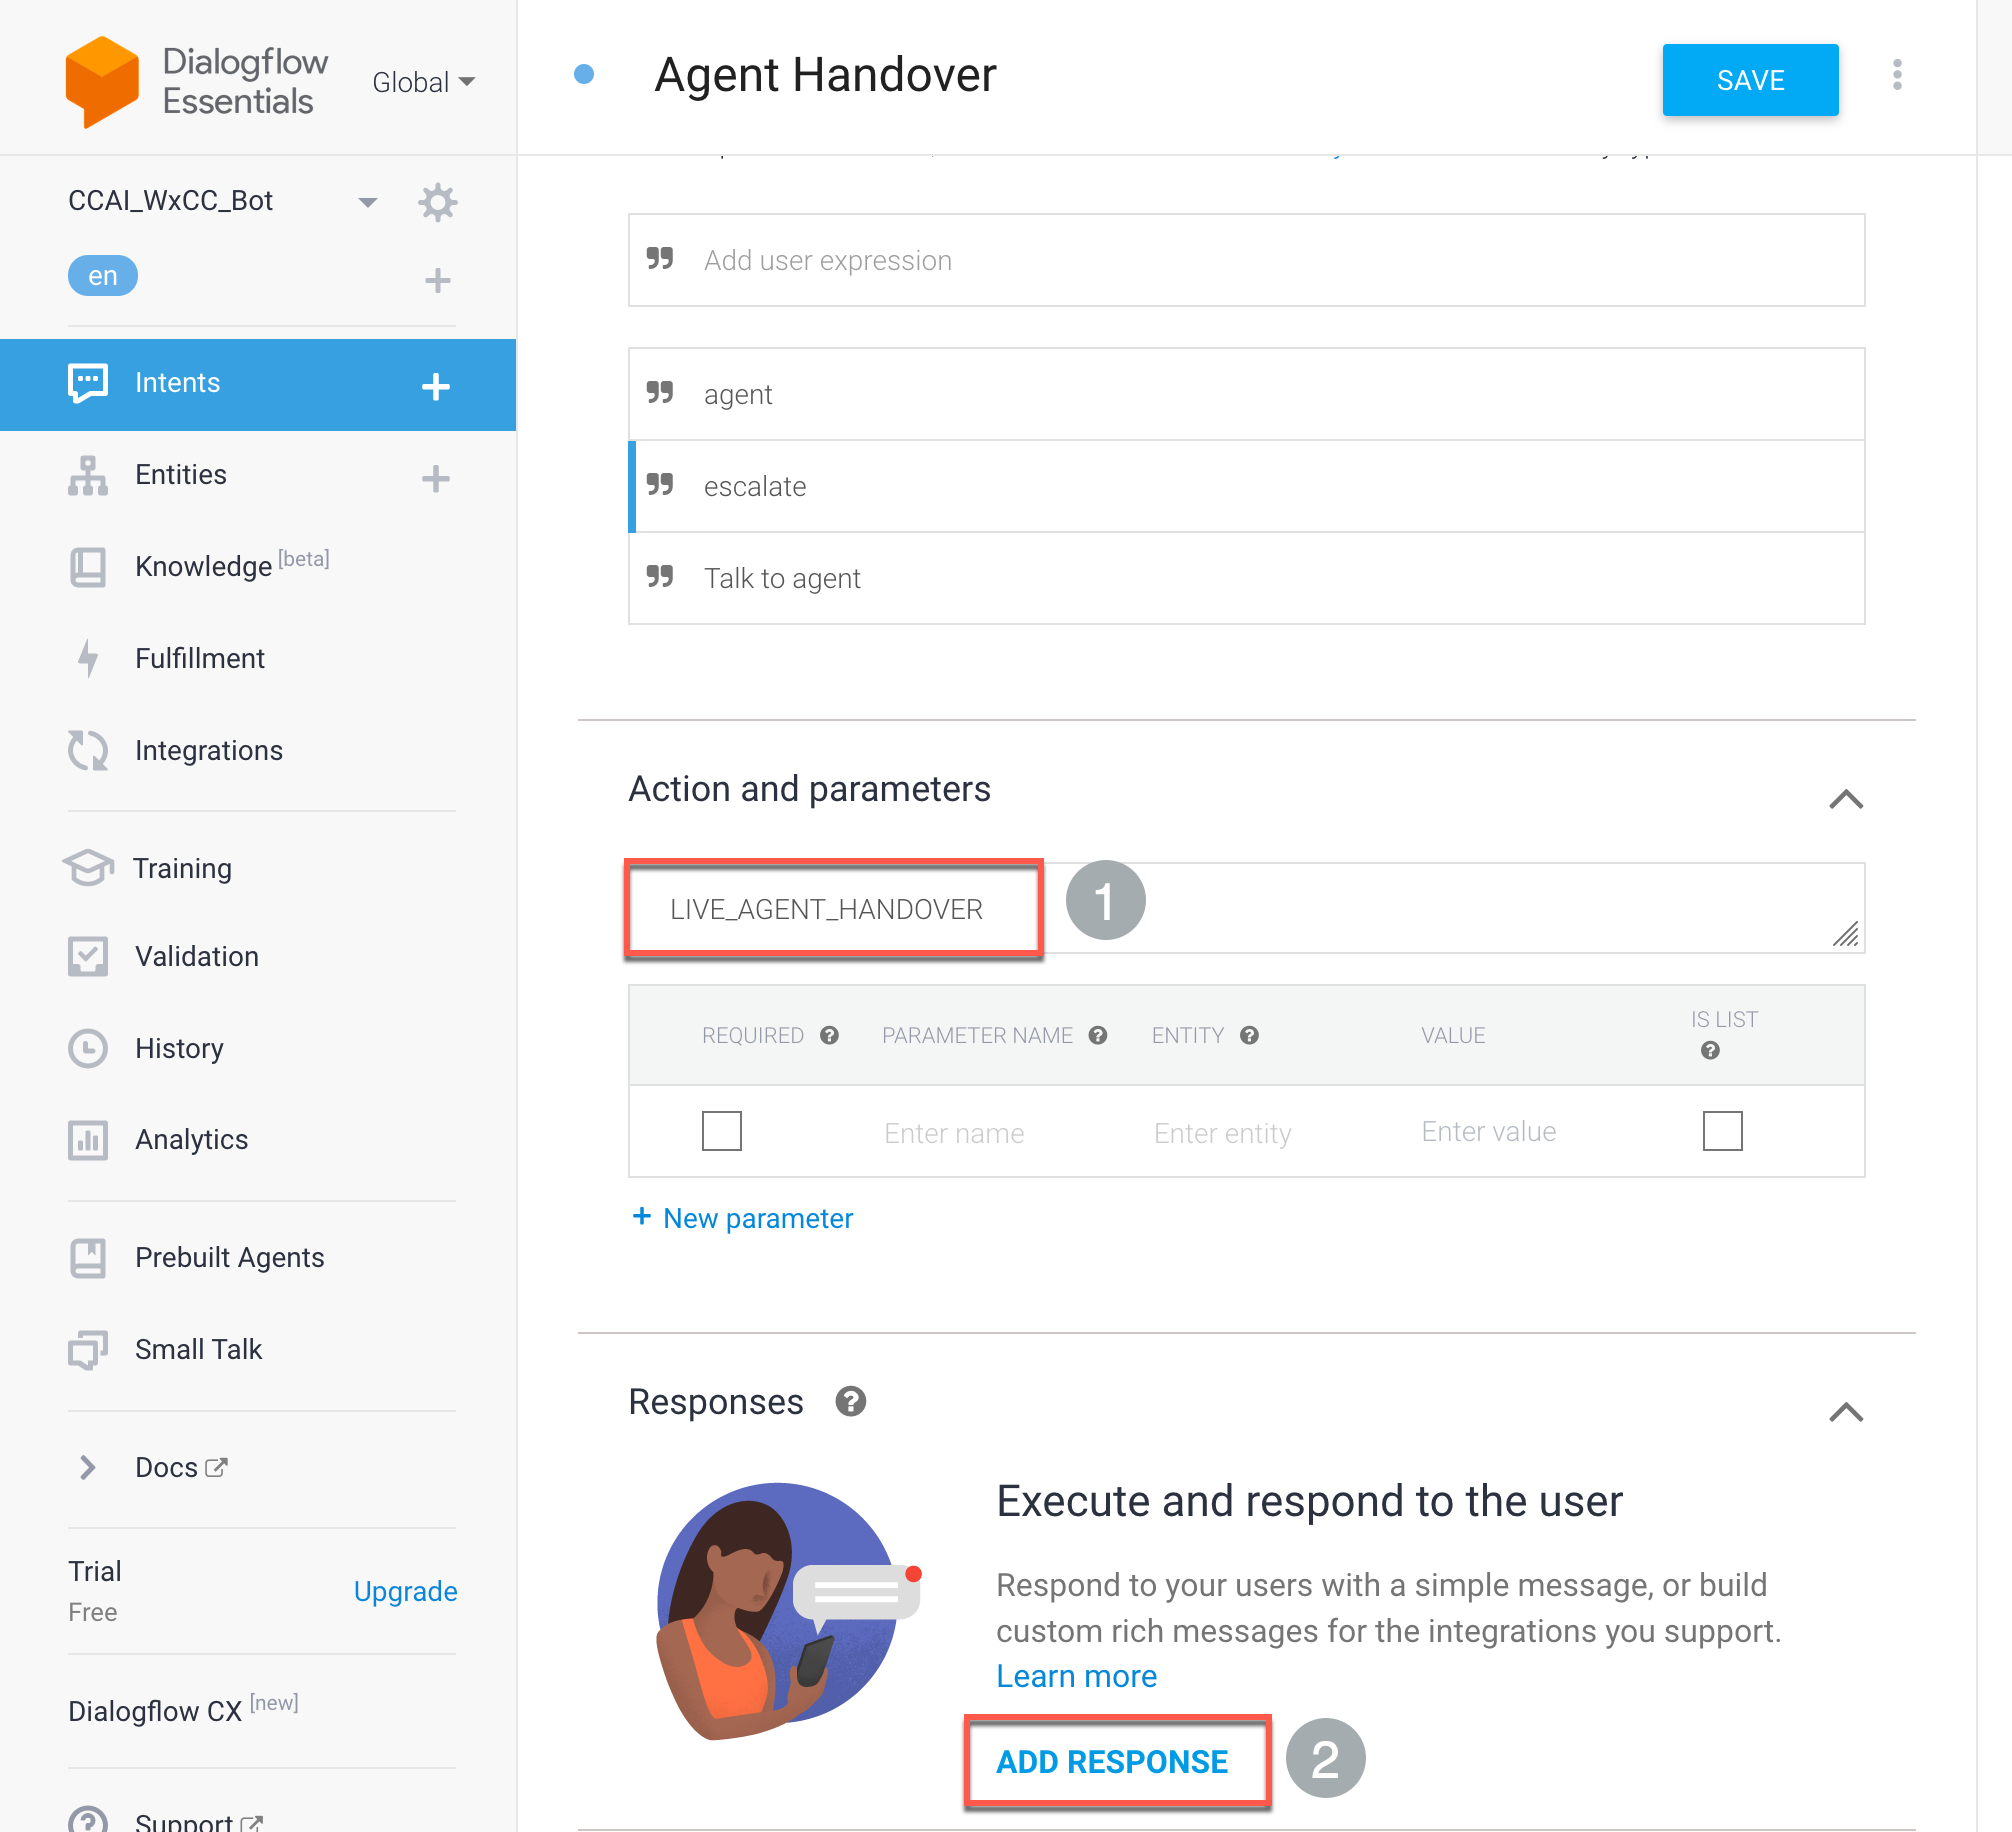
Input intent name as Agent Handover amd click Add Training Phrases
-
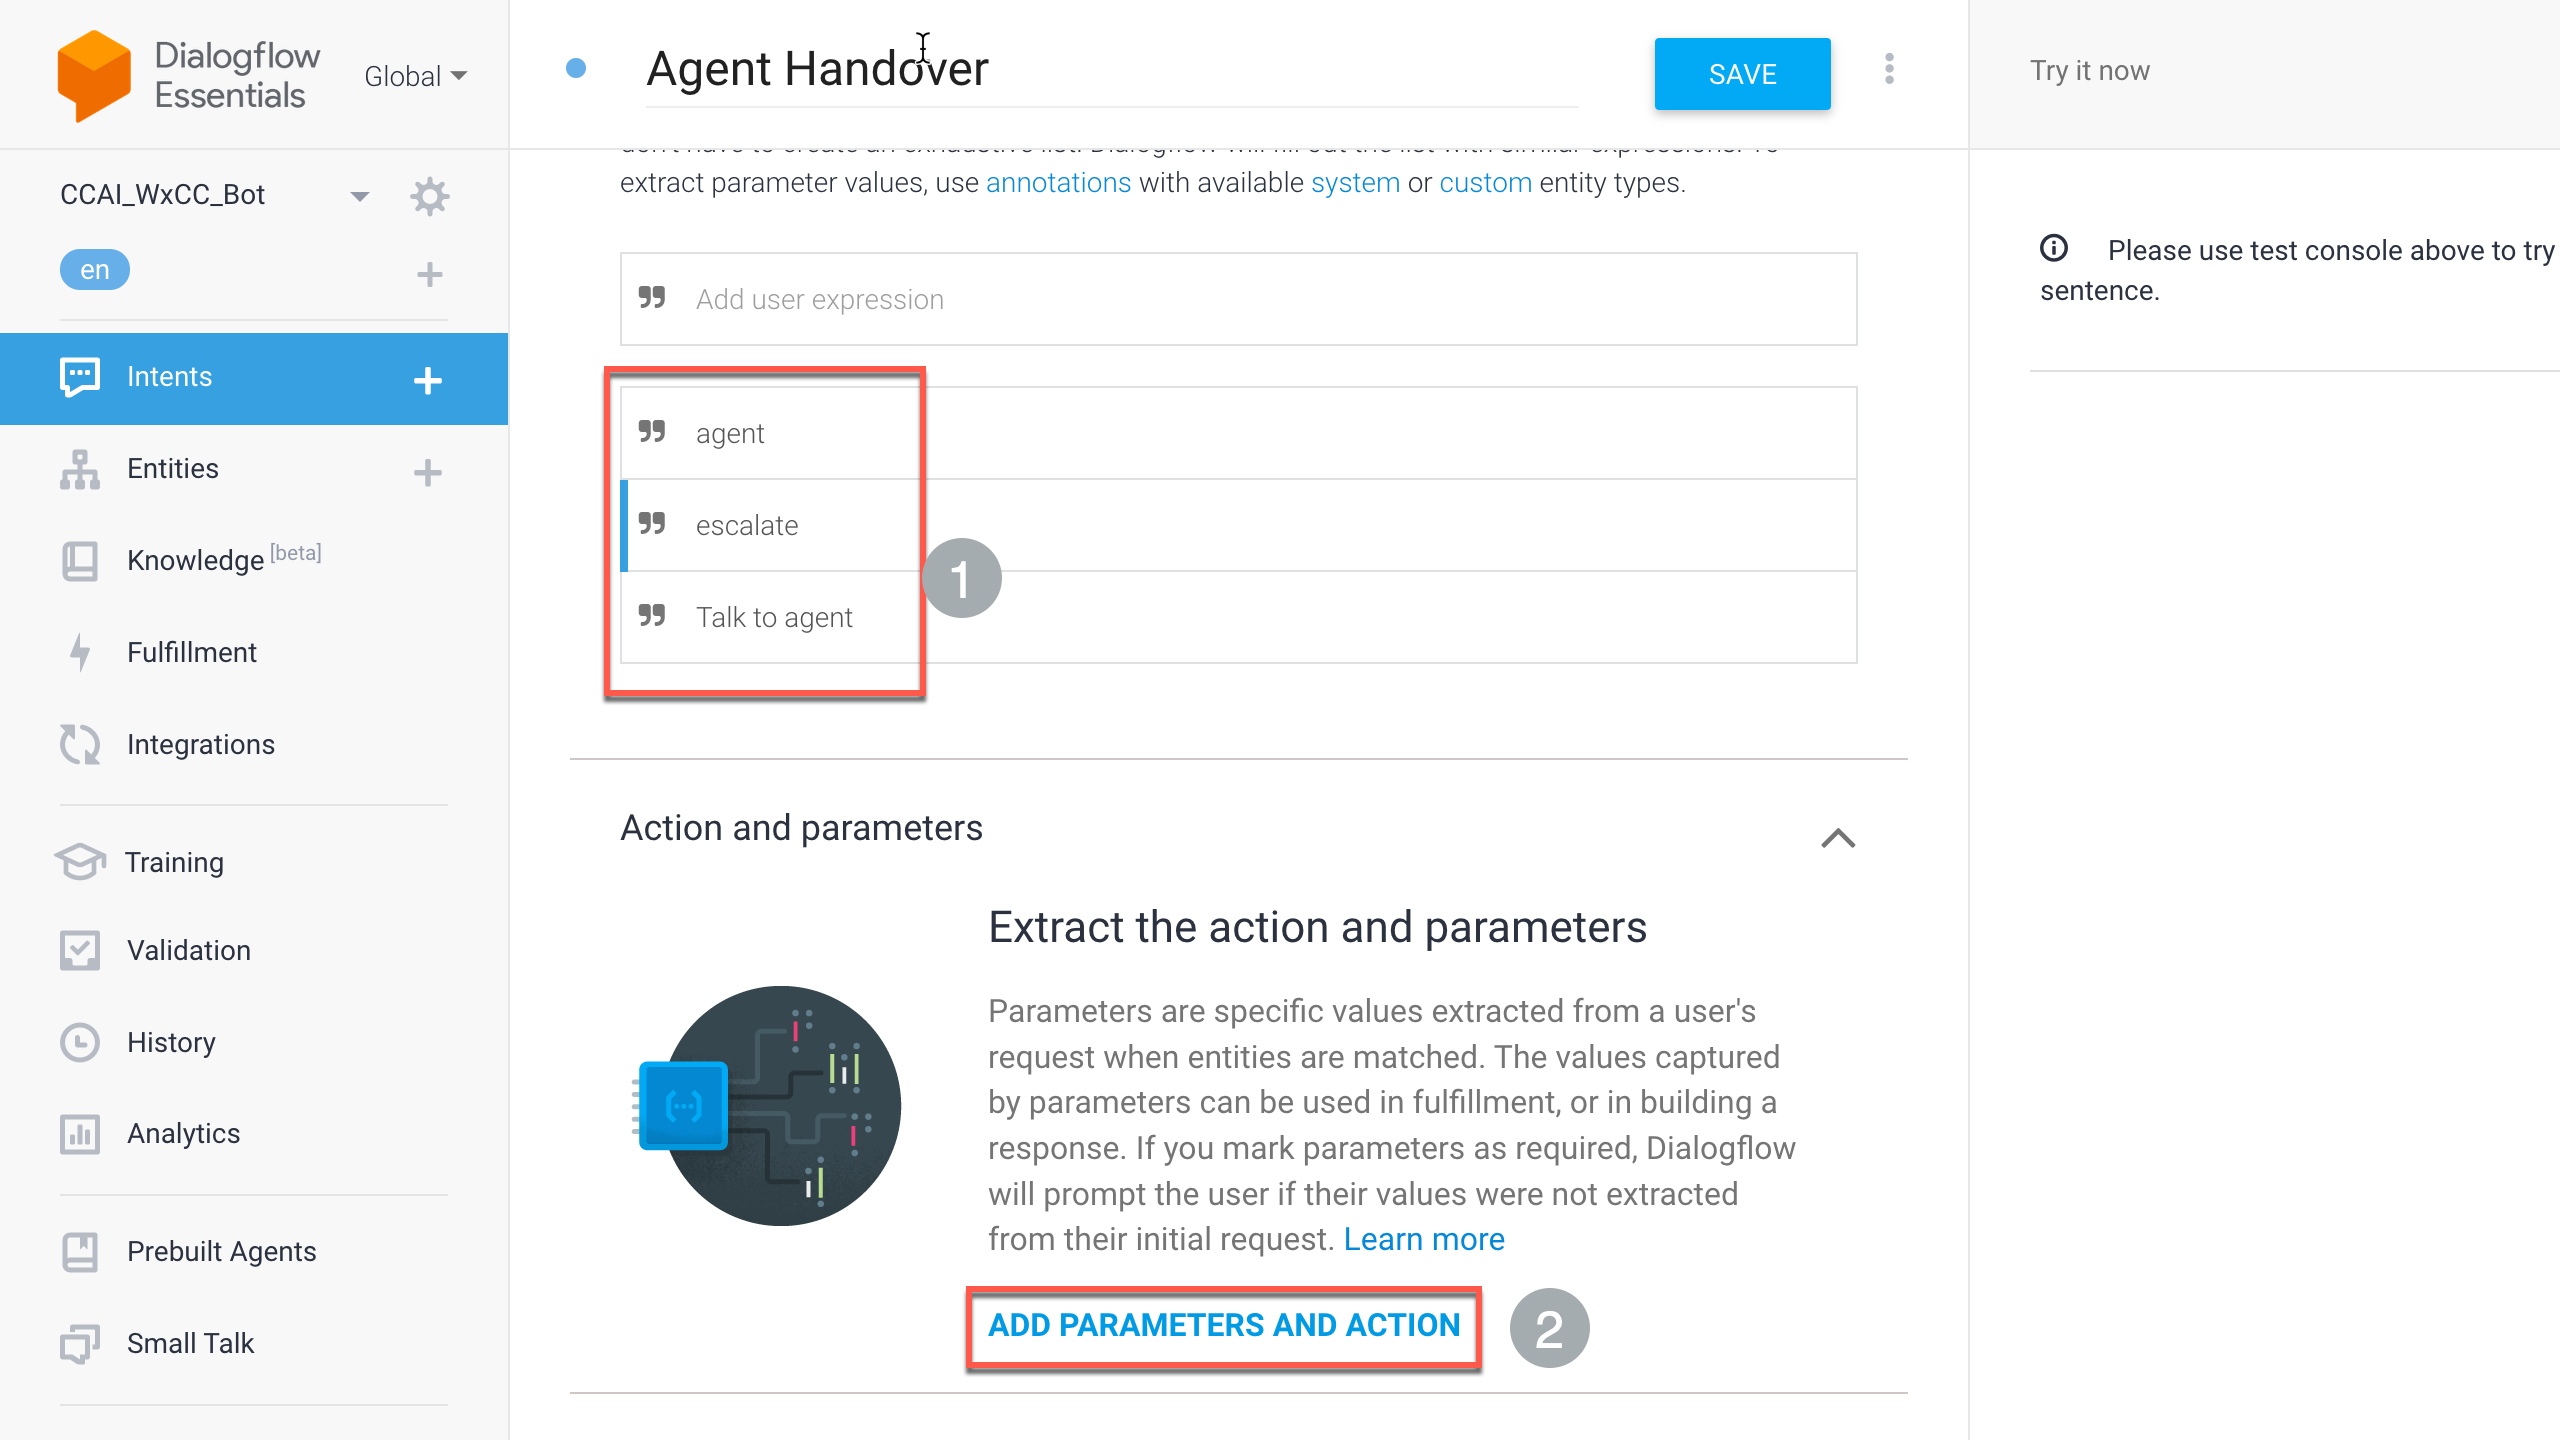
Input some sample training phrases as shown in the image below and click Add parameters and action
-
Input LIVE_AGENT_HANDOVER (this will be used later in the flow configuration) as the parameter name click Add Response
-
Input a desired response for this intent and click Save